When performing manual updates it’s always recommended to make a full backup of your site first, so if anything goes wrong, you’ll still have all your data.
Using Ghost CLI backup
The fastest way to perform a backup is to use Ghost CLI to automatically generate a zip file containing all of your site data using theghost backup command.
Manual backup methods
If you need more control over your backups, or need to back up a Docker installation, the following sections explain how to manually back up different parts of your Ghost site.What’s included: JSON exports are great for moving content between sites, but don’t include email analytics, member engagement data, or comments. For disaster recovery or exact site replication, back up your database and content folder directly.
Database backup
For Docker installations:Content folder backup
For Docker installations:Download to local machine
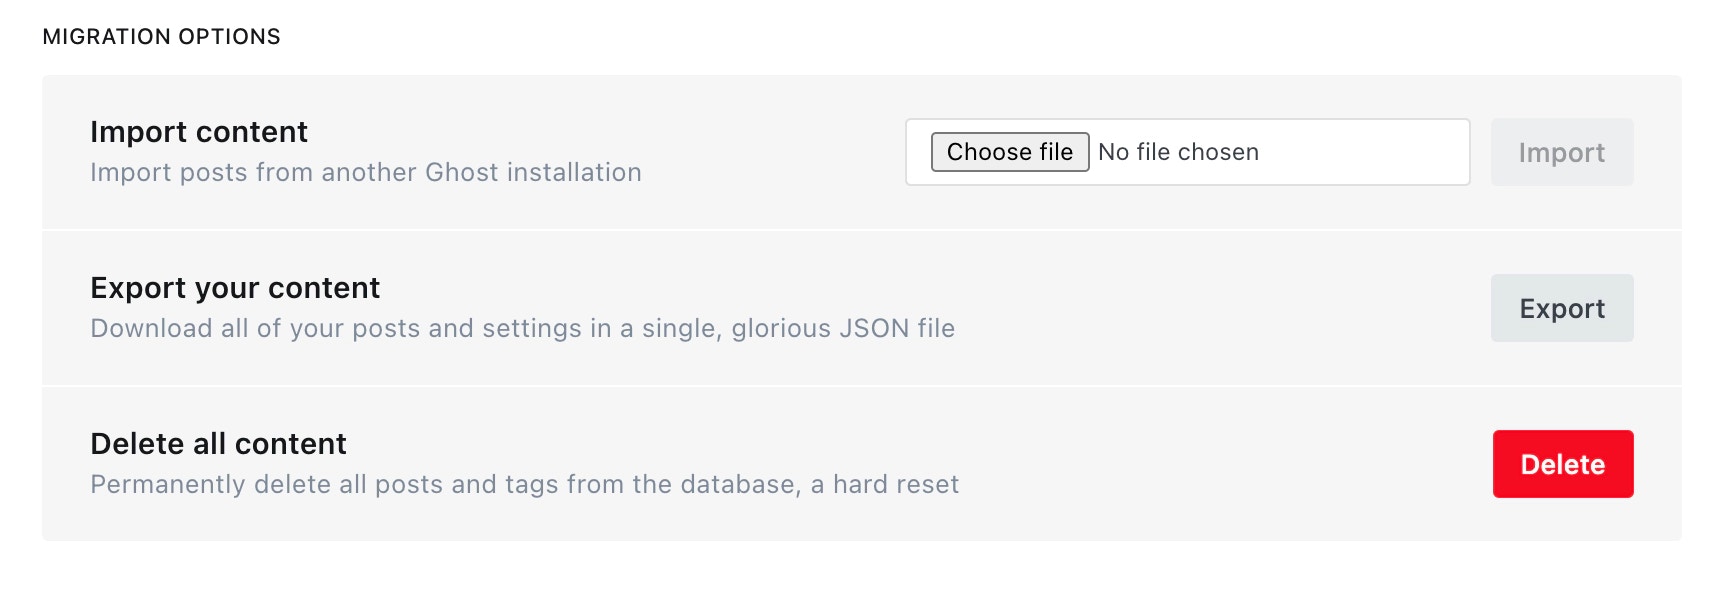
Export content
Log into Ghost Admin, navigate to theLabsview, and clickExportto download all content. This will be a.jsonfile, with a name likemy-site.ghost.2020-09-30-14-15-49.json.
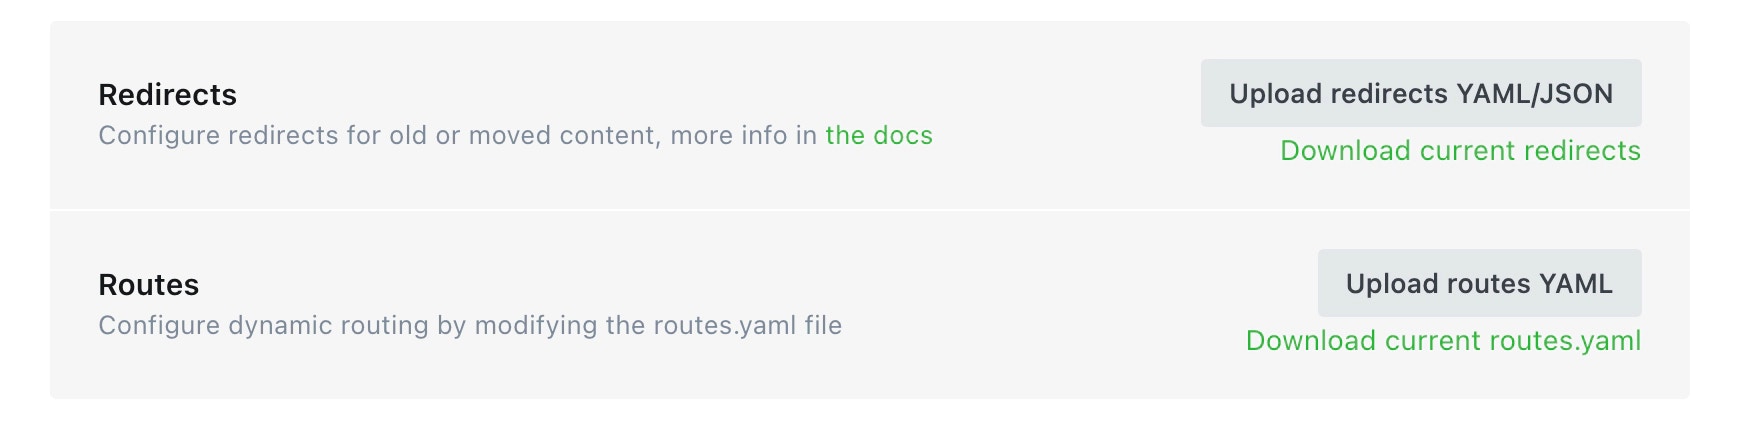
Download routes and redirects
Staying on theLabspage, clickDownload current redirectsto get your redirects file. This will be calledredirects.yamlorredirects.jsondepending on your Ghost version. If you’re using custom routes, clickDownload current routes.yamlto get yourroutes.yamlfile.
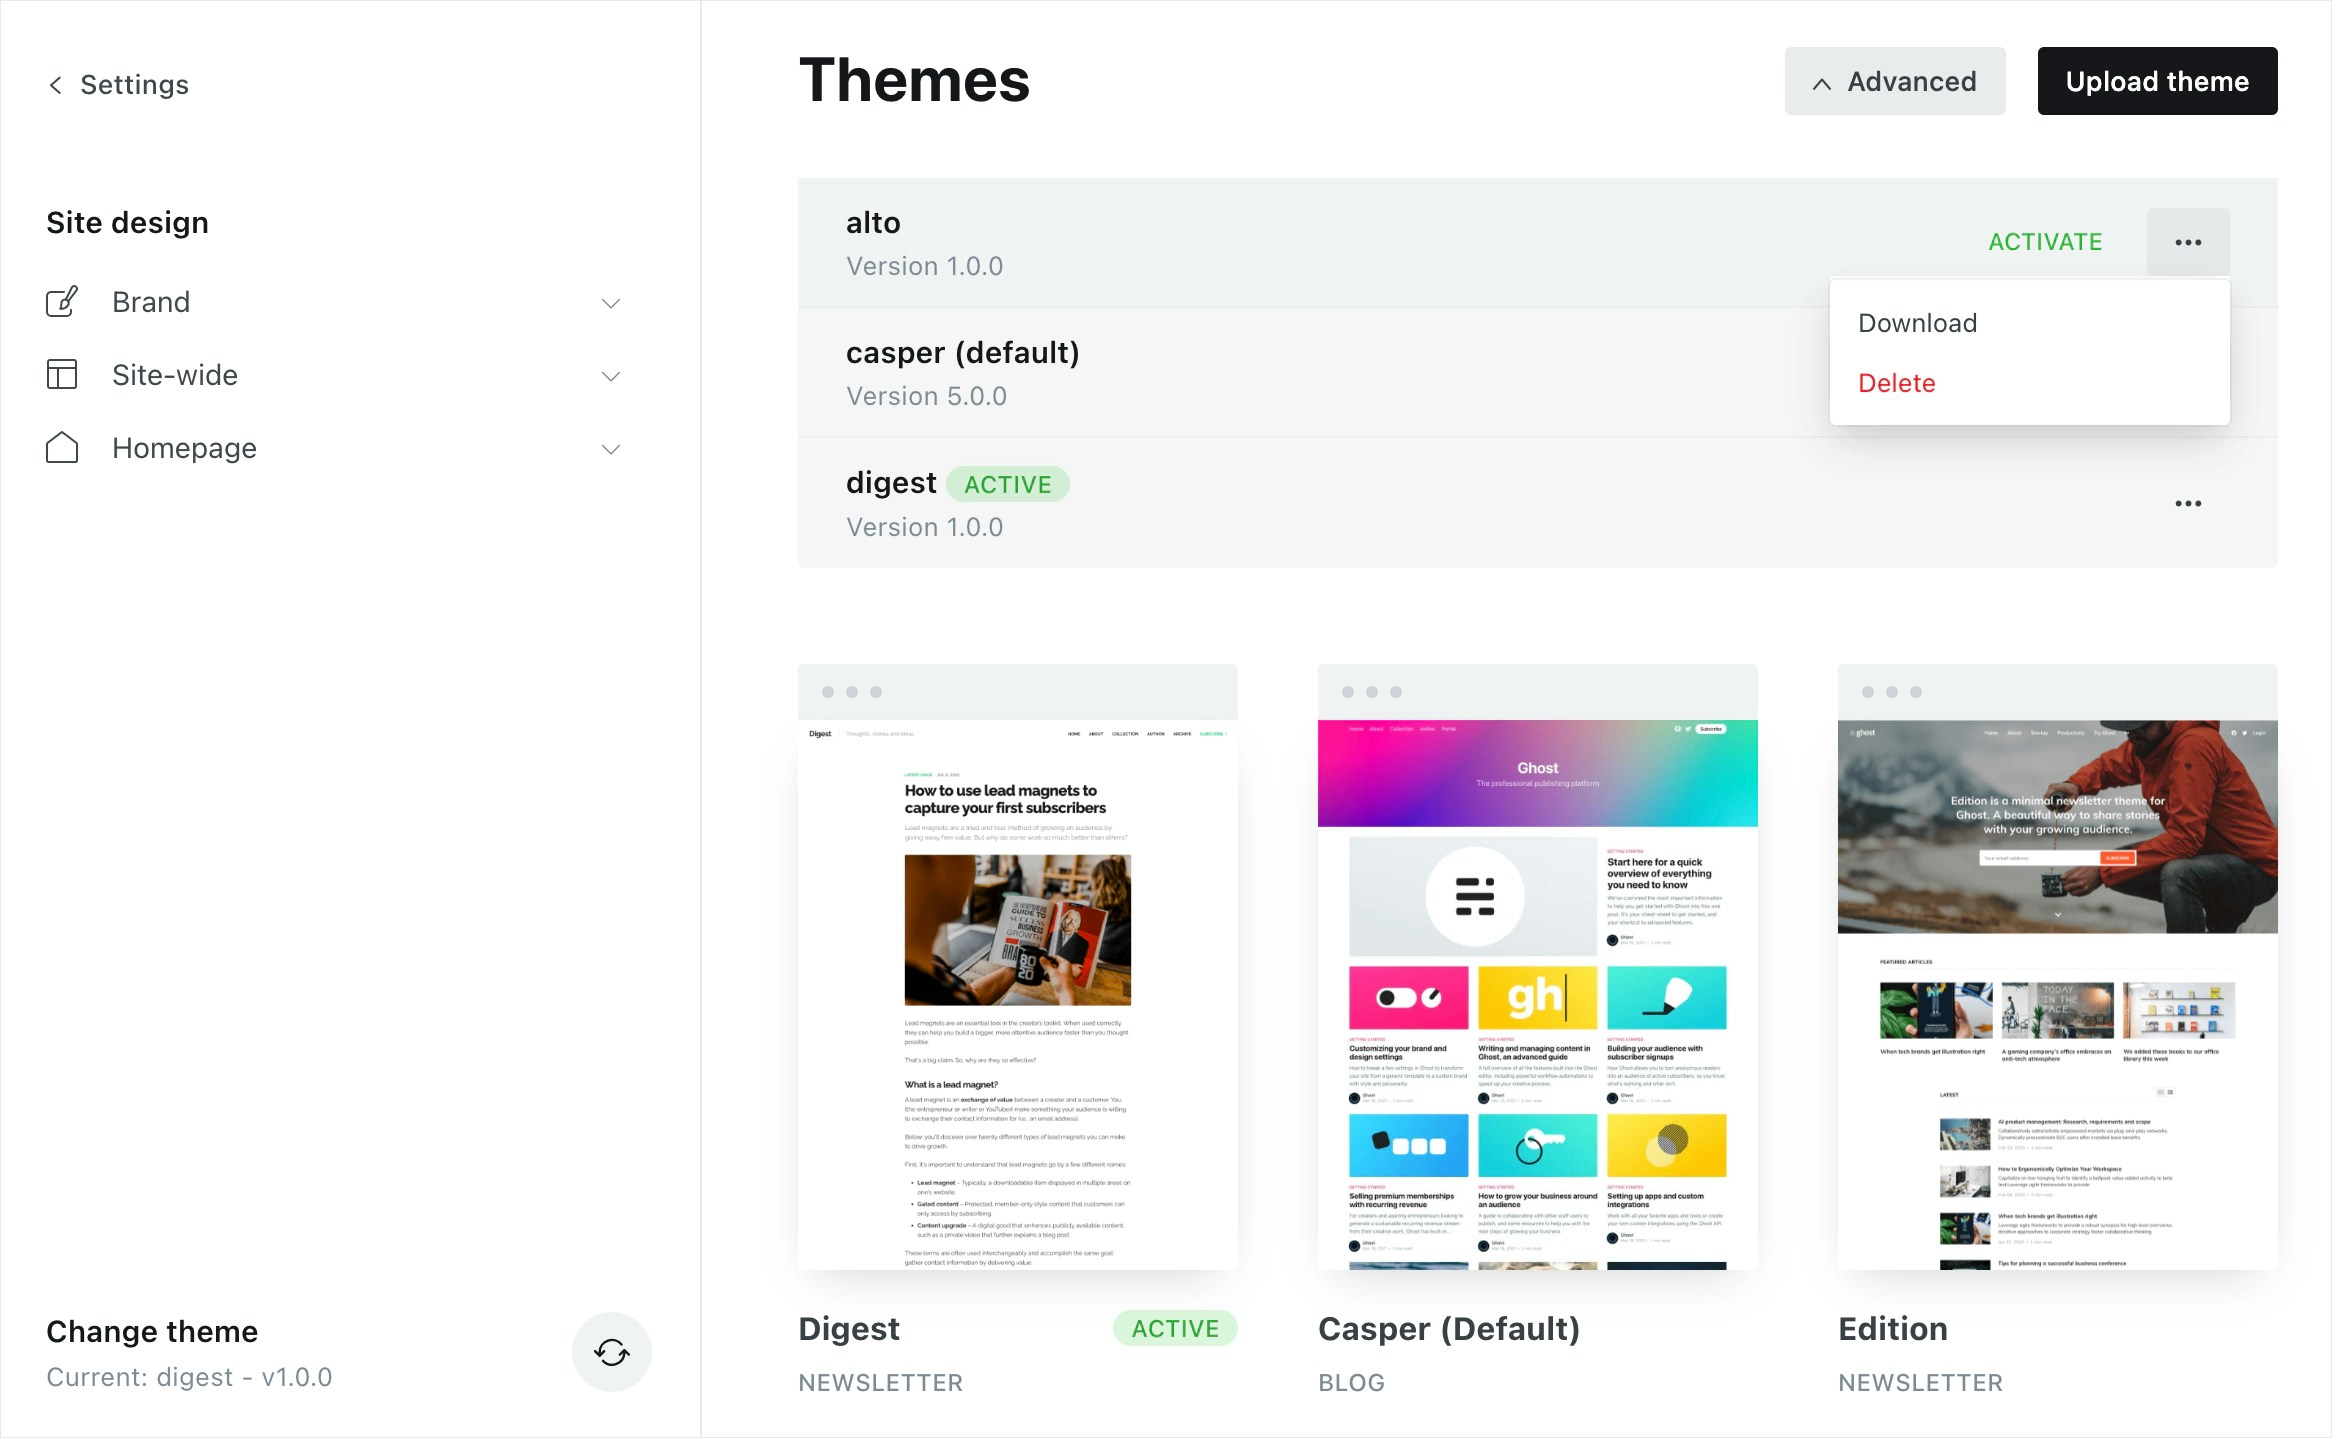
Download themes
Navigate to theDesignsettings page, and navigate to the themes section to download your active theme, and any other themes you want to store. This will be a.zipfile.
Copy images, files and media
To download images and media, you’ll need shell access to your server. If you’re unable to gain shell access to your current web host, you may need to contact their support team. When logged in to your server,cdto thecontentdirectory: cd /var/www/ghost/content
Then,ziptheimagesand other file storage directories with their contents zip -r content-files.zip images/ files/ media/
Then, to move the zip files from your server onto your local machine. scp user@123.456.789.123:/var/www/ghost/content/content-files.zip ~/Desktop/content-files.zip
Export members
Export all members in one CSV file from the Members dashboard in Ghost Admin.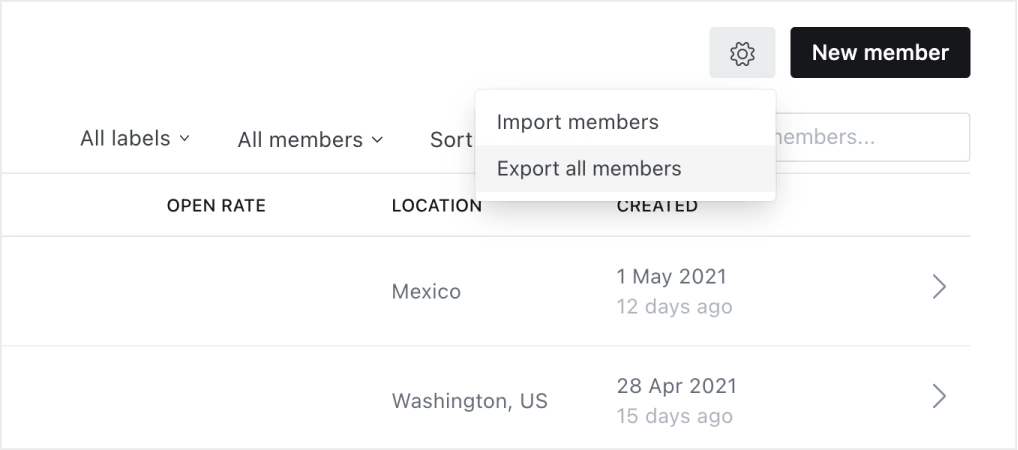
Restoring your data from a manual backup
Restoring database and content backups
If you backed up your MySQL database and content folder, follow these steps to restore them: For Docker installations:Copy images, files and media
All images, files and media need to be copied over to your new install. After doing that, run this command to fix permissions:sudo chown -R ghost:ghost content
Once this is complete, restart Ghost: ghost restart
Import content
To begin the content migration, head to theLabssection of Ghost Admin and import theghost.jsonbackup which you exported earlier.
Upload routes and redirects
From the Labs page, import theroutes.yaml and redirects.yaml files that you previously downloaded for your backup data.