# Overview
Source: https://docs.ghost.org/admin-api
It’s possible to create and manage your content using the Ghost Admin API. Our content management interface, Ghost Admin, uses the admin API - which means that everything Ghost Admin can do is also possible with the API, and a whole lot more!
***
Secure authentication is available either as a user with role-based permissions, or as an integration with a single standard set of permissions designed to support common publishing workflows.
The API is RESTful with predictable resource URLs, standard HTTP verbs, response codes and authentication used throughout. Requests and responses are JSON-encoded with consistent patterns and inline relations and responses are customisable using powerful query parameters.
## API Clients
### JavaScript Client Library
We’ve developed an [API client for JavaScript](/admin-api/javascript/), that simplifies authenticating with the admin API, and makes reading and writing data a breeze. The client is designed for use with integrations, supporting token authentication and the endpoints available to integrations.
## Structure
### Base URL
`https://{admin_domain}/ghost/api/admin/`
All admin API requests start with this base URL. Your admin domain can be different to your main domain, and may include a subdirectory. Using the correct domain and protocol are critical to getting consistent behaviour, particularly when dealing with CORS in the browser. All Ghost(Pro) blogs have a `*.ghost.io` domain as their admin domain and require https.
### Accept-Version Header
`Accept-Version: v{major}.{minor}`
Use the `Accept-Version` header to indicate the minimum version of Ghost’s API to operate with. See [API Versioning](/faq/api-versioning/) for more details.
### JSON Format
The API uses a consistent JSON structure for all requests and responses:
```json
{
"resource_type": [{
...
}],
"meta": {}
}
```
* `resource_type`: will always match the resource name in the URL. All resources are returned wrapped in an array, with the exception of `/site/` and `/settings/`.
* `meta`: contains [pagination](/content-api/pagination) information for browse requests.
#### Composing requests
When composing JSON payloads to send to the API as POST or PUT requests, you must always use this same format, unless the documentation for an endpoint says otherwise.
Requests with JSON payloads require the `Content-Type: application/json` header. Most request libraries have JSON-specific handling that will do this for you.
### Pagination
All browse endpoints are paginated, returning 15 records by default. You can use the [page](#page) and [limit](#limit) parameters to move through the pages of records. The response object contains a `meta.pagination` key with information on the current location within the records:
```json
"meta": {
"pagination": {
"page": 1,
"limit": 2,
"pages": 1,
"total": 1,
"next": null,
"prev": null
}
}
```
### Parameters
Query parameters provide fine-grained control over responses. All endpoints accept `include` and `fields`. Browse endpoints additionally accept `filter`, `limit`, `page` and `order`. Some endpoints have their own specific parameters.
The values provided as query parameters MUST be url encoded when used directly. The [client library](/admin-api/javascript/) will handle this for you.
For more details see the [Content API](/content-api/parameters).
### Filtering
See the [Content API](/content-api/filtering).
### Errors
See the [Content API](/content-api/errors).
## Authentication
There are three methods for authenticating with the Admin API: [integration token authentication](#token-authentication), [staff access token authentication](#staff-access-token-authentication) and [user authentication](#user-authentication). Most applications integrating with the Ghost Admin API should use one of the token authentication methods.
The JavaScript Admin API Client supports token authentication and staff access token authentication.
### Choosing an authentication method
**Integration Token authentication** is intended for integrations that handle common workflows, such as publishing new content, or sharing content to other platforms.
Using tokens, you authenticate as an integration. Each integration can have associated API keys & webhooks and are able to perform API requests independently of users. Admin API keys are used to generate short-lived single-use JSON Web Tokens (JWTs), which are then used to authenticate a request. The API Key is secret, and therefore this authentication method is only suitable for secure server side environments.
**Staff access token authentication** is intended for clients where different users login and manage various resources as themselves, without having to share their password.
Using a token found in a user’s settings page you authenticate as a specific user with their role-based permissions. You can use this token the same way you would use an integration token.
**User authentication** is intended for fully-fledged clients where different users login and manage various resources as themselves.
Using an email address and password, you authenticate as a specific user with their role-based permissions. Via the session API, credentials are swapped for a cookie-based session, which is then used to authenticate further API requests. Provided that passwords are entered securely, user-authentication is safe for use in the browser. User authentication requires support for second factor authentication codes.
### Permissions
Integrations have a restricted set of fixed permissions allowing access to certain endpoints e.g. `GET /users/` or `POST /posts/`. The full set of endpoints that integrations can access are those listed as [endpoints](#endpoints) on this page.
User permissions (whether using staff tokens or user authentication) are dependent entirely on their role. You can find more details in the [team management guide](https://ghost.org/help/managing-your-team/). Authenticating as a user with the Owner or Admin role will give access to the full set of API endpoints. Many endpoints can be discovered by inspecting the requests made by Ghost Admin, the [endpoints](#endpoints) listed on this page are those stable enough to document.
There are two exceptions: Staff tokens cannot transfer ownership or delete all content.
### Token Authentication
Token authentication is a simple, secure authentication mechanism using JSON Web Tokens (JWTs). Each integration and staff user is issued with an admin API key, which is used to generate a JWT token and then provided to the API via the standard HTTP Authorization header.
The admin API key must be kept private, therefore token authentication is not suitable for browsers or other insecure environments, unlike the Content API key.
#### Key
Admin API keys can be obtained by creating a new `Custom Integration` under the Integrations screen in Ghost Admin. Keys for individual users can be found on their respective profile page.
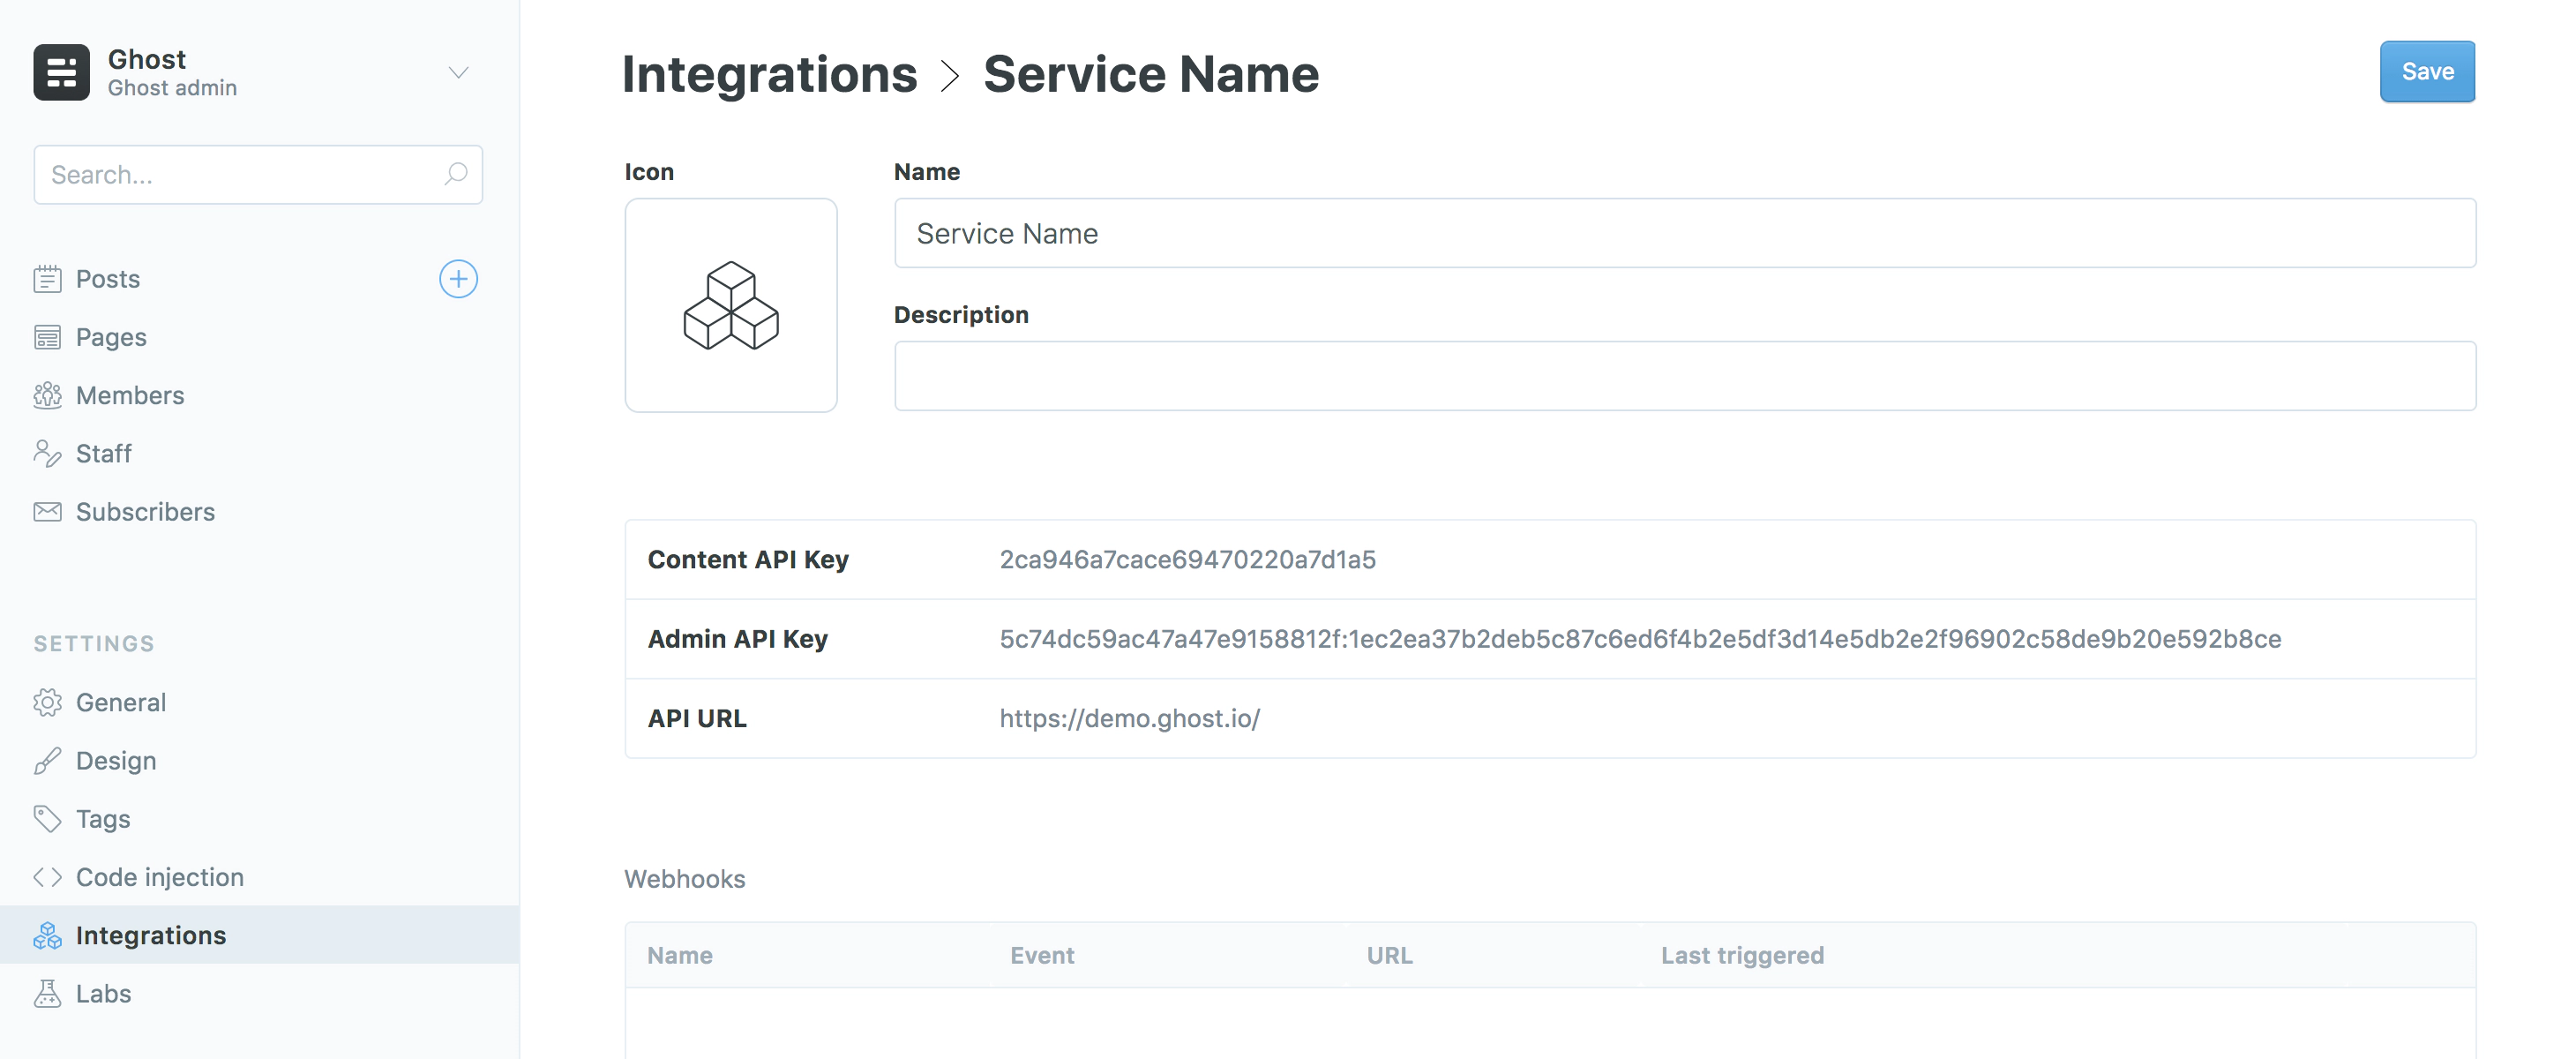 Admin API keys are made up of an id and secret, separated by a colon. These values are used separately to get a signed JWT token, which is used in the Authorization header of the request:
```bash
curl -H "Authorization: Ghost $token" -H "Accept-Version: $version" https://{admin_domain}/ghost/api/admin/{resource}/
```
The Admin API JavaScript client handles all the technical details of generating a JWT from an admin API key, meaning you only have to provide your url, version and key to start making requests.
#### Token Generation
If you’re using a language other than JavaScript, or are not using our client library, you’ll need to generate the tokens yourself. It is not safe to swap keys for tokens in the browser, or in any other insecure environment.
There are a myriad of [libraries](https://jwt.io/#libraries) available for generating JWTs in different environments.
JSON Web Tokens are made up of a header, a payload and a secret. The values needed for the header and payload are:
```json
// Header
{
"alg": "HS256",
"kid": {id}, // ID from your API key
"typ": "JWT"
}
```
```json
// Payload
{
// Timestamps are seconds sine the unix epoch, not milliseconds
"exp": {timestamp}, // Max 5 minutes after 'now'
"iat": {timestamp}, // 'now' (max 5 minutes after 'exp')
"aud": "/admin/"
}
```
The libraries on [https://jwt.io](https://jwt.io) all work slightly differently, but all of them allow you to specify the above required values, including setting the signing algorithm to the required HS-256. Where possible, the API will provide specific error messages when required values are missing or incorrect.
Regardless of language, you’ll need to:
1. Split the API key by the `:` into an `id` and a `secret`
2. Decode the hexadecimal secret into the original binary byte array
3. Pass these values to your JWT library of choice, ensuring that the header and payload are correct.
#### Token Generation Examples
These examples show how to generate a valid JWT in various languages & JWT libraries. The bash example shows step-by-step how to create a token without using a library.
```bash Bash (cURL)
#!/usr/bin/env bash
# Admin API key goes here
KEY="YOUR_ADMIN_API_KEY"
# Split the key into ID and SECRET
TMPIFS=$IFS
IFS=':' read ID SECRET <<< "$KEY"
IFS=$TMPIFS
# Prepare header and payload
NOW=$(date +'%s')
FIVE_MINS=$(($NOW + 300))
HEADER="{\"alg\": \"HS256\",\"typ\": \"JWT\", \"kid\": \"$ID\"}"
PAYLOAD="{\"iat\":$NOW,\"exp\":$FIVE_MINS,\"aud\": \"/admin/\"}"
# Helper function for performing base64 URL encoding
base64_url_encode() {
declare input=${1:-$( console.log(response))
.catch(error => console.error(error));
```
```js JavaScript
// Create a token without the client
const jwt = require('jsonwebtoken');
const axios = require('axios');
// Admin API key goes here
const key = 'YOUR_ADMIN_API_KEY';
// Split the key into ID and SECRET
const [id, secret] = key.split(':');
// Create the token (including decoding secret)
const token = jwt.sign({}, Buffer.from(secret, 'hex'), {
keyid: id,
algorithm: 'HS256',
expiresIn: '5m',
audience: `/admin/`
});
// Make an authenticated request to create a post
const url = 'http://localhost:2368/ghost/api/admin/posts/';
const headers = { Authorization: `Ghost ${token}` };
const payload = { posts: [{ title: 'Hello World' }] };
axios.post(url, payload, { headers })
.then(response => console.log(response))
.catch(error => console.error(error));
```
```ruby Ruby
require 'httparty'
require 'jwt'
# Admin API key goes here
key = 'YOUR_ADMIN_API_KEY'
# Split the key into ID and SECRET
id, secret = key.split(':')
# Prepare header and payload
iat = Time.now.to_i
header = {alg: 'HS256', typ: 'JWT', kid: id}
payload = {
iat: iat,
exp: iat + 5 * 60,
aud: '/admin/'
}
# Create the token (including decoding secret)
token = JWT.encode payload, [secret].pack('H*'), 'HS256', header
# Make an authenticated request to create a post
url = 'http://localhost:2368/ghost/api/admin/posts/'
headers = {Authorization: "Ghost #{token}", 'Accept-Version': "v4.0"}
body = {posts: [{title: 'Hello World'}]}
puts HTTParty.post(url, body: body, headers: headers)
```
```py Python
import requests # pip install requests
import jwt # pip install pyjwt
from datetime import datetime as date
# Admin API key goes here
key = 'YOUR_ADMIN_API_KEY'
# Split the key into ID and SECRET
id, secret = key.split(':')
# Prepare header and payload
iat = int(date.now().timestamp())
header = {'alg': 'HS256', 'typ': 'JWT', 'kid': id}
payload = {
'iat': iat,
'exp': iat + 5 * 60,
'aud': '/admin/'
}
# Create the token (including decoding secret)
token = jwt.encode(payload, bytes.fromhex(secret), algorithm='HS256', headers=header)
# Make an authenticated request to create a post
url = 'http://localhost:2368/ghost/api/admin/posts/'
headers = {'Authorization': 'Ghost {}'.format(token)}
body = {'posts': [{'title': 'Hello World'}]}
r = requests.post(url, json=body, headers=headers)
print(r)
```
### Staff access token authentication
Staff access token authentication is a simple, secure authentication mechanism using JSON Web Tokens (JWTs) to authenticate as a user. Each user can create and refresh their own token, which is used to generate a JWT token and then provided to the API via the standard HTTP Authorization header. For more information on usage, please refer to the [token authentication section](#token-authentication).
The staff access token must be kept private, therefore staff access token authentication is not suitable for browsers or other insecure environments.
### User Authentication
User Authentication is an advanced, session-based authentication method that should only be used for applications where the user is present and able to provide their credentials.
Authenticating as a user requires an application to collect a user’s email and password. These credentials are then swapped for a cookie, and the cookie is then used to maintain a session.
Requests to create a session may require new device verification or two-factor auth. In this case an auth code is sent to the user’s email address, and that must be provided in order to verify the session.
#### Creating a Session
The session and authentication endpoints have custom payloads, different to the standard JSON resource format.
```js
POST /admin/session/
```
**Request**
To create a new session, send a username and password to the sessions endpoint, in this format:
```json
// POST /admin/session/
{
"username": "{email address}",
"password": "{password}"
}
```
This request should also have an Origin header. See [CSRF protection](#csrf-protection) for details.
**Success Response**
`201 Created`: A successful session creation will return HTTP `201` response with an empty body and a `set-cookie` header, in the following format:
```text
set-cookie: ghost-admin-api-session={session token}; Path=/ghost; Expires=Mon, 26 Aug 2019 19:14:07 GMT; HttpOnly; SameSite=Lax
```
**2FA Response**
`403 Needs2FAError`: In many cases, session creation will require an auth code to be provided. In this case you’ll get a 403 and the message `User must verify session to login`.
This response still has the `set-cookie` header in the above format, which should be used in the request to provide the token:
**Verification Request**
To send the authentication token
```json
// PUT /admin/session/verify/
{
"token": "{auth code}"
}
```
To request an auth token to be resent:
```json
// POST /admin/session/verify/
{}
```
#### Making authenticated API requests
The provided session cookie should be provided with every subsequent API request:
* When making the request from a browser using the `fetch` API, pass `credentials: 'include'` to ensure cookies are sent.
* When using XHR you should set the `withCredentials` property of the xhr to `true`
* When using cURL you can use the `--cookie` and `--cookie-jar` options to store and send cookies from a text file.
**CSRF Protection**
Session-based requests must also include either an Origin (preferred) or a Referer header. The value of these headers is checked against the original session creation requests, in order to prevent Cross-Site Request Forgery (CSRF) in a browser environment. In a browser environment, these headers are handled automatically. For server-side or native apps, the Origin header should be sent with an identifying URL as the value.
#### Session-based Examples
```bash
# cURL
# Create a session, and store the cookie in ghost-cookie.txt
curl -c ghost-cookie.txt -d username=me@site.com -d password=secretpassword \
-H "Origin: https://myappsite.com" \
-H "Accept-Version: v3.0" \
https://demo.ghost.io/ghost/api/admin/session/
# Use the session cookie to create a post
curl -b ghost-cookie.txt \
-d '{"posts": [{"title": "Hello World"}]}' \
-H "Content-Type: application/json" \
-H "Accept-Version: v3.0" \
-H "Origin: https://myappsite.com" \
https://demo.ghost.io/ghost/api/admin/posts/
```
## Endpoints
These are the endpoints & methods currently available to integrations. More endpoints are available through user authentication. Each endpoint has a stability index, see [versioning](/faq/api-versioning) for more information.
| Resource | Methods | Stability |
| ---------------------------------------- | ------------------------------------- | --------- |
| [/posts/](/admin-api/#posts) | Browse, Read, Edit, Add, Copy, Delete | Stable |
| [/pages/](/admin-api/#pages) | Browse, Read, Edit, Add, Copy, Delete | Stable |
| /tags/ | Browse, Read, Edit, Add, Delete | Stable |
| [/tiers/](/admin-api/#tiers) | Browse, Read, Edit, Add | Stable |
| [/newsletters/](/admin-api/#newsletters) | Browse, Read, Edit, Add | Stable |
| [/offers/](/admin-api/#offers) | Browse, Read, Edit, Add | Stable |
| [/members/](/admin-api/#members) | Browse, Read, Edit, Add | Stable |
| [/users/](/admin-api/#users) | Browse, Read | Stable |
| [/images/](/admin-api/#images) | Upload | Stable |
| [/themes/](/admin-api/#themes)[]() | Upload, Activate | Stable |
| [/site/](/admin-api/#site) | Read | Stable |
| [/webhooks/](/admin-api/#webhooks) | Edit, Add, Delete | Stable |
# Overview
Source: https://docs.ghost.org/admin-api/images/overview
Sending images to Ghost via the API allows you to upload images one at a time, and store them with a [storage adapter](https://ghost.org/integrations/?tag=storage). The default adapter stores files locally in /content/images/ without making any modifications, except for sanitising the filename.
```js
POST /admin/images/upload/
```
### The image object
Images can be uploaded to, and fetched from storage. When an image is uploaded, the response is an image object that contains the new URL for the image - the location from which the image can be fetched.
`url`: *URI* The newly created URL for the image.
`ref`: *String (optional)* The reference for the image, if one was provided with the upload.
```json
// POST /admin/images/upload/
{
"images": [
{
"url": "https://demo.ghost.io/content/images/2019/02/ghost-logo.png",
"ref": "ghost-logo.png"
}
]
}
```
# Uploading an Image
Source: https://docs.ghost.org/admin-api/images/uploading-an-image
To upload an image, send a multipart formdata request by providing the `'Content-Type': 'multipart/form-data;'` header, along with the following fields encoded as [FormData](https://developer.mozilla.org/en-US/Web/API/FormData/FormData):
`file`: *[Blob](https://developer.mozilla.org/en-US/Web/API/Blob) or [File](https://developer.mozilla.org/en-US/Web/API/File)* The image data that you want to upload.
`purpose`: *String (default: `image`)* Intended use for the image, changes the validations performed. Can be one of `image` , `profile_image` or `icon`. The supported formats for `image`, `icon`, and `profile_image` are WEBP, JPEG, GIF, PNG and SVG. `profile_image` must be square. `icon` must also be square, and additionally supports the ICO format.
`ref`: *String (optional)* A reference or identifier for the image, e.g. the original filename and path. Will be returned as-is in the API response, making it useful for finding & replacing local image paths after uploads.
```bash
curl -X POST -F 'file=@/path/to/images/my-image.jpg' -F 'ref=path/to/images/my-image.jpg' -H "Authorization: 'Ghost $token'" -H "Accept-Version: $version" https://{admin_domain}/ghost/api/admin/images/upload/
```
# Creating a member
Source: https://docs.ghost.org/admin-api/members/creating-a-member
At minimum, an email is required to create a new, free member.
```json
// POST /admin/members/
{
"members": [
{
"email": "jamie@ghost.org",
}
]
}
```
```json
// Response
{
"members": [
{
"id": "624d445026833200a5801bce",
"uuid": "83525d87-ac70-40f5-b13c-f9b9753dcbe8",
"email": "jamie@ghost.org",
"name": null,
"note": null,
"geolocation": null,
"created_at": "2022-04-06T07:42:08.000Z",
"updated_at": "2022-04-06T07:42:08.000Z",
"labels": [],
"subscriptions": [],
"avatar_image": "https://gravatar.com/avatar/7d8efd2c2a781111599a8cae293cf704?s=250&d=blank",
"email_count": 0,
"email_opened_count": 0,
"email_open_rate": null,
"status": "free",
"last_seen_at": null,
"tiers": [],
"newsletters": []
}
]
}
```
Additional writable member fields include:
| Key | Description |
| --------------- | ------------------------------------------------ |
| **name** | member name |
| **note** | notes on the member |
| **labels** | member labels |
| **newsletters** | List of newsletters subscribed to by this member |
Create a new, free member with name, newsletter, and label:
```json
// POST /admin/members/
{
"members": [
{
"email": "jamie@ghost.org",
"name": "Jamie",
"labels": [
{
"name": "VIP",
"slug": "vip"
}
],
"newsletters": [
{
"id": "624d445026833200a5801bce"
}
]
}
]
}
```
# Overview
Source: https://docs.ghost.org/admin-api/members/overview
The members resource provides an endpoint for fetching, creating, and updating member data.
Fetch members (by default, the 15 newest members are returned):
```json
// GET /admin/members/?include=newsletters%2Clabels
{
"members": [
{
"id": "623199bfe8bc4d3097caefe0",
"uuid": "4fa3e4df-85d5-44bd-b0bf-d504bbe22060",
"email": "jamie@example.com",
"name": "Jamie",
"note": null,
"geolocation": null,
"created_at": "2022-03-16T08:03:11.000Z",
"updated_at": "2022-03-16T08:03:40.000Z",
"labels": [
{
"id": "623199dce8bc4d3097caefe9",
"name": "Label 1",
"slug": "label-1",
"created_at": "2022-03-16T08:03:40.000Z",
"updated_at": "2022-03-16T08:03:40.000Z"
}
],
"subscriptions": [],
"avatar_image": "https://gravatar.com/avatar/76a4c5450dbb6fde8a293a811622aa6f?s=250&d=blank",
"email_count": 0,
"email_opened_count": 0,
"email_open_rate": null,
"status": "free",
"last_seen_at": "2022-05-20T16:29:29.000Z",
"newsletters": [
{
"id": "62750bff2b868a34f814af08",
"name": "My Ghost Site",
"description": null,
"status": "active"
}
]
},
...
]
}
```
### Subscription object
A paid member includes a subscription object that provides subscription details.
```json
// Subscription object
[
{
"id": "sub_1KlTkYSHlkrEJE2dGbzcgc61",
"customer": {
"id": "cus_LSOXHFwQB7ql18",
"name": "Jamie",
"email": "jamie@ghost.org"
},
"status": "active",
"start_date": "2022-04-06T07:57:58.000Z",
"default_payment_card_last4": "4242",
"cancel_at_period_end": false,
"cancellation_reason": null,
"current_period_end": "2023-04-06T07:57:58.000Z",
"price": {
"id": "price_1Kg0ymSHlkrEJE2dflUN66EW",
"price_id": "6239692c664a9e6f5e5e840a",
"nickname": "Yearly",
"amount": 100000,
"interval": "year",
"type": "recurring",
"currency": "USD"
},
"tier": {...},
"offer": null
}
]
```
| Key | Description |
| --------------------------------- | --------------------------------------------------------------- |
| **customer** | Stripe customer attached to the subscription |
| **start\_date** | Subscription start date |
| **default\_payment\_card\_last4** | Last 4 digits of the card |
| **cancel\_at\_period\_end** | If the subscription should be canceled or renewed at period end |
| **cancellation\_reason** | Reason for subscription cancellation |
| **current\_period\_end** | Subscription end date |
| **price** | Price information for subscription including Stripe price ID |
| **tier** | Member subscription tier |
| **offer** | Offer details for a subscription |
# Updating a member
Source: https://docs.ghost.org/admin-api/members/updating-a-member
```js
PUT /admin/members/{id}/
```
All writable fields of a member can be updated. It’s recommended to perform a `GET` request to fetch the latest data before updating a member.
A minimal example for updating the name of a member.
```json
// PUT /admin/members/{id}/
{
"members": [
{
"name": "Jamie II"
}
]
}
```
# Creating a Newsletter
Source: https://docs.ghost.org/admin-api/newsletters/creating-a-newsletter
```js
POST /admin/newsletters/
```
Required fields: `name`
Options: `opt_in_existing`
When `opt_in_existing` is set to `true`, existing members with a subscription to one or more active newsletters are also subscribed to this newsletter. The response metadata will include the number of members opted-in.
```json
// POST /admin/newsletters/?opt_in_existing=true
{
"newsletters": [
{
"name": "My newly created newsletter",
"description": "This is a newsletter description",
"sender_reply_to": "newsletter",
"status": "active",
"subscribe_on_signup": true,
"show_header_icon": true,
"show_header_title": true,
"show_header_name": true,
"title_font_category": "sans_serif",
"title_alignment": "center",
"show_feature_image": true,
"body_font_category": "sans_serif",
"show_badge": true
}
]
}
```
# Overview
Source: https://docs.ghost.org/admin-api/newsletters/overview
Newsletters allow finer control over distribution of site content via email, allowing members to opt-in or opt-out of different categories of content. By default each site has one newsletter.
### The newsletter object
```json
// GET admin/newsletters/?limit=all
{
"newsletters": [
{
"id": "62750bff2b868a34f814af08",
"name": "My Ghost site",
"description": null,
"slug": "default-newsletter",
"sender_name": null,
"sender_email": null,
"sender_reply_to": "newsletter",
"status": "active",
"visibility": "members",
"subscribe_on_signup": true,
"sort_order": 0,
"header_image": null,
"show_header_icon": true,
"show_header_title": true,
"title_font_category": "sans_serif",
"title_alignment": "center",
"show_feature_image": true,
"body_font_category": "sans_serif",
"footer_content": null,
"show_badge": true,
"created_at": "2022-05-06T11:52:31.000Z",
"updated_at": "2022-05-20T07:43:43.000Z",
"show_header_name": true,
"uuid": "59fbce16-c0bf-4583-9bb3-5cd52db43159"
}
],
"meta": {
"pagination": {
"page": 1,
"limit": "all",
"pages": 1,
"total": 1,
"next": null,
"prev": null
}
}
}
```
| Key | Description |
| ------------------------- | ---------------------------------------------------------------------------------------------------------------------------------------------------- |
| **name** | Public name for the newsletter |
| **description** | (nullable) Public description of the newsletter |
| **status** | `active` or `archived` - denotes if the newsletter is active or archived |
| **slug** | The reference to this newsletter that can be used in the `newsletter` option when sending a post via email |
| **sender\_name** | (nullable) The sender name of the emails |
| **sender\_email** | (nullable) The email from which to send emails. Requires validation. |
| **sender\_reply\_to** | The reply-to email address for sent emails. Can be either `newsletter` (= use `sender_email`) or `support` (use support email from Portal settings). |
| **subscribe\_on\_signup** | `true`/`false`. Whether members should automatically subscribe to this newsletter on signup |
| **header\_image** | (nullable) Path to an image to show at the top of emails. Recommended size 1200x600 |
| **show\_header\_icon** | `true`/`false`. Show the site icon in emails |
| **show\_header\_title** | `true`/`false`. Show the site name in emails |
| **show\_header\_name** | `true`/`false`. Show the newsletter name in emails |
| **title\_font\_category** | Title font style. Either `serif` or `sans_serif` |
| **show\_feature\_image** | `true`/`false`. Show the post's feature image in emails |
| **body\_font\_category** | Body font style. Either `serif` or `sans_serif` |
| **footer\_content** | (nullable) Extra information or legal text to show in the footer of emails. Should contain valid HTML. |
| **show\_badge** | `true`/`false`. Show you’re a part of the indie publishing movement by adding a small Ghost badge in the footer |
# Sender email validation
Source: https://docs.ghost.org/admin-api/newsletters/sender-email-validation
When updating the `sender_email` field, email verification is required before emails are sent from the new address. After updating the property, the `sent_email_verification` metadata property will be set, containing `sender_email`. The `sender_email` property will remain unchanged until the address has been verified by clicking the link that is sent to the address specified in `sender_email`.
```json
PUT /admin/newsletters/62750bff2b868a34f814af08/
{
"newsletters": [
{
"sender_email": "daily-newsletter@domain.com"
}
]
}
```
```json
// Response
{
"newsletters": [
{
"id": "62750bff2b868a34f814af08",
"name": "My newly created newsletter",
"description": "This is an edited newsletter description",
"sender_name": "Daily Newsletter",
"sender_email": null,
"sender_reply_to": "newsletter",
"status": "active",
"subscribe_on_signup": true,
"sort_order": 1,
"header_image": null,
"show_header_icon": true,
"show_header_title": true,
"title_font_category": "sans_serif",
"title_alignment": "center",
"show_feature_image": true,
"body_font_category": "sans_serif",
"footer_content": null,
"show_badge": true,
"show_header_name": true
}
],
"meta": {
"sent_email_verification": [
"sender_email"
]
}
}
```
# Updating a Newsletter
Source: https://docs.ghost.org/admin-api/newsletters/updating-a-newsletter
```json
PUT /admin/newsletters/629711f95d57e7229f16181c/
{
"newsletters": [
{
"id": "62750bff2b868a34f814af08",
"name": "My newly created newsletter",
"description": "This is an edited newsletter description",
"sender_name": "Daily Newsletter",
"sender_email": null,
"sender_reply_to": "newsletter",
"status": "active",
"subscribe_on_signup": true,
"sort_order": 1,
"header_image": null,
"show_header_icon": true,
"show_header_title": true,
"title_font_category": "sans_serif",
"title_alignment": "center",
"show_feature_image": true,
"body_font_category": "sans_serif",
"footer_content": null,
"show_badge": true,
"show_header_name": true
}
]
}
```
# Creating an Offer
Source: https://docs.ghost.org/admin-api/offers/creating-an-offer
```js
POST /admin/offers/
```
Required fields: `name`, `code`, `cadence`, `duration`, `amount`, `tier.id` , `type`
When offer `type` is `fixed`, `currency` is also required and must match the tier’s currency. New offers are created as active by default.
Below is an example for creating an offer with all properties including prices, description, and benefits.
```json
// POST /admin/offers/
{
"offers": [
{
"name": "Black Friday",
"code": "black-friday",
"display_title": "Black Friday Sale!",
"display_description": "10% off on yearly plan",
"type": "percent",
"cadence": "year",
"amount": 12,
"duration": "once",
"duration_in_months": null,
"currency_restriction": false,
"currency": null,
"status": "active",
"redemption_count": 0,
"tier": {
"id": "62307cc71b4376a976734038",
"name": "Gold"
}
}
]
}
```
# Overview
Source: https://docs.ghost.org/admin-api/offers/overview
Use offers to create a discount or special price for members signing up on a tier.
### The offer object
When you fetch, create, or edit an offer, the API responds with an array of one or more offer objects. These objects include related `tier` data.
```json
// GET /admin/offers/
{
"offers": [
{
"id": "6230dd69e8bc4d3097caefd3",
"name": "Black friday",
"code": "black-friday",
"display_title": "Black friday sale!",
"display_description": "10% off our yearly price",
"type": "percent",
"cadence": "year",
"amount": 10,
"duration": "once",
"duration_in_months": null,
"currency_restriction": false,
"currency": null,
"status": "active",
"redemption_count": 0,
"tier": {
"id": "62307cc71b4376a976734038",
"name": "Platinum"
}
}
]
}
```
| Key | Description |
| ------------------------- | --------------------------------------------------------------------------------------------------------------------------------------------------------------------------- |
| **display\_title** | Name displayed in the offer window |
| **display\_description** | Text displayed in the offer window |
| **name** | Internal name for an offer, must be unique |
| **code** | Shortcode for the offer, for example: [https://yoursite.com/black-friday](https://yoursite.com/black-friday) |
| **status** | `active` or `archived` - denotes if the offer is active or archived |
| **type** | `percent` or `fixed` - whether the amount off is a percentage or fixed |
| **amount** | Offer discount amount, as a percentage or fixed value as set in `type`. *Amount is always denoted by the smallest currency unit (e.g., 100 cents instead of \$1.00 in USD)* |
| **currency** | `fixed` type offers only - specifies tier's currency as three letter ISO currency code |
| **currency\_restriction** | Denotes whether the offer \`currency\` is restricted. If so, changing the currency invalidates the offer |
| **duration** | `once`/`forever`/`repeating`. `repeating` duration is only available when `cadence` is `month` |
| **duration\_in\_months** | Number of months offer should be repeated when `duration` is `repeating` |
| **redemption\_count** | Number of times the offer has been redeemed |
| **tier** | Tier on which offer is applied |
| **cadence** | `month` or `year` - denotes if offer applies to tier's monthly or yearly price |
# Updating an Offer
Source: https://docs.ghost.org/admin-api/offers/updating-an-offer
For existing offers, only `name` , `code`, `display_title` and `display_description` are editable.
The example updates `display title` and `code`.
```json
// PUT /admin/offers/{id}/
{
"offers": [
{
"display_title": "Black Friday 2022",
"code": "black-friday-2022"
}
]
}
```
# Overview
Source: https://docs.ghost.org/admin-api/pages/overview
Pages are [static resources](/publishing/) that are not included in channels or collections on the Ghost front-end. They are identical to posts in terms of request and response structure when working with the APIs.
```js
GET /admin/pages/
GET /admin/pages/{id}/
GET /admin/pages/slug/{slug}/
POST /admin/pages/
POST /admin/pages/{id}/copy
PUT /admin/pages/{id}/
DELETE /admin/pages/{id}/
```
# Creating a Post
Source: https://docs.ghost.org/admin-api/posts/creating-a-post
```js
POST /admin/posts/
```
Required fields: `title`
Create draft and published posts with the add posts endpoint. All fields except `title` can be empty or have a default that is applied automatically. Below is a minimal example for creating a published post with content:
```json
// POST /admin/posts/
{
"posts": [
{
"title": "My test post",
"lexical": "{\"root\":{\"children\":[{\"children\":[{\"detail\":0,\"format\":0,\"mode\":\"normal\",\"style\":\"\",\"text\":\"Hello, beautiful world! 👋\",\"type\":\"extended-text\",\"version\":1}],\"direction\":\"ltr\",\"format\":\"\",\"indent\":0,\"type\":\"paragraph\",\"version\":1}],\"direction\":\"ltr\",\"format\":\"\",\"indent\":0,\"type\":\"root\",\"version\":1}}",
"status": "published"
}
]
}
```
A post must always have [at least one author](#tags-and-authors), and this will default to the staff user with the owner role when [token authentication](#token-authentication) is used.
#### Source HTML
The post creation endpoint is also able to convert HTML into Lexical. The conversion generates the best available Lexical representation, meaning this operation is lossy and the HTML rendered by Ghost may be different from the source HTML. For the best results ensure your HTML is well-formed, e.g. uses block and inline elements correctly.
To use HTML as the source for your content instead of Lexical, use the `source` parameter:
```json
// POST /admin/posts/?source=html
{
"posts": [
{
"title": "My test post",
"html": "
Admin API keys are made up of an id and secret, separated by a colon. These values are used separately to get a signed JWT token, which is used in the Authorization header of the request:
```bash
curl -H "Authorization: Ghost $token" -H "Accept-Version: $version" https://{admin_domain}/ghost/api/admin/{resource}/
```
The Admin API JavaScript client handles all the technical details of generating a JWT from an admin API key, meaning you only have to provide your url, version and key to start making requests.
#### Token Generation
If you’re using a language other than JavaScript, or are not using our client library, you’ll need to generate the tokens yourself. It is not safe to swap keys for tokens in the browser, or in any other insecure environment.
There are a myriad of [libraries](https://jwt.io/#libraries) available for generating JWTs in different environments.
JSON Web Tokens are made up of a header, a payload and a secret. The values needed for the header and payload are:
```json
// Header
{
"alg": "HS256",
"kid": {id}, // ID from your API key
"typ": "JWT"
}
```
```json
// Payload
{
// Timestamps are seconds sine the unix epoch, not milliseconds
"exp": {timestamp}, // Max 5 minutes after 'now'
"iat": {timestamp}, // 'now' (max 5 minutes after 'exp')
"aud": "/admin/"
}
```
The libraries on [https://jwt.io](https://jwt.io) all work slightly differently, but all of them allow you to specify the above required values, including setting the signing algorithm to the required HS-256. Where possible, the API will provide specific error messages when required values are missing or incorrect.
Regardless of language, you’ll need to:
1. Split the API key by the `:` into an `id` and a `secret`
2. Decode the hexadecimal secret into the original binary byte array
3. Pass these values to your JWT library of choice, ensuring that the header and payload are correct.
#### Token Generation Examples
These examples show how to generate a valid JWT in various languages & JWT libraries. The bash example shows step-by-step how to create a token without using a library.
```bash Bash (cURL)
#!/usr/bin/env bash
# Admin API key goes here
KEY="YOUR_ADMIN_API_KEY"
# Split the key into ID and SECRET
TMPIFS=$IFS
IFS=':' read ID SECRET <<< "$KEY"
IFS=$TMPIFS
# Prepare header and payload
NOW=$(date +'%s')
FIVE_MINS=$(($NOW + 300))
HEADER="{\"alg\": \"HS256\",\"typ\": \"JWT\", \"kid\": \"$ID\"}"
PAYLOAD="{\"iat\":$NOW,\"exp\":$FIVE_MINS,\"aud\": \"/admin/\"}"
# Helper function for performing base64 URL encoding
base64_url_encode() {
declare input=${1:-$( console.log(response))
.catch(error => console.error(error));
```
```js JavaScript
// Create a token without the client
const jwt = require('jsonwebtoken');
const axios = require('axios');
// Admin API key goes here
const key = 'YOUR_ADMIN_API_KEY';
// Split the key into ID and SECRET
const [id, secret] = key.split(':');
// Create the token (including decoding secret)
const token = jwt.sign({}, Buffer.from(secret, 'hex'), {
keyid: id,
algorithm: 'HS256',
expiresIn: '5m',
audience: `/admin/`
});
// Make an authenticated request to create a post
const url = 'http://localhost:2368/ghost/api/admin/posts/';
const headers = { Authorization: `Ghost ${token}` };
const payload = { posts: [{ title: 'Hello World' }] };
axios.post(url, payload, { headers })
.then(response => console.log(response))
.catch(error => console.error(error));
```
```ruby Ruby
require 'httparty'
require 'jwt'
# Admin API key goes here
key = 'YOUR_ADMIN_API_KEY'
# Split the key into ID and SECRET
id, secret = key.split(':')
# Prepare header and payload
iat = Time.now.to_i
header = {alg: 'HS256', typ: 'JWT', kid: id}
payload = {
iat: iat,
exp: iat + 5 * 60,
aud: '/admin/'
}
# Create the token (including decoding secret)
token = JWT.encode payload, [secret].pack('H*'), 'HS256', header
# Make an authenticated request to create a post
url = 'http://localhost:2368/ghost/api/admin/posts/'
headers = {Authorization: "Ghost #{token}", 'Accept-Version': "v4.0"}
body = {posts: [{title: 'Hello World'}]}
puts HTTParty.post(url, body: body, headers: headers)
```
```py Python
import requests # pip install requests
import jwt # pip install pyjwt
from datetime import datetime as date
# Admin API key goes here
key = 'YOUR_ADMIN_API_KEY'
# Split the key into ID and SECRET
id, secret = key.split(':')
# Prepare header and payload
iat = int(date.now().timestamp())
header = {'alg': 'HS256', 'typ': 'JWT', 'kid': id}
payload = {
'iat': iat,
'exp': iat + 5 * 60,
'aud': '/admin/'
}
# Create the token (including decoding secret)
token = jwt.encode(payload, bytes.fromhex(secret), algorithm='HS256', headers=header)
# Make an authenticated request to create a post
url = 'http://localhost:2368/ghost/api/admin/posts/'
headers = {'Authorization': 'Ghost {}'.format(token)}
body = {'posts': [{'title': 'Hello World'}]}
r = requests.post(url, json=body, headers=headers)
print(r)
```
### Staff access token authentication
Staff access token authentication is a simple, secure authentication mechanism using JSON Web Tokens (JWTs) to authenticate as a user. Each user can create and refresh their own token, which is used to generate a JWT token and then provided to the API via the standard HTTP Authorization header. For more information on usage, please refer to the [token authentication section](#token-authentication).
The staff access token must be kept private, therefore staff access token authentication is not suitable for browsers or other insecure environments.
### User Authentication
User Authentication is an advanced, session-based authentication method that should only be used for applications where the user is present and able to provide their credentials.
Authenticating as a user requires an application to collect a user’s email and password. These credentials are then swapped for a cookie, and the cookie is then used to maintain a session.
Requests to create a session may require new device verification or two-factor auth. In this case an auth code is sent to the user’s email address, and that must be provided in order to verify the session.
#### Creating a Session
The session and authentication endpoints have custom payloads, different to the standard JSON resource format.
```js
POST /admin/session/
```
**Request**
To create a new session, send a username and password to the sessions endpoint, in this format:
```json
// POST /admin/session/
{
"username": "{email address}",
"password": "{password}"
}
```
This request should also have an Origin header. See [CSRF protection](#csrf-protection) for details.
**Success Response**
`201 Created`: A successful session creation will return HTTP `201` response with an empty body and a `set-cookie` header, in the following format:
```text
set-cookie: ghost-admin-api-session={session token}; Path=/ghost; Expires=Mon, 26 Aug 2019 19:14:07 GMT; HttpOnly; SameSite=Lax
```
**2FA Response**
`403 Needs2FAError`: In many cases, session creation will require an auth code to be provided. In this case you’ll get a 403 and the message `User must verify session to login`.
This response still has the `set-cookie` header in the above format, which should be used in the request to provide the token:
**Verification Request**
To send the authentication token
```json
// PUT /admin/session/verify/
{
"token": "{auth code}"
}
```
To request an auth token to be resent:
```json
// POST /admin/session/verify/
{}
```
#### Making authenticated API requests
The provided session cookie should be provided with every subsequent API request:
* When making the request from a browser using the `fetch` API, pass `credentials: 'include'` to ensure cookies are sent.
* When using XHR you should set the `withCredentials` property of the xhr to `true`
* When using cURL you can use the `--cookie` and `--cookie-jar` options to store and send cookies from a text file.
**CSRF Protection**
Session-based requests must also include either an Origin (preferred) or a Referer header. The value of these headers is checked against the original session creation requests, in order to prevent Cross-Site Request Forgery (CSRF) in a browser environment. In a browser environment, these headers are handled automatically. For server-side or native apps, the Origin header should be sent with an identifying URL as the value.
#### Session-based Examples
```bash
# cURL
# Create a session, and store the cookie in ghost-cookie.txt
curl -c ghost-cookie.txt -d username=me@site.com -d password=secretpassword \
-H "Origin: https://myappsite.com" \
-H "Accept-Version: v3.0" \
https://demo.ghost.io/ghost/api/admin/session/
# Use the session cookie to create a post
curl -b ghost-cookie.txt \
-d '{"posts": [{"title": "Hello World"}]}' \
-H "Content-Type: application/json" \
-H "Accept-Version: v3.0" \
-H "Origin: https://myappsite.com" \
https://demo.ghost.io/ghost/api/admin/posts/
```
## Endpoints
These are the endpoints & methods currently available to integrations. More endpoints are available through user authentication. Each endpoint has a stability index, see [versioning](/faq/api-versioning) for more information.
| Resource | Methods | Stability |
| ---------------------------------------- | ------------------------------------- | --------- |
| [/posts/](/admin-api/#posts) | Browse, Read, Edit, Add, Copy, Delete | Stable |
| [/pages/](/admin-api/#pages) | Browse, Read, Edit, Add, Copy, Delete | Stable |
| /tags/ | Browse, Read, Edit, Add, Delete | Stable |
| [/tiers/](/admin-api/#tiers) | Browse, Read, Edit, Add | Stable |
| [/newsletters/](/admin-api/#newsletters) | Browse, Read, Edit, Add | Stable |
| [/offers/](/admin-api/#offers) | Browse, Read, Edit, Add | Stable |
| [/members/](/admin-api/#members) | Browse, Read, Edit, Add | Stable |
| [/users/](/admin-api/#users) | Browse, Read | Stable |
| [/images/](/admin-api/#images) | Upload | Stable |
| [/themes/](/admin-api/#themes)[]() | Upload, Activate | Stable |
| [/site/](/admin-api/#site) | Read | Stable |
| [/webhooks/](/admin-api/#webhooks) | Edit, Add, Delete | Stable |
# Overview
Source: https://docs.ghost.org/admin-api/images/overview
Sending images to Ghost via the API allows you to upload images one at a time, and store them with a [storage adapter](https://ghost.org/integrations/?tag=storage). The default adapter stores files locally in /content/images/ without making any modifications, except for sanitising the filename.
```js
POST /admin/images/upload/
```
### The image object
Images can be uploaded to, and fetched from storage. When an image is uploaded, the response is an image object that contains the new URL for the image - the location from which the image can be fetched.
`url`: *URI* The newly created URL for the image.
`ref`: *String (optional)* The reference for the image, if one was provided with the upload.
```json
// POST /admin/images/upload/
{
"images": [
{
"url": "https://demo.ghost.io/content/images/2019/02/ghost-logo.png",
"ref": "ghost-logo.png"
}
]
}
```
# Uploading an Image
Source: https://docs.ghost.org/admin-api/images/uploading-an-image
To upload an image, send a multipart formdata request by providing the `'Content-Type': 'multipart/form-data;'` header, along with the following fields encoded as [FormData](https://developer.mozilla.org/en-US/Web/API/FormData/FormData):
`file`: *[Blob](https://developer.mozilla.org/en-US/Web/API/Blob) or [File](https://developer.mozilla.org/en-US/Web/API/File)* The image data that you want to upload.
`purpose`: *String (default: `image`)* Intended use for the image, changes the validations performed. Can be one of `image` , `profile_image` or `icon`. The supported formats for `image`, `icon`, and `profile_image` are WEBP, JPEG, GIF, PNG and SVG. `profile_image` must be square. `icon` must also be square, and additionally supports the ICO format.
`ref`: *String (optional)* A reference or identifier for the image, e.g. the original filename and path. Will be returned as-is in the API response, making it useful for finding & replacing local image paths after uploads.
```bash
curl -X POST -F 'file=@/path/to/images/my-image.jpg' -F 'ref=path/to/images/my-image.jpg' -H "Authorization: 'Ghost $token'" -H "Accept-Version: $version" https://{admin_domain}/ghost/api/admin/images/upload/
```
# Creating a member
Source: https://docs.ghost.org/admin-api/members/creating-a-member
At minimum, an email is required to create a new, free member.
```json
// POST /admin/members/
{
"members": [
{
"email": "jamie@ghost.org",
}
]
}
```
```json
// Response
{
"members": [
{
"id": "624d445026833200a5801bce",
"uuid": "83525d87-ac70-40f5-b13c-f9b9753dcbe8",
"email": "jamie@ghost.org",
"name": null,
"note": null,
"geolocation": null,
"created_at": "2022-04-06T07:42:08.000Z",
"updated_at": "2022-04-06T07:42:08.000Z",
"labels": [],
"subscriptions": [],
"avatar_image": "https://gravatar.com/avatar/7d8efd2c2a781111599a8cae293cf704?s=250&d=blank",
"email_count": 0,
"email_opened_count": 0,
"email_open_rate": null,
"status": "free",
"last_seen_at": null,
"tiers": [],
"newsletters": []
}
]
}
```
Additional writable member fields include:
| Key | Description |
| --------------- | ------------------------------------------------ |
| **name** | member name |
| **note** | notes on the member |
| **labels** | member labels |
| **newsletters** | List of newsletters subscribed to by this member |
Create a new, free member with name, newsletter, and label:
```json
// POST /admin/members/
{
"members": [
{
"email": "jamie@ghost.org",
"name": "Jamie",
"labels": [
{
"name": "VIP",
"slug": "vip"
}
],
"newsletters": [
{
"id": "624d445026833200a5801bce"
}
]
}
]
}
```
# Overview
Source: https://docs.ghost.org/admin-api/members/overview
The members resource provides an endpoint for fetching, creating, and updating member data.
Fetch members (by default, the 15 newest members are returned):
```json
// GET /admin/members/?include=newsletters%2Clabels
{
"members": [
{
"id": "623199bfe8bc4d3097caefe0",
"uuid": "4fa3e4df-85d5-44bd-b0bf-d504bbe22060",
"email": "jamie@example.com",
"name": "Jamie",
"note": null,
"geolocation": null,
"created_at": "2022-03-16T08:03:11.000Z",
"updated_at": "2022-03-16T08:03:40.000Z",
"labels": [
{
"id": "623199dce8bc4d3097caefe9",
"name": "Label 1",
"slug": "label-1",
"created_at": "2022-03-16T08:03:40.000Z",
"updated_at": "2022-03-16T08:03:40.000Z"
}
],
"subscriptions": [],
"avatar_image": "https://gravatar.com/avatar/76a4c5450dbb6fde8a293a811622aa6f?s=250&d=blank",
"email_count": 0,
"email_opened_count": 0,
"email_open_rate": null,
"status": "free",
"last_seen_at": "2022-05-20T16:29:29.000Z",
"newsletters": [
{
"id": "62750bff2b868a34f814af08",
"name": "My Ghost Site",
"description": null,
"status": "active"
}
]
},
...
]
}
```
### Subscription object
A paid member includes a subscription object that provides subscription details.
```json
// Subscription object
[
{
"id": "sub_1KlTkYSHlkrEJE2dGbzcgc61",
"customer": {
"id": "cus_LSOXHFwQB7ql18",
"name": "Jamie",
"email": "jamie@ghost.org"
},
"status": "active",
"start_date": "2022-04-06T07:57:58.000Z",
"default_payment_card_last4": "4242",
"cancel_at_period_end": false,
"cancellation_reason": null,
"current_period_end": "2023-04-06T07:57:58.000Z",
"price": {
"id": "price_1Kg0ymSHlkrEJE2dflUN66EW",
"price_id": "6239692c664a9e6f5e5e840a",
"nickname": "Yearly",
"amount": 100000,
"interval": "year",
"type": "recurring",
"currency": "USD"
},
"tier": {...},
"offer": null
}
]
```
| Key | Description |
| --------------------------------- | --------------------------------------------------------------- |
| **customer** | Stripe customer attached to the subscription |
| **start\_date** | Subscription start date |
| **default\_payment\_card\_last4** | Last 4 digits of the card |
| **cancel\_at\_period\_end** | If the subscription should be canceled or renewed at period end |
| **cancellation\_reason** | Reason for subscription cancellation |
| **current\_period\_end** | Subscription end date |
| **price** | Price information for subscription including Stripe price ID |
| **tier** | Member subscription tier |
| **offer** | Offer details for a subscription |
# Updating a member
Source: https://docs.ghost.org/admin-api/members/updating-a-member
```js
PUT /admin/members/{id}/
```
All writable fields of a member can be updated. It’s recommended to perform a `GET` request to fetch the latest data before updating a member.
A minimal example for updating the name of a member.
```json
// PUT /admin/members/{id}/
{
"members": [
{
"name": "Jamie II"
}
]
}
```
# Creating a Newsletter
Source: https://docs.ghost.org/admin-api/newsletters/creating-a-newsletter
```js
POST /admin/newsletters/
```
Required fields: `name`
Options: `opt_in_existing`
When `opt_in_existing` is set to `true`, existing members with a subscription to one or more active newsletters are also subscribed to this newsletter. The response metadata will include the number of members opted-in.
```json
// POST /admin/newsletters/?opt_in_existing=true
{
"newsletters": [
{
"name": "My newly created newsletter",
"description": "This is a newsletter description",
"sender_reply_to": "newsletter",
"status": "active",
"subscribe_on_signup": true,
"show_header_icon": true,
"show_header_title": true,
"show_header_name": true,
"title_font_category": "sans_serif",
"title_alignment": "center",
"show_feature_image": true,
"body_font_category": "sans_serif",
"show_badge": true
}
]
}
```
# Overview
Source: https://docs.ghost.org/admin-api/newsletters/overview
Newsletters allow finer control over distribution of site content via email, allowing members to opt-in or opt-out of different categories of content. By default each site has one newsletter.
### The newsletter object
```json
// GET admin/newsletters/?limit=all
{
"newsletters": [
{
"id": "62750bff2b868a34f814af08",
"name": "My Ghost site",
"description": null,
"slug": "default-newsletter",
"sender_name": null,
"sender_email": null,
"sender_reply_to": "newsletter",
"status": "active",
"visibility": "members",
"subscribe_on_signup": true,
"sort_order": 0,
"header_image": null,
"show_header_icon": true,
"show_header_title": true,
"title_font_category": "sans_serif",
"title_alignment": "center",
"show_feature_image": true,
"body_font_category": "sans_serif",
"footer_content": null,
"show_badge": true,
"created_at": "2022-05-06T11:52:31.000Z",
"updated_at": "2022-05-20T07:43:43.000Z",
"show_header_name": true,
"uuid": "59fbce16-c0bf-4583-9bb3-5cd52db43159"
}
],
"meta": {
"pagination": {
"page": 1,
"limit": "all",
"pages": 1,
"total": 1,
"next": null,
"prev": null
}
}
}
```
| Key | Description |
| ------------------------- | ---------------------------------------------------------------------------------------------------------------------------------------------------- |
| **name** | Public name for the newsletter |
| **description** | (nullable) Public description of the newsletter |
| **status** | `active` or `archived` - denotes if the newsletter is active or archived |
| **slug** | The reference to this newsletter that can be used in the `newsletter` option when sending a post via email |
| **sender\_name** | (nullable) The sender name of the emails |
| **sender\_email** | (nullable) The email from which to send emails. Requires validation. |
| **sender\_reply\_to** | The reply-to email address for sent emails. Can be either `newsletter` (= use `sender_email`) or `support` (use support email from Portal settings). |
| **subscribe\_on\_signup** | `true`/`false`. Whether members should automatically subscribe to this newsletter on signup |
| **header\_image** | (nullable) Path to an image to show at the top of emails. Recommended size 1200x600 |
| **show\_header\_icon** | `true`/`false`. Show the site icon in emails |
| **show\_header\_title** | `true`/`false`. Show the site name in emails |
| **show\_header\_name** | `true`/`false`. Show the newsletter name in emails |
| **title\_font\_category** | Title font style. Either `serif` or `sans_serif` |
| **show\_feature\_image** | `true`/`false`. Show the post's feature image in emails |
| **body\_font\_category** | Body font style. Either `serif` or `sans_serif` |
| **footer\_content** | (nullable) Extra information or legal text to show in the footer of emails. Should contain valid HTML. |
| **show\_badge** | `true`/`false`. Show you’re a part of the indie publishing movement by adding a small Ghost badge in the footer |
# Sender email validation
Source: https://docs.ghost.org/admin-api/newsletters/sender-email-validation
When updating the `sender_email` field, email verification is required before emails are sent from the new address. After updating the property, the `sent_email_verification` metadata property will be set, containing `sender_email`. The `sender_email` property will remain unchanged until the address has been verified by clicking the link that is sent to the address specified in `sender_email`.
```json
PUT /admin/newsletters/62750bff2b868a34f814af08/
{
"newsletters": [
{
"sender_email": "daily-newsletter@domain.com"
}
]
}
```
```json
// Response
{
"newsletters": [
{
"id": "62750bff2b868a34f814af08",
"name": "My newly created newsletter",
"description": "This is an edited newsletter description",
"sender_name": "Daily Newsletter",
"sender_email": null,
"sender_reply_to": "newsletter",
"status": "active",
"subscribe_on_signup": true,
"sort_order": 1,
"header_image": null,
"show_header_icon": true,
"show_header_title": true,
"title_font_category": "sans_serif",
"title_alignment": "center",
"show_feature_image": true,
"body_font_category": "sans_serif",
"footer_content": null,
"show_badge": true,
"show_header_name": true
}
],
"meta": {
"sent_email_verification": [
"sender_email"
]
}
}
```
# Updating a Newsletter
Source: https://docs.ghost.org/admin-api/newsletters/updating-a-newsletter
```json
PUT /admin/newsletters/629711f95d57e7229f16181c/
{
"newsletters": [
{
"id": "62750bff2b868a34f814af08",
"name": "My newly created newsletter",
"description": "This is an edited newsletter description",
"sender_name": "Daily Newsletter",
"sender_email": null,
"sender_reply_to": "newsletter",
"status": "active",
"subscribe_on_signup": true,
"sort_order": 1,
"header_image": null,
"show_header_icon": true,
"show_header_title": true,
"title_font_category": "sans_serif",
"title_alignment": "center",
"show_feature_image": true,
"body_font_category": "sans_serif",
"footer_content": null,
"show_badge": true,
"show_header_name": true
}
]
}
```
# Creating an Offer
Source: https://docs.ghost.org/admin-api/offers/creating-an-offer
```js
POST /admin/offers/
```
Required fields: `name`, `code`, `cadence`, `duration`, `amount`, `tier.id` , `type`
When offer `type` is `fixed`, `currency` is also required and must match the tier’s currency. New offers are created as active by default.
Below is an example for creating an offer with all properties including prices, description, and benefits.
```json
// POST /admin/offers/
{
"offers": [
{
"name": "Black Friday",
"code": "black-friday",
"display_title": "Black Friday Sale!",
"display_description": "10% off on yearly plan",
"type": "percent",
"cadence": "year",
"amount": 12,
"duration": "once",
"duration_in_months": null,
"currency_restriction": false,
"currency": null,
"status": "active",
"redemption_count": 0,
"tier": {
"id": "62307cc71b4376a976734038",
"name": "Gold"
}
}
]
}
```
# Overview
Source: https://docs.ghost.org/admin-api/offers/overview
Use offers to create a discount or special price for members signing up on a tier.
### The offer object
When you fetch, create, or edit an offer, the API responds with an array of one or more offer objects. These objects include related `tier` data.
```json
// GET /admin/offers/
{
"offers": [
{
"id": "6230dd69e8bc4d3097caefd3",
"name": "Black friday",
"code": "black-friday",
"display_title": "Black friday sale!",
"display_description": "10% off our yearly price",
"type": "percent",
"cadence": "year",
"amount": 10,
"duration": "once",
"duration_in_months": null,
"currency_restriction": false,
"currency": null,
"status": "active",
"redemption_count": 0,
"tier": {
"id": "62307cc71b4376a976734038",
"name": "Platinum"
}
}
]
}
```
| Key | Description |
| ------------------------- | --------------------------------------------------------------------------------------------------------------------------------------------------------------------------- |
| **display\_title** | Name displayed in the offer window |
| **display\_description** | Text displayed in the offer window |
| **name** | Internal name for an offer, must be unique |
| **code** | Shortcode for the offer, for example: [https://yoursite.com/black-friday](https://yoursite.com/black-friday) |
| **status** | `active` or `archived` - denotes if the offer is active or archived |
| **type** | `percent` or `fixed` - whether the amount off is a percentage or fixed |
| **amount** | Offer discount amount, as a percentage or fixed value as set in `type`. *Amount is always denoted by the smallest currency unit (e.g., 100 cents instead of \$1.00 in USD)* |
| **currency** | `fixed` type offers only - specifies tier's currency as three letter ISO currency code |
| **currency\_restriction** | Denotes whether the offer \`currency\` is restricted. If so, changing the currency invalidates the offer |
| **duration** | `once`/`forever`/`repeating`. `repeating` duration is only available when `cadence` is `month` |
| **duration\_in\_months** | Number of months offer should be repeated when `duration` is `repeating` |
| **redemption\_count** | Number of times the offer has been redeemed |
| **tier** | Tier on which offer is applied |
| **cadence** | `month` or `year` - denotes if offer applies to tier's monthly or yearly price |
# Updating an Offer
Source: https://docs.ghost.org/admin-api/offers/updating-an-offer
For existing offers, only `name` , `code`, `display_title` and `display_description` are editable.
The example updates `display title` and `code`.
```json
// PUT /admin/offers/{id}/
{
"offers": [
{
"display_title": "Black Friday 2022",
"code": "black-friday-2022"
}
]
}
```
# Overview
Source: https://docs.ghost.org/admin-api/pages/overview
Pages are [static resources](/publishing/) that are not included in channels or collections on the Ghost front-end. They are identical to posts in terms of request and response structure when working with the APIs.
```js
GET /admin/pages/
GET /admin/pages/{id}/
GET /admin/pages/slug/{slug}/
POST /admin/pages/
POST /admin/pages/{id}/copy
PUT /admin/pages/{id}/
DELETE /admin/pages/{id}/
```
# Creating a Post
Source: https://docs.ghost.org/admin-api/posts/creating-a-post
```js
POST /admin/posts/
```
Required fields: `title`
Create draft and published posts with the add posts endpoint. All fields except `title` can be empty or have a default that is applied automatically. Below is a minimal example for creating a published post with content:
```json
// POST /admin/posts/
{
"posts": [
{
"title": "My test post",
"lexical": "{\"root\":{\"children\":[{\"children\":[{\"detail\":0,\"format\":0,\"mode\":\"normal\",\"style\":\"\",\"text\":\"Hello, beautiful world! 👋\",\"type\":\"extended-text\",\"version\":1}],\"direction\":\"ltr\",\"format\":\"\",\"indent\":0,\"type\":\"paragraph\",\"version\":1}],\"direction\":\"ltr\",\"format\":\"\",\"indent\":0,\"type\":\"root\",\"version\":1}}",
"status": "published"
}
]
}
```
A post must always have [at least one author](#tags-and-authors), and this will default to the staff user with the owner role when [token authentication](#token-authentication) is used.
#### Source HTML
The post creation endpoint is also able to convert HTML into Lexical. The conversion generates the best available Lexical representation, meaning this operation is lossy and the HTML rendered by Ghost may be different from the source HTML. For the best results ensure your HTML is well-formed, e.g. uses block and inline elements correctly.
To use HTML as the source for your content instead of Lexical, use the `source` parameter:
```json
// POST /admin/posts/?source=html
{
"posts": [
{
"title": "My test post",
"html": "My post content. Work in progress...
",
"status": "published"
}
]
}
```
For lossless HTML conversion, you can wrap your HTML in a single Lexical card:
```html
HTML goes here
```
#### Tags and Authors
You can link tags and authors to any post you create in the same request body, using either short or long form to identify linked resources.
Short form uses a single string to identify a tag or author resource. Tags are identified by name and authors are identified by email address:
```json
// POST /admin/posts/
{
"posts": [
{
"title": "My test post",
"tags": ["Getting Started", "Tag Example"],
"authors": ["example@ghost.org", "test@ghost.org"],
"lexical": "{\"root\":{\"children\":[{\"children\":[{\"detail\":0,\"format\":0,\"mode\":\"normal\",\"style\":\"\",\"text\":\"Hello, beautiful world! 👋\",\"type\":\"extended-text\",\"version\":1}],\"direction\":\"ltr\",\"format\":\"\",\"indent\":0,\"type\":\"paragraph\",\"version\":1}],\"direction\":\"ltr\",\"format\":\"\",\"indent\":0,\"type\":\"root\",\"version\":1}}",
"status": "published"
}
]
}
```
Long form requires an object with at least one identifying key-value pair:
```json
// POST /admin/posts/
{
"posts": [
{
"title": "My test post",
"tags": [
{ "name": "my tag", "description": "a very useful tag" },
{ "name": "#hidden" }
],
"authors": [
{ "id": "5c739b7c8a59a6c8ddc164a1" },
{ "id": "5c739b7c8a59a6c8ddc162c5" },
{ "id": "5c739b7c8a59a6c8ddc167d9" }
]
}
]
}
```
Tags that cannot be matched are automatically created. If no author can be matched, Ghost will fallback to using the staff user with the owner role.
# Deleting a Post
Source: https://docs.ghost.org/admin-api/posts/deleting-a-post
```js
DELETE /admin/posts/{id}/
```
Delete requests have no payload in the request or response. Successful deletes will return an empty 204 response.
# Email only posts
Source: https://docs.ghost.org/admin-api/posts/email-only-posts
To send a post as an email without publishing it on the site, the `email_only` property must be set to `true` when publishing or scheduling the post in combination with the `newsletter` parameter:
```json
// PUT admin/posts/5b7ada404f87d200b5b1f9c8/?newsletter=weekly-newsletter
{
"posts": [
{
"updated_at": "2022-06-05T20:52:37.000Z",
"status": "published",
"email_only": true
}
]
}
```
When an email-only post has been sent, the post will have a `status` of `sent`.
# Overview
Source: https://docs.ghost.org/admin-api/posts/overview
Posts are the [primary resource](/publishing/) in a Ghost site, providing means for publishing, managing and displaying content.
At the heart of every post is a Lexical field, containing a standardised JSON-based representation of your content, which can be rendered in multiple formats.
```js
GET /admin/posts/
GET /admin/posts/{id}/
GET /admin/posts/slug/{slug}/
POST /admin/posts/
PUT /admin/posts/{id}/
DELETE /admin/posts/{id}/
```
### The post object
Whenever you fetch, create, or edit a post, the API will respond with an array of one or more post objects. These objects will include all related tags, authors, and author roles.
By default, the API expects and returns content in the **Lexical** format only. To include **HTML** in the response use the `formats` parameter:
```json
// GET /admin/posts/?formats=html,lexical
{
"posts": [
{
"slug": "welcome-short",
"id": "5ddc9141c35e7700383b2937",
"uuid": "a5aa9bd8-ea31-415c-b452-3040dae1e730",
"title": "Welcome",
"lexical": "{\"root\":{\"children\":[{\"children\":[{\"detail\":0,\"format\":0,\"mode\":\"normal\",\"style\":\"\",\"text\":\"Hello, beautiful world! 👋\",\"type\":\"extended-text\",\"version\":1}],\"direction\":\"ltr\",\"format\":\"\",\"indent\":0,\"type\":\"paragraph\",\"version\":1}],\"direction\":\"ltr\",\"format\":\"\",\"indent\":0,\"type\":\"root\",\"version\":1}}",
"html": "Hello, beautiful world! 👋
",
"comment_id": "5ddc9141c35e7700383b2937",
"feature_image": "https://static.ghost.org/v3.0.0/images/welcome-to-ghost.png",
"feature_image_alt": null,
"feature_image_caption": null,
"featured": false,
"status": "published",
"visibility": "public",
"created_at": "2019-11-26T02:43:13.000Z",
"updated_at": "2019-11-26T02:44:17.000Z",
"published_at": "2019-11-26T02:44:17.000Z",
"custom_excerpt": null,
"codeinjection_head": null,
"codeinjection_foot": null,
"custom_template": null,
"canonical_url": null,
"tags": [
{
"created_at": "2019-11-26T02:39:31.000Z",
"description": null,
"feature_image": null,
"id": "5ddc9063c35e7700383b27e0",
"meta_description": null,
"meta_title": null,
"name": "Getting Started",
"slug": "getting-started",
"updated_at": "2019-11-26T02:39:31.000Z",
"url": "https://docs.ghost.io/tag/getting-started/",
"visibility": "public"
}
],
"authors": [
{
"id": "5951f5fca366002ebd5dbef7",
"name": "Ghost",
"slug": "ghost-user",
"email": "info@ghost.org",
"profile_image": "//www.gravatar.com/avatar/2fab21a4c4ed88e76add10650c73bae1?s=250&d=mm&r=x",
"cover_image": null,
"bio": null,
"website": "https://ghost.org",
"location": "The Internet",
"facebook": "ghost",
"twitter": "@ghost",
"accessibility": null,
"status": "locked",
"meta_title": null,
"meta_description": null,
"tour": null,
"last_seen": null,
"created_at": "2019-11-26T02:39:32.000Z",
"updated_at": "2019-11-26T04:30:57.000Z",
"roles": [
{
"id": "5ddc9063c35e7700383b27e3",
"name": "Author",
"description": "Authors",
"created_at": "2019-11-26T02:39:31.000Z",
"updated_at": "2019-11-26T02:39:31.000Z"
}
],
"url": "https://docs.ghost.io/author/ghost-user/"
}
],
"primary_author": {
"id": "5951f5fca366002ebd5dbef7",
"name": "Ghost",
"slug": "ghost-user",
"email": "info@ghost.org",
"profile_image": "//www.gravatar.com/avatar/2fab21a4c4ed88e76add10650c73bae1?s=250&d=mm&r=x",
"cover_image": null,
"bio": null,
"website": "https://ghost.org",
"location": "The Internet",
"facebook": "ghost",
"twitter": "@ghost",
"accessibility": null,
"status": "locked",
"meta_title": null,
"meta_description": null,
"tour": null,
"last_seen": null,
"created_at": "2019-11-26T02:39:32.000Z",
"updated_at": "2019-11-26T04:30:57.000Z",
"roles": [
{
"id": "5ddc9063c35e7700383b27e3",
"name": "Author",
"description": "Authors",
"created_at": "2019-11-26T02:39:31.000Z",
"updated_at": "2019-11-26T02:39:31.000Z"
}
],
"url": "https://docs.ghost.io/author/ghost-user/"
},
"primary_tag": {
"id": "5ddc9063c35e7700383b27e0",
"name": "Getting Started",
"slug": "getting-started",
"description": null,
"feature_image": null,
"visibility": "public",
"meta_title": null,
"meta_description": null,
"created_at": "2019-11-26T02:39:31.000Z",
"updated_at": "2019-11-26T02:39:31.000Z",
"og_image": null,
"og_title": null,
"og_description": null,
"twitter_image": null,
"twitter_title": null,
"twitter_description": null,
"codeinjection_head": null,
"codeinjection_foot": null,
"canonical_url": null,
"accent_color": null,
"parent": null,
"url": "https://docs.ghost.io/tag/getting-started/"
},
"url": "https://docs.ghost.io/welcome-short/",
"excerpt": "👋 Welcome, it's great to have you here.",
"og_image": null,
"og_title": null,
"og_description": null,
"twitter_image": null,
"twitter_title": null,
"twitter_description": null,
"meta_title": null,
"meta_description": null,
"email_only": false,
"newsletter": {
"id": "62750bff2b868a34f814af08",
"name": "Weekly newsletter",
"description": null,
"slug": "default-newsletter",
"sender_name": "Weekly newsletter",
"sender_email": null,
"sender_reply_to": "newsletter",
"status": "active",
"visibility": "members",
"subscribe_on_signup": true,
"sort_order": 0,
"header_image": null,
"show_header_icon": true,
"show_header_title": true,
"title_font_category": "sans_serif",
"title_alignment": "center",
"show_feature_image": true,
"body_font_category": "sans_serif",
"footer_content": null,
"show_badge": true,
"created_at": "2022-06-06T11:52:31.000Z",
"updated_at": "2022-06-20T07:43:43.000Z",
"show_header_name": true,
"uuid": "59fbce16-c0bf-4583-9bb3-5cd52db43159"
},
"email": {
"id": "628f3b462de0a130909d4a6a",
"uuid": "955305de-d89e-4468-927f-2d2b8fec88e5",
"status": "submitted",
"recipient_filter": "status:-free",
"error": null,
"error_data": "[]",
"email_count": 256,
"delivered_count": 256,
"opened_count": 59,
"failed_count": 0,
"subject": "Welcome",
"from": "\"Weekly newsletter\"",
"reply_to": "noreply@example.com",
"html": "...",
"plaintext": "...",
"track_opens": true,
"submitted_at": "2022-05-26T08:33:10.000Z",
"created_at": "2022-06-26T08:33:10.000Z",
"updated_at": "2022-06-26T08:33:16.000Z"
}
}
]
}
```
#### Parameters
When retrieving posts from the admin API, it is possible to use the `include`, `formats`, `filter`, `limit`, `page` and `order` parameters as documented for the [Content API](/content-api/#parameters).
Some defaults are different between the two APIs, however the behaviour and availability of the parameters remains the same.
# Publishing a Post
Source: https://docs.ghost.org/admin-api/posts/publishing-a-post
Publish a draft post by updating its status to `published`:
```json
// PUT admin/posts/5b7ada404f87d200b5b1f9c8/
{
"posts": [
{
"updated_at": "2022-06-05T20:52:37.000Z",
"status": "published"
}
]
}
```
# Scheduling a Post
Source: https://docs.ghost.org/admin-api/posts/scheduling-a-post
A post can be scheduled by updating or setting the `status` to `scheduled` and setting `published_at` to a datetime in the future:
```json
// PUT admin/posts/5b7ada404f87d200b5b1f9c8/
{
"posts": [
{
"updated_at": "2022-06-05T20:52:37.000Z",
"status": "scheduled",
"published_at": "2023-06-10T11:00:00.000Z"
}
]
}
```
At the time specified in `published_at`, the post will be published, email newsletters will be sent (if applicable), and the status of the post will change to `published`. For email-only posts, the status will change to `sent`.
# Sending a Post via email
Source: https://docs.ghost.org/admin-api/posts/sending-a-post
To send a post by email, the `newsletter` query parameter must be passed when publishing or scheduling the post, containing the newsletter’s `slug`.
Optionally, a filter can be provided to send the email to a subset of members subscribed to the newsletter by passing the `email_segment` query parameter containing a valid NQL filter for members. Commonly used values are `status:free` (all free members), `status:-free` (all paid members) and `all`. If `email_segment` is not specified, the default is `all` (no additional filtering applied).
Posts are sent by email if and only if an active newsletter is provided.
```json
// PUT admin/posts/5b7ada404f87d200b5b1f9c8/?newsletter=weekly-newsletter&email_segment=status%3Afree
{
"posts": [
{
"updated_at": "2022-06-05T20:52:37.000Z",
"status": "published"
}
]
}
```
When a post has been sent by email, the post object will contain the related `newsletter` and `email` objects. If the related email object has a `status` of `failed`, sending can be retried by reverting the post’s status to `draft` and then republishing the post.
```json
{
"posts": [
{
"id": "5ddc9141c35e7700383b2937",
...
"email": {
"id": "628f3b462de0a130909d4a6a",
"uuid": "955305de-d89e-4468-927f-2d2b8fec88e5",
"status": "failed",
"recipient_filter": "all",
"error": "Email service is currently unavailable - please try again",
"error_data": "[{...}]",
"email_count": 2,
"delivered_count": 0,
"opened_count": 0,
"failed_count": 0,
"subject": "Welcome",
"from": "\"Weekly newsletter\"",
"reply_to": "noreply@example.com",
"html": "...",
"plaintext": "...",
"track_opens": true,
"submitted_at": "2022-05-26T08:33:10.000Z",
"created_at": "2022-06-26T08:33:10.000Z",
"updated_at": "2022-06-26T08:33:16.000Z"
},
...
}
]
}
```
# Updating a Post
Source: https://docs.ghost.org/admin-api/posts/updating-a-post
```js
PUT /admin/posts/{id}/
```
Required fields: `updated_at`
All writable fields of a post can be updated via the edit endpoint. The `updated_at` field is required as it is used to handle collision detection and ensure you’re not overwriting more recent updates. It is recommended to perform a GET request to fetch the latest data before updating a post. Below is a minimal example for updating the title of a post:
```json
// PUT admin/posts/5b7ada404f87d200b5b1f9c8/
{
"posts": [
{
"title": "My new title",
"updated_at": "2022-06-05T20:52:37.000Z"
}
]
}
```
#### Tags and Authors
Tag and author relations will be replaced, not merged. Again, the recommendation is to always fetch the latest version of a post, make any amends to this such as adding another tag to the tags array, and then send the amended data via the edit endpoint.
# Overview
Source: https://docs.ghost.org/admin-api/themes/overview
Themes can be uploaded from a local ZIP archive and activated.
```js
POST /admin/themes/upload;
PUT /admin/themes/{ name }/activate;
```
### The theme object
When a theme is uploaded or activated, the response is a `themes` array containing one theme object with metadata about the theme, as well as its status (active or not).
`name`: *String* The name of the theme. This is the value that is used to activate the theme.
`package`: *Object* The contents of the `package.json` file is exposed in the API as it contains useful theme metadata.
`active`: *Boolean* The status of the theme showing if the theme is currently used or not.
`templates`: *Array* The list of templates defined by the theme.
```json
// POST /admin/images/upload/
{
themes: [{
name: "Alto-master",
package: {...},
active: false,
templates: [{
filename: "custom-full-feature-image",
name: "Full Feature Image",
for: ["page", "post"],
slug: null
}, ...]
}]
}
```
# Uploading a theme
Source: https://docs.ghost.org/admin-api/themes/uploading-a-theme
To upload a theme ZIP archive, send a multipart formdata request by providing the `'Content-Type': 'multipart/form-data;'` header, along with the following field encoded as [FormData](https://developer.mozilla.org/en-US/docs/Web/API/FormData/FormData):
`file`: *[Blob](https://developer.mozilla.org/en-US/docs/Web/API/Blob) or [File](https://developer.mozilla.org/en-US/docs/Web/API/File)* The theme archive that you want to upload.
```bash
curl -X POST -F 'file=@/path/to/themes/my-theme.zip' -H "Authorization: Ghost $token" -H "Accept-Version: $version" https://{admin_domain}/ghost/api/admin/themes/upload
```
# Creating a Tier
Source: https://docs.ghost.org/admin-api/tiers/creating-a-tier
```js
POST /admin/tiers/
```
Required fields: `name`
Create public and hidden tiers by using this endpoint. New tiers are always set as `active` when created.
The example below creates a paid Tier with all properties including custom monthly/yearly prices, description, benefits, and welcome page.
```json
// POST /admin/tiers/
{
"tiers": [
{
"name": "Platinum",
"description": "Access to everything",
"welcome_page_url": "/welcome-to-platinum",
"visibility": "public",
"monthly_price": 1000,
"yearly_price": 10000,
"currency": "usd",
"benefits": [
"Benefit 1",
"Benefit 2"
]
}
]
}
```
# Overview
Source: https://docs.ghost.org/admin-api/tiers/overview
Tiers allow publishers to create multiple options for an audience to become paid subscribers. Each tier can have its own price points, benefits, and content access levels. Ghost connects tiers directly to the publication’s Stripe account.
### The tier object
Whenever you fetch, create, or edit a tier, the API responds with an array of one or more tier objects.
By default, the API doesn’t return monthly/yearly prices or benefits. To include them in the response, use the `include` parameter with any or all of the following values: `monthly_price`, `yearly_price`, `benefits`.
```json
// GET admin/tiers/?include=monthly_price,yearly_price,benefits
{
"tiers": [
{
"id": "622727ad96a190e914ab6664",
"name": "Free",
"description": null,
"slug": "free",
"active": true,
"type": "free",
"welcome_page_url": null,
"created_at": "2022-03-08T09:53:49.000Z",
"updated_at": "2022-03-08T10:43:15.000Z",
"stripe_prices": null,
"monthly_price": null,
"yearly_price": null,
"benefits": [],
"visibility": "public"
},
{
"id": "622727ad96a190e914ab6665",
"name": "Bronze",
"description": "Access to basic features",
"slug": "default-product",
"active": true,
"type": "paid",
"welcome_page_url": null,
"created_at": "2022-03-08T09:53:49.000Z",
"updated_at": "2022-03-14T19:22:46.000Z",
"stripe_prices": null,
"monthly_price": 500,
"yearly_price": 5000,
"currency": "usd",
"benefits": [
"Free daily newsletter",
"3 posts a week"
],
"visibility": "public"
}
],
"meta": {
"pagination": {
"page": 1,
"limit": 15,
"pages": 1,
"total": 2,
"next": null,
"prev": null
}
}
}
```
### Parameters
When retrieving tiers from the Admin API, it’s possible to use the `include` and `filter` parameters.
Available **include** values:
* `monthly_price` - include monthly price data
* `yearly_price` - include yearly price data
* `benefits` - include benefits data
Available **filter** values:
* `type:free|paid` - for filtering paid or free tiers
* `visibility:public|none` - for filtering tiers based on their visibility
* `active:true|false` - for filtering active or archived tiers
For browse requests, it’s also possible to use `limit`, `page`, and `order` parameters as documented in the [Content API](/content-api/#parameters).
By default, tiers are ordered by ascending monthly price amounts.
# Updating a Tier
Source: https://docs.ghost.org/admin-api/tiers/updating-a-tier
```js
PUT /admin/tiers/{id}/
```
Required fields: `name`
Update all writable fields of a tier by using the edit endpoint. For example, rename a tier or set it as archived with this endpoint.
```json
// PUT /admin/tiers/{id}/
{
"tiers": [
{
"name": "Silver",
"description": "silver"
}
]
}
```
# Deleting a user
Source: https://docs.ghost.org/admin-api/users/deleting-a-user
```js
DELETE /admin/users/{id}/
```
This will delete the user. Note: You cannot delete the Owner user.
# Invites
Source: https://docs.ghost.org/admin-api/users/invites
The invites resource provides an endpoint for inviting staff users to the Ghost instance. To invite a user you must specify the ID of the role they should receive (fetch roles, detailed above, to find the role IDs for your site), and the email address that the invite link should be sent to.
```json
// POST /admin/invites/
{
"invites": [
{
"role_id": "64498c2a7c11e805e0b4ad4b",
"email": "person@example.com"
},
...
]
}
```
# Overview
Source: https://docs.ghost.org/admin-api/users/overview
The users resource provides an endpoint for fetching and editing staff user data.
Fetch users (by default, the 15 newest staff users are returned):
```json
// GET /admin/users/?include=count.posts%2Cpermissions%2Croles%2Croles.permissions
{
"id": "1",
"name": "Jamie Larson",
"slug": "jamie",
"email": "jamie@example.com",
"profile_image": "http://localhost:2368/content/images/1970/01/jamie-profile.jpg",
"cover_image": null,
"bio": null,
"website": null,
"location": null,
"facebook": null,
"twitter": null,
"accessibility": null,
"status": "active",
"meta_title": null,
"meta_description": null,
"tour": null,
"last_seen": "1970-01-01T00:00:00.000Z",
"comment_notifications": true,
"free_member_signup_notification": true,
"paid_subscription_started_notification": true,
"paid_subscription_canceled_notification": false,
"mention_notifications": true,
"milestone_notifications": true,
"created_at": "1970-01-01T00:00:00.000Z",
"updated_at": "1970-01-01T00:00:00.000Z",
"permissions": [],
"roles": [{
"id": "64498c2a7c11e805e0b4ad4f",
"name": "Owner",
"description": "Site Owner",
"created_at": "1970-01-01T00:00:00.000Z",
"updated_at": "1970-01-01T00:00:00.000Z",
"permissions": []
}],
"count": {
"posts": 1
},
"url": "http://localhost:2368/author/jamie/"
},
...
]
}
```
Note that the Owner user does not have permissions assigned to it, or to the Owner role. This is because the Owner user has *all* permissions implicitly.
# Roles
Source: https://docs.ghost.org/admin-api/users/roles
The roles resource provides an endpoint for fetching role data.
```json
// GET /admin/roles/
{
"roles": [
{
"id": "64498c2a7c11e805e0b4ad4b",
"name": "Administrator",
"description": "Administrators",
"created_at": "1920-01-01T00:00:00.000Z",
"updated_at": "1920-01-01T00:00:00.000Z"
},
...
]
}
```
# Updating a user
Source: https://docs.ghost.org/admin-api/users/updating-a-user
```js
PUT /admin/users/{id}/
```
All writable fields of a user can be updated. It’s recommended to perform a `GET` request to fetch the latest data before updating a user.
```json
// PUT /admin/users/{id}/
{
"users": [
{
"name": "Cameron Larson"
}
]
}
```
# Creating a Webhook
Source: https://docs.ghost.org/admin-api/webhooks/creating-a-webhook
```js
POST /admin/webhooks/
```
Required fields: `event`, `target_url` Conditionally required field: `integration_id` - required if request is done using [user authentication](#user-authentication) Optional fields: `name`, `secret`, `api_version`
Example to create a webhook using [token authenticated](#token-authentication) request.
```json
// POST /admin/webhooks/
{
"webhooks": [{
"event": "post.added",
"target_url": "https://example.com/hook/"
}]
}
```
When creating a webhook through [user authenticated](#user-authentication) request, minimal payload would look like following:
```json
// POST /admin/webhooks/
{
"webhooks": [{
"event": "post.added",
"target_url": "https://example.com/hook/",
"integration_id": "5c739b7c8a59a6c8ddc164a1"
}]
}
```
and example response for both requests would be:
```json
{
"webhooks": [
{
"id": "5f04028cc9b839282b0eb5e3",
"event": "post.added",
"target_url": "https://example.com/hook/",
"name": null,
"secret": null,
"api_version": "v5",
"integration_id": "5c739b7c8a59a6c8ddc164a1",
"status": "available",
"last_triggered_at": null,
"last_triggered_status": null,
"last_triggered_error": null,
"created_at": "2020-07-07T05:05:16.000Z",
"updated_at": "2020-09-15T04:01:07.643Z"
}
]
}
```
# Deleting a Webhook
Source: https://docs.ghost.org/admin-api/webhooks/deleting-a-webhook
```js
DELETE /admin/webhooks/{id}/
```
Delete requests have no payload in the request or response. Successful deletes will return an empty 204 response.
# Overview
Source: https://docs.ghost.org/admin-api/webhooks/overview
Webhooks allow you to build or set up [custom integrations](https://ghost.org/integrations/custom-integrations/#api-webhook-integrations), which subscribe to certain events in Ghost. When one of such events is triggered, Ghost sends a HTTP POST payload to the webhook’s configured URL. For instance, when a new post is published Ghost can send a notification to configured endpoint to trigger a search index re-build, slack notification, or whole site deploy. For more information about webhooks read [this webhooks reference](/webhooks/).
```js
POST /admin/webhooks/
PUT /admin/webhooks/{id}/
DELETE /admin/webhooks/{id}/
```
### The webhook object
Webhooks can be created, updated, and removed. There is no API to retrieve webhook resources independently.
# Updating a Webhook
Source: https://docs.ghost.org/admin-api/webhooks/updating-a-webhook
```js
PUT /admin/webhooks/{id}/
```
All writable fields of a webhook can be updated via edit endpoint. These are following fields:
* `event` - one of [available events](/webhooks/#available-events)
* `target_url` - the target URL to notify when event happens
* `name` - custom name
* `api_version` - API version used when creating webhook payload for an API resource
```json
// PUT admin/webhooks/5f04028cc9b839282b0eb5e3
{
"webhooks": [{
"event": "post.published.edited",
"name": "webhook example"
}]
}
```
```json
{
"webhooks": [
{
"id": "5f04028cc9b839282b0eb5e3",
"event": "post.published.edited",
"target_url": "https://example.com/hook/",
"name": "webhook example",
"secret": null,
"api_version": "v",
"integration_id": "5c739b7c8a59a6c8ddc164a1",
"status": "available",
"last_triggered_at": null,
"last_triggered_status": null,
"last_triggered_error": null,
"created_at": "2020-07-07T05:05:16.000Z",
"updated_at": "2020-09-15T04:05:07.643Z"
}
]
}
```
# Architecture
Source: https://docs.ghost.org/architecture
Ghost is structured as a modern, decoupled web application with a sensible service-based architecture.
***
1. **A robust core JSON API**
2. **A beautiful admin client app**
3. **A simple, powerful front-end theme layer**
These three areas work together to make every Ghost site function smoothly, but because they’re decoupled there’s plenty of room for customisation.
***
### How things fit together
 Physically, the Ghost codebase is structured in two main directories:
* `core` - Contains the core files which make up Ghost
* `content` - Contains the files which may be added or changed by the user such as themes and images
#### Data & Storage
Ghost ships with the [Bookshelf.js ORM](https://bookshelfjs.org/) layer by default allowing for a range of databases to be used. Currently SQLite3 is the supported default in development while MySQL is recommended for production. Other databases are available, and compatible, but not supported by the core team.
Additionally, while Ghost uses local file storage by default it’s also possible to use custom storage adapters to make your filesystem completely external. There are fairly wide range of pre-made [storage adapters for Ghost](https://ghost.org/integrations/?tag=storage) already available for use.
#### Ghost-CLI
Orchestrating these different components is done via a comprehensive CLI and set of utilities to keep everything running and up to date.
#### Philosophy
Ghost is architected to be familiar and easy to work with for teams who are already used to working with JavaScript based codebases, whilst still being accessible to a broad audience. It’s neither the most bleeding-edge structure in the world, nor the most simple, but strives to be right balance between the two.
You can help build the future. Ghost is currently hiring Product Engineers - check out what it’s like to be part of the team and see our open roles at [careers.ghost.org](https://careers.ghost.org/)
***
## Ghost Core
At its heart, Ghost is a RESTful JSON API — designed to create, manage and retrieve publication content with ease.
Ghost’s API is split by function into two parts: Content and Admin. Each has its own authentication methods, structure and extensive tooling so that common publication usecases are solved with minimal effort.
Whether you want to publish content from your favourite desktop editor, build a custom interface for handling editorial workflow, share your most recent posts on your marketing site, or use Ghost as a full headless CMS, Ghost has the tools to support you.
### Content API
Ghost’s public Content API is what delivers published content to the world and can be accessed in a read-only manner by any client to render in a website, app or other embedded media.
Access control is managed via an API key, and even the most complex filters are made simple with our [query language](/content-api/#filtering). The Content API is designed to be fully cachable, meaning you can fetch data as often as you like without limitation.
### Admin API
Managing content is done via Ghost’s Admin API, which has both read and write access used to create and update content.
The Admin API provides secure role-based authentication so that you can publish from anywhere with confidence, either as a staff user via session authentication or via an integration with a third-party service.
When authenticated with the **admin** or **owner** role, the Admin API provides full control for creating, editing and deleting all data in your publication, giving you even more power and flexibility than the standard Ghost admin client.
### JavaScript SDK
Ghost core comes with an accompanying JavaScript [API Client](/content-api/javascript/) and [SDK](/content-api/javascript/#javascript-sdk) designed to remove pain around authentication and data access.
It provides tools for working with API data to accomplish common use cases such as returning a list of tags for a post, rendering meta data in the ``, and outputting data with sensible fallbacks.
Leveraging FLOSS & npm, an ever-increasing amount of Ghost’s JavaScript tooling has been made available. If you’re working in JavaScript, chances are you won’t need to code anything more than wiring.
### Webhooks
Notify an external service when content has changed or been updated by calling a configured HTTP endpoint. This makes it a breeze to do things like trigger a rebuild in a static site generator, or notify Slack that something happened.
By combining Webhooks and the API it is possible to integrate into any aspect of your content lifecycle, to enable a wide range of content distribution and workflow automation use cases.
### Versioning
Ghost ships with a mature set of core APIs, with only minimal changes between major versions. We maintain a [stability index](/faq/api-versioning/) so that you can be sure about depending on them in production.
Ghost major versions ship every 8-12 months, meaning code you write against our API today will be stable for a minimum of 2 years.
***
## Admin Client
A streamlined clientside admin interface for editors who need a powerful tool to manage their content.
Traditionally, people writing content and people writing code rarely agree on the best platform to use. Tools with great editors generally lack speed and extensibility, and speedy frameworks basically always sacrifice user experience.
### Overview
Thanks to its decoupled architecture Ghost is able to have the best of both worlds. Ghost-Admin is a completely independent client application to the Ghost Core API which doesn’t have any impact on performance. And, writers don’t need to suffer their way through learning Git just to publish a new post.
Great for editors. Great for developers.
Physically, the Ghost codebase is structured in two main directories:
* `core` - Contains the core files which make up Ghost
* `content` - Contains the files which may be added or changed by the user such as themes and images
#### Data & Storage
Ghost ships with the [Bookshelf.js ORM](https://bookshelfjs.org/) layer by default allowing for a range of databases to be used. Currently SQLite3 is the supported default in development while MySQL is recommended for production. Other databases are available, and compatible, but not supported by the core team.
Additionally, while Ghost uses local file storage by default it’s also possible to use custom storage adapters to make your filesystem completely external. There are fairly wide range of pre-made [storage adapters for Ghost](https://ghost.org/integrations/?tag=storage) already available for use.
#### Ghost-CLI
Orchestrating these different components is done via a comprehensive CLI and set of utilities to keep everything running and up to date.
#### Philosophy
Ghost is architected to be familiar and easy to work with for teams who are already used to working with JavaScript based codebases, whilst still being accessible to a broad audience. It’s neither the most bleeding-edge structure in the world, nor the most simple, but strives to be right balance between the two.
You can help build the future. Ghost is currently hiring Product Engineers - check out what it’s like to be part of the team and see our open roles at [careers.ghost.org](https://careers.ghost.org/)
***
## Ghost Core
At its heart, Ghost is a RESTful JSON API — designed to create, manage and retrieve publication content with ease.
Ghost’s API is split by function into two parts: Content and Admin. Each has its own authentication methods, structure and extensive tooling so that common publication usecases are solved with minimal effort.
Whether you want to publish content from your favourite desktop editor, build a custom interface for handling editorial workflow, share your most recent posts on your marketing site, or use Ghost as a full headless CMS, Ghost has the tools to support you.
### Content API
Ghost’s public Content API is what delivers published content to the world and can be accessed in a read-only manner by any client to render in a website, app or other embedded media.
Access control is managed via an API key, and even the most complex filters are made simple with our [query language](/content-api/#filtering). The Content API is designed to be fully cachable, meaning you can fetch data as often as you like without limitation.
### Admin API
Managing content is done via Ghost’s Admin API, which has both read and write access used to create and update content.
The Admin API provides secure role-based authentication so that you can publish from anywhere with confidence, either as a staff user via session authentication or via an integration with a third-party service.
When authenticated with the **admin** or **owner** role, the Admin API provides full control for creating, editing and deleting all data in your publication, giving you even more power and flexibility than the standard Ghost admin client.
### JavaScript SDK
Ghost core comes with an accompanying JavaScript [API Client](/content-api/javascript/) and [SDK](/content-api/javascript/#javascript-sdk) designed to remove pain around authentication and data access.
It provides tools for working with API data to accomplish common use cases such as returning a list of tags for a post, rendering meta data in the ``, and outputting data with sensible fallbacks.
Leveraging FLOSS & npm, an ever-increasing amount of Ghost’s JavaScript tooling has been made available. If you’re working in JavaScript, chances are you won’t need to code anything more than wiring.
### Webhooks
Notify an external service when content has changed or been updated by calling a configured HTTP endpoint. This makes it a breeze to do things like trigger a rebuild in a static site generator, or notify Slack that something happened.
By combining Webhooks and the API it is possible to integrate into any aspect of your content lifecycle, to enable a wide range of content distribution and workflow automation use cases.
### Versioning
Ghost ships with a mature set of core APIs, with only minimal changes between major versions. We maintain a [stability index](/faq/api-versioning/) so that you can be sure about depending on them in production.
Ghost major versions ship every 8-12 months, meaning code you write against our API today will be stable for a minimum of 2 years.
***
## Admin Client
A streamlined clientside admin interface for editors who need a powerful tool to manage their content.
Traditionally, people writing content and people writing code rarely agree on the best platform to use. Tools with great editors generally lack speed and extensibility, and speedy frameworks basically always sacrifice user experience.
### Overview
Thanks to its decoupled architecture Ghost is able to have the best of both worlds. Ghost-Admin is a completely independent client application to the Ghost Core API which doesn’t have any impact on performance. And, writers don’t need to suffer their way through learning Git just to publish a new post.
Great for editors. Great for developers.
 ### Publishing workflow
Hacking together some Markdown files and throwing a static-site generator on top is nice in theory, but anyone who has tried to manage a content archive knows how quickly this falls apart even under light usage. What happens when you want to schedule a post to be published on Monday?
### Publishing workflow
Hacking together some Markdown files and throwing a static-site generator on top is nice in theory, but anyone who has tried to manage a content archive knows how quickly this falls apart even under light usage. What happens when you want to schedule a post to be published on Monday?
 Great editorial teams need proper tools which help them be effective, which is why Ghost-Admin has all the standard editorial workflow features available at the click of a button. From inputting custom social and SEO data to customising exactly how and where content will be output.
### Best-in-class editor
Ghost Admin also comes with a world-class editor for authoring posts, which is directly tied to a rock-solid document storage format. More on that a bit later!
Great editorial teams need proper tools which help them be effective, which is why Ghost-Admin has all the standard editorial workflow features available at the click of a button. From inputting custom social and SEO data to customising exactly how and where content will be output.
### Best-in-class editor
Ghost Admin also comes with a world-class editor for authoring posts, which is directly tied to a rock-solid document storage format. More on that a bit later!
 But, our default client app isn’t the only way to interact with content on the Ghost [Admin API](/admin-api/). You can send data into Ghost from pretty much anywhere, or even write your own custom admin client if you have a particular usecase which requires it.
Ghost-Admin is extremely powerful but entirely optional.
***
## Front-end
Ghost is a full headless CMS which is completely agnostic of any particular front end or static site framework.
Just like Ghost’s admin client, its front-end is both optional and interchangeable. While Ghost’s early architecture represented more of a standard monolithic web-app, it’s now compatible with just about any front-end you can throw at it.
It doesn’t even have to be a website!
### Handlebars Themes
Ghost ships with its own [Handlebars.js](/themes/) theme layer served by an Express.js webserver, so out of the box it automatically comes with a default front-end. This is a really fast way to get a site up and running, and despite being relatively simple Handlebars is both powerful and extremely performant.
Ghost Handlebars Themes have the additional benefit of being fairly widely adopted since the platform first launched back in 2013, so there’s a broad [third party marketplace](https://ghost.org/marketplace/) of pre-built themes as well as [extensive documentation](/themes/) on how to build a custom theme.
### Static Site Generators
Thanks to its decoupled architecture Ghost is also compatible with just about any of the front-end frameworks or static site generators which have become increasingly popular thanks to being fun to work with, extremely fast, and more and more powerful as the JAMstack grows in maturity. So it works with the tools you already use.
This very documentation site is running on a [Gatsby.js](/jamstack/gatsby/) front-end, connected to both **Ghost** and **GitHub** as content sources, hosted statically on [Netlify](https://netlify.com) with dynamic serverless functions powered by [AWS Lambda](https://aws.amazon.com/lambda/) (like the feedback form at the bottom of this page). It’s a brave new world!
We’re working on greatly expanding our range of documentation, tools and SDKs to better serve the wider front-end development community.
### Custom front-ends
Of course you can also just build your own completely custom front-end, too. Particularly if you’re using the Ghost API as a service to drive content infrastructure for a mobile or native application which isn’t based on the web.
# Breaking Changes
Source: https://docs.ghost.org/changes
A catalog of critical changes between major Ghost versions
***
New major versions typically involve some backwards incompatible changes. These mostly affect custom themes, and our theme compatibility tool [GScan](/themes/gscan/) will guide you through the updates. If you use custom integrations,the API or webhooks you should also expect things to change when switching between [API versions](/faq/api-versioning).
#### How to update?
The [update guide](/update/) explains how to update from Ghost 1.0 or higher to the **latest version**. Ghost(Pro) customers should use the [update guide for Ghost (Pro)](https://ghost.org/help/how-to-upgrade-ghost/).
#### When to update?
The best time to do a [major version](/faq/major-versions-lts) update is shortly after the first minor version - so for Ghost 5.x, the best time to update will be when 5.1.0 is released, which is usually a week or two after the first 5.x release.
This is when any bugs or unexpected compatibility issues have been resolved but the [team & community](https://forum.ghost.org) are still context loaded about the changes. The longer you hold off, the bigger the gap becomes between the software you are using and the latest version.
## Mobiledoc deprecation
With the release of the [new editor](https://ghost.org/changelog/editor-beta/), Ghost uses [Lexical](https://lexical.dev/) to store post content, which replaces the previous format Mobiledoc. Transitioning to Lexical enables Ghost to build new powerful features that weren’t possible with Mobiledoc. To remain compatible with Ghost, integrations that rely on Mobiledoc should switch to using Lexical. [For more resources on working with Lexical, see their docs](https://lexical.dev/docs/intro).
## Ghost 5.0
Ghost 5.0 includes significant changes to the Ghost API and database support to ensure optimal performance.
#### Supported databases
**MySQL 8** is the only supported database for both development and production environments.
* SQLite3 is supported only in development environments where scalability and data consistency across updates is not critical (during local theme development, for example)
* MySQL 5 is no longer supported in any environment
Note: MariaDB is not an officially supported database for Ghost.
#### Portal
If you’re embedding portal on an external site, you’ll need to update your script tag.
You can generate a Content API key and check your API url in the Custom Integration section in Ghost Admin. For more information see the [Content API docs](/content-api/).
```html
```
#### Themes
Themes can be validated against 5.x in [GScan](https://gscan.ghost.org).
* Card assets will now be included by default, including bookmark and gallery cards. ([docs](/themes/helpers/data/config/))
* Previously deprecated features have been removed: `@blog`, single authors.
**Custom membership flows**
The syntax used to build custom membership flows has changed significantly.
* Tier benefits are now returned as a list of strings. ([docs](/themes/helpers/data/tiers/#fetching-tiers-with-the-get-helper))
* Paid Tiers now have numeric `monthly_price` and `yearly_price` attributes, and a separate `currency` attribute. ([docs](/themes/helpers/data/tiers/))
* The following legacy product and price helpers used to build custom membership flows have been removed: `@price`, `@products`, `@product` and `@member.product`. See below for examples of the new syntax for building a custom signup form and account page. ([docs](/themes/members/#member-subscriptions))
**Sign up form**
```handlebars
{{! Fetch all available tiers }}
{{#get "tiers" limit="all" include="monthly_price,yearly_price,benefits"}}
{{#foreach tiers}}
{{/foreach}}
{{/get}}
```
**Account page**
```handlebars
But, our default client app isn’t the only way to interact with content on the Ghost [Admin API](/admin-api/). You can send data into Ghost from pretty much anywhere, or even write your own custom admin client if you have a particular usecase which requires it.
Ghost-Admin is extremely powerful but entirely optional.
***
## Front-end
Ghost is a full headless CMS which is completely agnostic of any particular front end or static site framework.
Just like Ghost’s admin client, its front-end is both optional and interchangeable. While Ghost’s early architecture represented more of a standard monolithic web-app, it’s now compatible with just about any front-end you can throw at it.
It doesn’t even have to be a website!
### Handlebars Themes
Ghost ships with its own [Handlebars.js](/themes/) theme layer served by an Express.js webserver, so out of the box it automatically comes with a default front-end. This is a really fast way to get a site up and running, and despite being relatively simple Handlebars is both powerful and extremely performant.
Ghost Handlebars Themes have the additional benefit of being fairly widely adopted since the platform first launched back in 2013, so there’s a broad [third party marketplace](https://ghost.org/marketplace/) of pre-built themes as well as [extensive documentation](/themes/) on how to build a custom theme.
### Static Site Generators
Thanks to its decoupled architecture Ghost is also compatible with just about any of the front-end frameworks or static site generators which have become increasingly popular thanks to being fun to work with, extremely fast, and more and more powerful as the JAMstack grows in maturity. So it works with the tools you already use.
This very documentation site is running on a [Gatsby.js](/jamstack/gatsby/) front-end, connected to both **Ghost** and **GitHub** as content sources, hosted statically on [Netlify](https://netlify.com) with dynamic serverless functions powered by [AWS Lambda](https://aws.amazon.com/lambda/) (like the feedback form at the bottom of this page). It’s a brave new world!
We’re working on greatly expanding our range of documentation, tools and SDKs to better serve the wider front-end development community.
### Custom front-ends
Of course you can also just build your own completely custom front-end, too. Particularly if you’re using the Ghost API as a service to drive content infrastructure for a mobile or native application which isn’t based on the web.
# Breaking Changes
Source: https://docs.ghost.org/changes
A catalog of critical changes between major Ghost versions
***
New major versions typically involve some backwards incompatible changes. These mostly affect custom themes, and our theme compatibility tool [GScan](/themes/gscan/) will guide you through the updates. If you use custom integrations,the API or webhooks you should also expect things to change when switching between [API versions](/faq/api-versioning).
#### How to update?
The [update guide](/update/) explains how to update from Ghost 1.0 or higher to the **latest version**. Ghost(Pro) customers should use the [update guide for Ghost (Pro)](https://ghost.org/help/how-to-upgrade-ghost/).
#### When to update?
The best time to do a [major version](/faq/major-versions-lts) update is shortly after the first minor version - so for Ghost 5.x, the best time to update will be when 5.1.0 is released, which is usually a week or two after the first 5.x release.
This is when any bugs or unexpected compatibility issues have been resolved but the [team & community](https://forum.ghost.org) are still context loaded about the changes. The longer you hold off, the bigger the gap becomes between the software you are using and the latest version.
## Mobiledoc deprecation
With the release of the [new editor](https://ghost.org/changelog/editor-beta/), Ghost uses [Lexical](https://lexical.dev/) to store post content, which replaces the previous format Mobiledoc. Transitioning to Lexical enables Ghost to build new powerful features that weren’t possible with Mobiledoc. To remain compatible with Ghost, integrations that rely on Mobiledoc should switch to using Lexical. [For more resources on working with Lexical, see their docs](https://lexical.dev/docs/intro).
## Ghost 5.0
Ghost 5.0 includes significant changes to the Ghost API and database support to ensure optimal performance.
#### Supported databases
**MySQL 8** is the only supported database for both development and production environments.
* SQLite3 is supported only in development environments where scalability and data consistency across updates is not critical (during local theme development, for example)
* MySQL 5 is no longer supported in any environment
Note: MariaDB is not an officially supported database for Ghost.
#### Portal
If you’re embedding portal on an external site, you’ll need to update your script tag.
You can generate a Content API key and check your API url in the Custom Integration section in Ghost Admin. For more information see the [Content API docs](/content-api/).
```html
```
#### Themes
Themes can be validated against 5.x in [GScan](https://gscan.ghost.org).
* Card assets will now be included by default, including bookmark and gallery cards. ([docs](/themes/helpers/data/config/))
* Previously deprecated features have been removed: `@blog`, single authors.
**Custom membership flows**
The syntax used to build custom membership flows has changed significantly.
* Tier benefits are now returned as a list of strings. ([docs](/themes/helpers/data/tiers/#fetching-tiers-with-the-get-helper))
* Paid Tiers now have numeric `monthly_price` and `yearly_price` attributes, and a separate `currency` attribute. ([docs](/themes/helpers/data/tiers/))
* The following legacy product and price helpers used to build custom membership flows have been removed: `@price`, `@products`, `@product` and `@member.product`. See below for examples of the new syntax for building a custom signup form and account page. ([docs](/themes/members/#member-subscriptions))
**Sign up form**
```handlebars
{{! Fetch all available tiers }}
{{#get "tiers" limit="all" include="monthly_price,yearly_price,benefits"}}
{{#foreach tiers}}
{{/foreach}}
{{/get}}
```
**Account page**
```handlebars
{{@member.name}}
{{@member.email}}
{{#foreach @member.subscriptions}}
Tier name: {{tier.name}}
Subscription status: {{status}}
Amount: {{price plan numberFormat="long"}}/{{plan.interval}}
Start date: {{date start_date}}
End date: {{date current_period_end}}
{{cancel_link}} {{! Generate a link to cancel the membership }}
{{/foreach}}
```
#### API versioning
Ghost 5.0 no longer includes multiple API versions for backwards compatibility with previous versions. The URLs for the APIs are now `ghost/api/content` and `ghost/api/admin`. Breaking changes will continue to be made only in major versions; new features and additions may be added in minor version updates.
Backwards compatibility is now provided by sending an `accept-version` header with API requests specifying the compatibility version a client expects. When this header is present in a request, Ghost will respond with a `content-version` header indicating the version that responded. In the case that the provided `accept-version` is below the minimum version supported by Ghost and a request either cannot be served or has changed significantly, Ghost will notify the site’s administrators via email informing them of the problem.
Requests to the old, versioned URLs are rewritten internally with the relevant `accept-version` header set. These requests will return a `deprecation` header.
#### Admin API changes
* The `/posts` and `/pages` endpoints no longer accept `page:(true|false)` as a filter in the query parameters
* The `email_recipient_filter` and `send_email_when_published` parameters have been removed from the `/posts` endpoint, and email sending is now controlled by the new `newsletter` and `email_segment` parameters
* The `/mail` endpoint has been removed
* The `/email_preview` endpoint has been renamed to `/email_previews`
* The `/authentication/reset_all_passwords` endpoint has been renamed to `/authentication/global_password_reset` and returns a `204 No Content` response on success
* The `/authentication/passwordreset` endpoint has been renamed to `/authentication/password_reset`, and accepts and returns a `password_reset` object
* The `DELETE /settings/stripe/connect` endpoint now returns a `204 No Content` response on success
* The `POST /settings/members/email` endpoint now returns a `204 No Content` response on success
#### Content API changes
* The `GET /posts` and `GET /pages` endpoints no longer return the `page:(true|false)` attribute in the response
#### Members
* The `members/api/site` and `members/api/offers` endpoints have been removed, and Portal now uses the Content API
* All `/products/*` endpoints have been replaced with `/tiers/*`, and all references to `products` in requests/responses have been updated to use `tiers`
* Tier benefits are now returned as a list of strings
* Paid Tiers now have numeric `monthly_price` and `yearly_price` attributes, and a separate `currency` attribute
* The member `subscribed` flag has been deprecated in favor of the `newsletters` relation, which includes the newsletters a member is subscribed to
#### Misc
* Removed support for serving secure requests when `config.url` is set to `http`
* Removed support for configuring the server to connect to a socket instead of a port
* Deleting a user will no longer remove their posts, but assign them to the site owner instead
* Site-level email design settings have been replaced with design settings on individual newsletters (see [`/newsletters/*` endpoints](/admin-api/#newsletters))
## Ghost 4.0
Ghost 4.0 focuses on bringing Memberships out of beta. There are a few additional changes:
* New `/v4/` (stable) and `/canary/` (experimental) API versions have been added.
* The `/v3/` (maintenance) endpoints will not receive any further changes.
* The `/v2/` (deprecated) endpoints will be removed in the next major version.
* v4 Admin API `/settings/` endpoint no longer supports the `?type` query parameter.
* v4 Admin API `/settings/` endpoint only accepts boolean values for the key `unsplash`.
* Redirects: definitions should now be uploaded in YAML format - `redirects.json` has been deprecated in favour of `redirects.yaml`.
* Themes: **must** now define which version of the API they want to use by adding `"engines": {"ghost-api": "vX"}}` to the `package.json` file.
* Themes: due to content images having `width` / `height` attributes, themes with CSS that use `max-width` may need to add `height: auto` to prevent images appearing squashed or stretched.
* Themes: The default format for the `{{date}}` helper is now a localised short date string (`ll`).
* Themes: `@site.lang` has been deprecated in favour of `@site.locale`.
* Private mode: the cookie has been renamed from `express:sess` to `ghost-private`.
* Other: It’s no longer possible to require or use Ghost as an NPM module.
### Members
Members functionality is no longer considered beta and is always enabled. The following are breaking changes from the behaviour in Ghost 3.x:
* v3/v4 Admin API `/members/` endpoint no longer supports the `?paid` query parameter
* v3/v4 Admin API `/members/` endpoints now have subscriptions on the `subscriptions` key, rather than `stripe.subscriptions`.
* v3/v4 Admin API `/posts/` endpoint has deprecated the `send_email_when_published` flag in favour of `email_recipient_filter`.
* Themes: The `@labs.members` theme helper always returns `true`, and will be removed in the next major version.
* Themes: The default post visibility in `foreach` in themes is now `all`.
* Themes: The `default_payment_card_last4` property of member subscriptions now returns `****` instead of `null` if the data is unavailable.
* Portal: query parameters no longer use `portal-` prefixes.
* Portal: the root container has been renamed from `ghost-membersjs-root` to `ghost-portal-root`.
* Other: Stripe keys are no longer included in exports.
* Other: Using Stripe related features in a local development environment requires `WEBHOOK_SECRET`, and live stripe keys are no longer supported in non-production environments.
## Ghost 3.0
* The Subscribers labs feature has been replaced with the [Members](/members/) labs feature.
* The v0.1 API endpoints & Public API Beta have been removed. Ghost now has a set of fully supported [Core APIs](/architecture/).
* The Apps beta concept has been removed. Use the Core APIs & [integrations](https://ghost.org/integrations/) instead.
* Themes using [GhostHunter](https://github.com/jamalneufeld/ghostHunter) must upgrade to [GhostHunter 0.6.0](https://github.com/jamalneufeld/ghostHunter#ghosthunter-v060).
* Themes using `ghost.url.api()` must upgrade to the [Content API client library](/content-api/javascript/).
* Themes may be missing CSS for editor cards added in 2.x. Use [GScan](https://gscan.ghost.org/) to make sure your theme is fully 3.0 compatible.
* Themes must replace `{{author}}` for either `{{#primary_author}}` or `{{authors}}`.
* New `/v3/` (stable) and `/canary/` (experimental) API versions have been added.
* The `/v2/` (maintenance) endpoints will not receive any further changes.
* v3 Content API `/posts/` & `/pages/` don’t return `primary_tag` or `primary_author` when `?include=tags,authors` isn’t specified (these were returned as null previously).
* v3 Content API `/posts/` & `/pages/` no longer return page: `true|false`.
* v3 Content + Admin API `/settings/` no longer returns ghost\_head or `ghost_foot`, use `codeinjection_head` and `codeinjection_foot` instead.
* v3 Admin API `/subscribers/*` endpoints are removed and replaced with `/members/*`.
* v3 Content + Admin API consistently stores relative and serves absolute URLs for all images and links, including inside content & srcsets.
### Switching from v0.1 API
* The Core APIs are stable, with both read & write access fully supported.
* v0.1 Public API (read only access) is replaced by the [Content API](/content-api/).
* v0.1 Private API (write access) is replaced by the [Admin API](/admin-api/).
* v0.1 Public API `client_id` and `client_secret` are replaced with a single `key`, found by configuring a new Custom Integration in Ghost Admin.
* v0.1 Public API `ghost-sdk.min.js` and `ghost.url.api()` are replaced with the `@tryghost/content-api` [client library](/content-api/javascript/).
* v0.1 Private API client auth is replaced with JWT auth & user auth now uses a session cookie. The `@tryghost/admin-api` [client library](/admin-api/javascript/) supports easily creating content via JWT auth.
* Scripts need updating to handle API changes, e.g. posts and pages being served on separate endpoints and users being called authors in the Content API.
## Ghost 2.0
* API: The `/v2/` API replaces the deprecated `/v0.1/` API.
* Themes: The editor has gained many new features in 2.x, you may need to add CSS to your theme for certain cards to display correctly.
* Themes: `{{#get "users"}}` should be replaced with `{{#get "authors"}}`
* Themes: multiple authors are now supported, swap uses of author for either `{{#primary_author}}` or `{{authors}}`.
* Themes: can now define which version of the API they want to use by adding `"engines": {"ghost-api": "vX"}}` to the `package.json` file.
* Themes: there are many minor deprecations and warnings, e.g. `@blog` has been renamed to `@site`, use [GScan](https://gscan.ghost.org) to make sure your theme is fully 2.0 compatible.
* v2 Content+Admin API has split `/posts/` & `/pages/` endpoints, instead of just `/posts/`.
* v2 Content API has an `/authors/` endpoint instead of `/users/`.
* v2 Admin API `/posts/` and `/pages/` automatically include tags and authors without needing `?includes=`.
* v2 Content + Admin API attempts to always save relative & serve absolute urls for images and links, but this behaviour is inconsistent 🐛.
## Ghost 1.0
* This is a major upgrade, with breaking changes and no automatic migration path. All publications upgrading from Ghost 0.x versions must be [upgraded](/faq/update-0x/) to Ghost 1.0 before they can be successfully upgraded to Ghost 2.0 and beyond.
* See [announcement post](https://ghost.org/changelog/1-0/) and [developer details](https://ghost.org/changelog/ghost-1-0-0/) for full information on what we changed in 1.0.
* v0.1 Public API `/shared/ghost-url.min.js` util has been moved and renamed to `/public/ghost-sdk.min.js`
* Ghost 0.11.x exports don’t include `clients` and `trusted_domains` so these aren’t imported to your new site - you’ll need to update any scripts with a new `client_id` and `client_secret` from your 1.0 install.
* Themes: Many image fields were renamed, use [GScan](https://gscan.ghost.org) to make sure your theme is 1.0 compatible.
# Configuration
Source: https://docs.ghost.org/config
For self-hosted Ghost users, a custom configuration file can be used to override Ghost’s default behaviour. This provides you with a range of options to configure your publication to suit your needs.
***
## Overview
When you install Ghost using the supported and recommended method using `ghost-cli`, a custom configuration file is created for you by default. There are some configuration options which are required by default, and many optional configurations.
The three required options are `url` and `database` which are configured during setup, and `mail` which needs to be configured once you’ve installed Ghost.
This article explains how to setup your mail config, as well as walk you through all of the available config options.
## Custom configuration files
The configuration is managed by [nconf](https://github.com/indexzero/nconf/). A custom configuration file must be a valid JSON file located in the root folder and changes to the file can be implemented using `ghost restart`.
Since Node.js has the concept of environments built in, Ghost supports two environments: **development** and **production**. All public Ghost publications run in production mode, while development mode can be used to test or build on top of Ghost locally.
Check out the official install guides for [development](/install/local/) and [production](/install/ubuntu/).
The configuration files reflect the environment you are using:
* `config.development.json`
* `config.production.json`
#### Ghost in development
If you would like to start Ghost in development, you don’t have to specify any environment, because development is default. To test Ghost in production, you can use:
```bash
NODE_ENV=production node index.js
```
If you want to make changes when developing and working on Ghost, you can create a special configuration file that will be ignored in git:
* `config.local.json`
This file is merged on top of `config.development.json` so you can use both at the same time.
#### Debugging the configuration output
Start Ghost with:
```bash
DEBUG=ghost:*,ghost-config node index.js
```
#### Running Ghost with config env variables
Start Ghost using environment variables which match the name and case of each config option:
```bash
url=http://ghost.local:2368 node index.js
```
For nested config options, separate with two underscores:
```bash
database__connection__host=mysql node index.js
```
## Configuration options
There are a number of configuration options which are explained in detail in this article. Below is an index of all configuration options:
| Name | Required? | Description |
| ------------------- | ------------- | -------------------------------------------------------------------------------------------------------------------------------- |
| `url` | In production | Set the public URL for your blog |
| `database` | In production | Type of database used (default: MySQL) |
| `mail` | In production | Add a mail service |
| `admin` | Optional | Set the protocol and hostname for your admin panel |
| `server` | Optional | Host and port for Ghost to listen on |
| `privacy` | Optional | Disable features set in [privacy.md](https://github.com/TryGhost/Ghost/blob/2f09dd888024f143d28a0d81bede1b53a6db9557/PRIVACY.md) |
| `security` | Optional | Disable security features that are enabled by default |
| `paths` | Optional | Customise internal paths |
| `referrerPolicy` | Optional | Control the content attribute of the meta referrer tag |
| `useMinFiles` | Optional | Generate assets URL with .min notation |
| `storage` | Optional | Set a custom storage adapter |
| `scheduling` | Optional | Set a custom scheduling adapter |
| `logging` | Optional | Configure logging for Ghost |
| `spam` | Optional | Configure spam settings |
| `caching` | Optional | Configure HTTP caching settings |
| `compress` | Optional | Disable compression of server responses |
| `imageOptimization` | Optional | Configure image manipulation and processing |
| `opensea` | Optional | Increase rate limit for fetching NFT embeds from OpenSea.io |
| `tenor` | Optional | Enable integration with Tenor.com for embedding GIFs directly from the editor |
| `twitter` | Optional | Add support for rich Twitter embeds in newsletters |
| `portal` | Optional | Relocate or remove the scripts for Portal |
| `sodoSearch` | Optional | Relocate or remove the scripts for Sodo search |
| `comments` | Optional | Relocate or remove the scripts for comments |
### URL
*(Required in production)*
Once a Ghost publication is installed, the first thing to do is set a URL. When installing using `ghost-cli`, the install process requests the URL during the setup process.
Enter the URL that is used to access your publication. If using a subpath, enter the full path, `https://example.com/blog/`. If using SSL, always enter the URL with `https://`.
#### SSL
We always recommend using SSL to run your Ghost publication in production. Ghost has a number of configuration options for working with SSL, and securing the URLs for the admin `/ghost/` and the frontend of your publication. Without SSL your username and password are sent in plaintext.
`ghost-cli` prompts to set up SSL during the installation process. After a successful SSL setup, you can find your SSL certificate in `/etc/letsencrypt`.
If you see errors such as `access denied from url`, then the provided URL in your config file is incorrect and needs to be updated.
### Database
*(Required in production)*
Ghost is configured using MySQL by default:
```json
"database": {
"client": "mysql",
"connection": {
"host": "127.0.0.1",
"port": 3306,
"user": "your_database_user",
"password": "your_database_password",
"database": "your_database_name"
}
}
```
Alternatively, you can configure sqlite3:
```json
"database": {
"client": "sqlite3",
"connection": {
"filename": "content/data/ghost-test.db"
},
"useNullAsDefault": true,
"debug": false
}
```
#### Number of connections
It’s possible to limit the number of simultaneous connections using the pool setting. The default values are a minimum of 2 and a maximum of 10, which means Ghost always maintains two active database connections. You can set the minimum to 0 to prevent this:
```json
"database": {
"client": ...,
"connection": { ... },
"pool": {
"min": 2,
"max": 20
}
}
```
#### SSL
In a typical Ghost installation, the MySQL database will be on the same server as Ghost itself. With cloud computing and database-as-a-service providers you might want to enable SSL connections to the database.
For Amazon RDS you’ll need to configure the connection with `"ssl": "Amazon RDS"`:
```json
"database": {
"client": "mysql",
"connection": {
"host": "your_cloud_database",
"port": 3306,
"user": "your_database_user",
"password": "your_database_password",
"database": "your_database_name",
"ssl": "Amazon RDS"
}
}
```
For other hosts, you’ll need to output your CA certificate (not your CA private key) as a single line string including literal new line characters `\n` (you can get the single line string with `awk '{printf "%s\\n", $0}' CustomRootCA.crt`) and add it to the configuration:
```json
"database": {
"client": "mysql",
"connection": {
"host": "your_cloud_database",
"port": 3306,
"user": "your_database_user",
"password": "your_database_password",
"database": "your_database_name",
"ssl": {
"ca": "-----BEGIN CERTIFICATE-----\nMIIFY... truncated ...pq8fa/a\n-----END CERTIFICATE-----\n"
}
}
}
```
For a certificate chain, include all CA certificates in the single line string:
```json
"database": {
"client": "mysql",
"connection": {
"host": "your_cloud_database",
"port": 3306,
"user": "your_database_user",
"password": "your_database_password",
"database": "your_database_name",
"ssl": {
"ca": "-----BEGIN CERTIFICATE-----\nMIIFY... truncated ...pq8fa/a\n-----END CERTIFICATE-----\n-----BEGIN CERTIFICATE-----\nMIIFY... truncated ...wn8v90/a\n-----END CERTIFICATE-----\n"
}
}
}
```
### Mail
*(Required in production)*
The most important piece of configuration once the installation is complete is to set up mail. Configuring mail allows Ghost to send transactional emails such as user invitations, password resets, member signups, and member login links. With the help of a bulk email service, you can also configure Ghost to send newsletters to members.
Ghost uses [Nodemailer](https://github.com/nodemailer/nodemailer/) under the hood, and tries to use the direct mail service if available.
We recommend ensuring transactional emails are functional before moving on to bulk mail configuration.
#### Configuring with Mailgun
[Mailgun](https://www.mailgun.com/) is a service for sending emails and provides more than adequate resources to send bulk emails at a reasonable price. Find out more about [using Mailgun with Ghost here](/faq/mailgun-newsletters/).
Mailgun allows you to use your own domain for sending transactional emails. Otherwise, you can use a subdomain that Mailgun provides you with (also known as the sandbox domain, limited to 300 emails per day). You can change this at any time.
Mailgun is an optional service for sending transactional emails, but it is required for bulk mail — [read more](/faq/mailgun-newsletters/).
#### Create a Mailgun account
Once your site is fully set up [create a Mailgun account](https://signup.mailgun.com/). After your account is verified navigate to **Domain settings** under **Sending** in the Mailgun admin. There you’ll find your SMTP credentials.
 In addition to this information, you’ll need the password, which can be obtained by clicking the **Reset Password** button. Keep these details for future reference.
Mailgun provides options for using their own subdomains for sending emails, as well as custom domains for a [competitive price](/faq/mailgun-newsletters/#did-you-know-mailgun-doesn-t-have-free-accounts-anymore).
#### Add credentials to `config.production.json`
Open your production config file in any code editor and add the following mail configuration, making sure to update the values to the same credentials shown in your own Mailgun SMTP settings:
```json
// config.production.json
"mail": {
"transport": "SMTP",
"options": {
"service": "Mailgun",
"auth": {
"user": "postmaster@example.mailgun.org",
"pass": "1234567890"
}
}
},
```
Once you are finished, hit save and then run `ghost restart` for your changes to take effect. These same credentials can be used for development environments, by adding them to the `config.development.json` file.
Mailgun provides a sandbox mode, which restricts emails to authorized recipients. Once sandbox mode is enabled, add and verify the email addresses you want to send emails to prior to testing.
#### Secure connection
Depending on your Mailgun settings you may want to force a secure SMTP connection. Update your `config.production.json` with the following for a secure connection:
```json
// config.production.json
"mail": {
"transport": "SMTP",
"options": {
"service": "Mailgun",
"host": "smtp.mailgun.org",
"port": 465,
"secure": true,
"auth": {
"user": "postmaster@example.mailgun.org",
"pass": "1234567890"
}
}
},
```
As always, hit save and run `ghost restart` for your changes to take effect.
#### Amazon SES
It’s also possible to use [Amazon Simple Email Service](https://aws.amazon.com/ses/). Use the SMTP username and password given when signing up and configure your `config.[env].json` file as follows:
```json
"mail": {
"transport": "SMTP",
"options": {
"host": "YOUR-SES-SERVER-NAME",
"port": 465,
"service": "SES",
"auth": {
"user": "YOUR-SES-SMTP-ACCESS-KEY-ID",
"pass": "YOUR-SES-SMTP-SECRET-ACCESS-KEY"
}
}
}
```
#### Email addresses
**Default email address**
Ghost uses the value set in `mail.from` as the default email address:
```json
"mail": {
"from": "support@example.com",
}
```
A custom name can also optionally be provided:
```json
"mail": {
"from": "'Acme Support' ",
}
```
Try to use a real, working email address - as this greatly improves delivery rates for important emails sent by Ghost (Like password reset requests and user invitations). If you have a company support email address, this is a good place to use it.
**Support email address**
When setting a custom support email address via **Settings** → **Portal settings** → **Account page**, you override the default email address for member communications like sign-in/sign-up emails and member notifications.
**Newsletter addresses**
It’s also possible to set a separate sender and reply-to address per newsletter, which will be used instead of the default. Configure these addresses via **Settings** → **Newsletters**.
The table below shows which email is used based on email type. In the table, if an address is not, it falls back to the next available address until reaching the default.
| Email type | Address used | Examples |
| -------------------- | ------------------- | ---------------------------------- |
| Member notifications | Support, Default | Signup/sign links, comment replies |
| Newsletters | Newsletter, Default | Configurable per newsletter |
| Staff notifications | Default | Recommendations, signups |
Irrespective of how you configure email addresses, maximize deliverability by ensuring DKIM, SPF, and DMARC records are configured for your sending domains.
### Admin URL
Admin can be used to specify a different protocol for your admin panel or a different hostname (domain name). It can’t affect the path at which the admin panel is served (this is always /ghost/).
```json
"admin": {
"url": "http://example.com"
}
```
### Server
The server host and port are the IP address and port number that Ghost listens on for requests. By default, requests are routed from port 80 to Ghost by nginx (recommended), or Apache.
```json
"server": {
"host": "127.0.0.1",
"port": 2368
}
```
### Privacy
All features inside the privacy.md file are enabled by default. It is possible to turn these off in order to protect privacy:
* Update check
* Gravatar
* RPC ping
* Structured data
For more information about the features, read the [privacy.md page](https://github.com/TryGhost/Ghost/blob/2f09dd888024f143d28a0d81bede1b53a6db9557/PRIVACY.md).
To turn off **all** of the features, use:
```json
"privacy": {
"useTinfoil": true
}
```
Alternatively, configure each feature individually:
```json
"privacy": {
"useUpdateCheck": false,
"useGravatar": false,
"useRpcPing": false,
"useStructuredData": false
}
```
### Security
By default Ghost will email an auth code when it detects a login from a new device. To disable this feature, use:
```json
"security": {
"staffDeviceVerification": false
}
```
Note: if you want to force 2FA for all staff logins, not just new devices, you can do so under the Settings > Staff in the admin panel
### Paths
The configuration of paths can be relative or absolute. To use a content directory that does not live inside the Ghost folder, specify a paths object with a new contentPath:
```json
"paths": {
"contentPath": "content/"
},
```
When using a custom content path, the content directory must exist and contain subdirectories for data, images, themes, logs, and adapters.
If using a SQLite database, you’ll also need to update the path to your database to match the new location of the data folder.
### Referrer Policy
Set the value of the content attribute of the meta referrer HTML tag by adding referrerPolicy to your config. `origin-when-crossorigin` is the default. Read through all possible [options](https://www.w3.org/TR/referrer-policy/#referrer-policies/).
## Adapters
Ghost allows for customizations at multiple layers through an adapter system. Customizable layers include: `storage`, `caching`, `sso`, and `scheduling`.
Use the `adapters` configuration block with “storage”, “caching”, “sso,” or “scheduling” keys to initialize a custom adapter. For example, the following configuration uses `storage-module-name` to handle all `storage` capabilities in Ghost. Note that the `active` key indicates a default adapter used for all features if no other adapters are declared.
```json
"adapters": {
"storage": {
"active": "storage-module-name",
"storage-module-name": {
"key": "value"
}
}
}
```
Customize parts of Ghost’s features by declaring adapters at the feature level. For example, to use a custom `cache` adapter only for the `imageSizes` feature, configure the cache adapter as follows:
```json
"adapters": {
"cache": {
"custom-redis-cache-adapter": {
"host": "localhost",
"port": 6379,
"password": "secret_password"
},
"imageSizes": {
"adapter": "custom-redis-cache-adapter",
"ttl": 3600
}
}
}
```
The above declaration uses the `custom-redis-cache-adapter` only for the `imageSizes` cache feature with these values:
```json
{
"host": "localhost",
"port": 6379,
"password": "secret_password",
"ttl": 3600
}
```
### Storage adapters
The storage layer is used to store images uploaded from the Ghost Admin UI, API, or when images are included in a zip file uploaded via the importer. Using a custom storage module allows you to change where images are stored without changing Ghost core.
By default, Ghost stores uploaded images in the file system. The default location is the Ghost content path in your Ghost folder under `content/images` or an alternative custom content path that’s been configured.
To use a custom storage adapter, your custom configuration file needs to be updated to provide configuration for your new storage module and set it as active:
```json
"storage": {
"active": "my-module",
"my-module": {
"key": "abcdef"
}
}
```
The storage block should have 2 items:
* An active key, which contains the name\* of your module
* A key that reflects the name\* of your module, containing any config your module needs
#### Available storage features
* `images` - storage of image files uploaded through `POST '/images/upload'` endpoint
* `media` - storage of media files uploaded through `POST '/media/upload'` and `POST/media/thumbnail/upload` endpoints
* `files` - storage of generic files uploaded through `POST '/files/upload'` endpoint
#### Available custom storage adapters
* [local-file-store](https://github.com/TryGhost/Ghost/blob/fa1861aad3ba4e5e1797cec346f775c5931ca856/ghost/core/core/server/adapters/storage/LocalFilesStorage.js) (default) saves images to the local filesystem
* [http-store](https://gist.github.com/ErisDS/559e11bf3e84b89a9594) passes image requests through to an HTTP endpoint
* [s3-store](https://github.com/spanishdict/ghost-s3-compat) saves to Amazon S3 and proxies requests to S3
* [s3-store](https://github.com/colinmeinke/ghost-storage-adapter-s3) saves to Amazon S3 and works with 0.10+
* [qn-store](https://github.com/Minwe/qn-store) saves to Qiniu
* [ghost-cloudinary-store](https://github.com/mmornati/ghost-cloudinary-store) saves to Cloudinary
* [ghost-storage-cloudinary](https://github.com/eexit/ghost-storage-cloudinary) saves to Cloudinary with RetinaJS support
* [upyun-ghost-store](https://github.com/sanddudu/upyun-ghost-store) saves to Upyun
* [ghost-upyun-store](https://github.com/pupboss/ghost-upyun-store) saves to Upyun
* [ghost-google-drive](https://github.com/robincsamuel/ghost-google-drive) saves to Google Drive
* [ghost-azure-storage](https://github.com/tparnell8/ghost-azurestorage) saves to Azure Storage
* [ghost-imgur](https://github.com/wrenth04/ghost-imgur) saves to Imgur
* [google-cloud-storage](https://github.com/thombuchi/ghost-google-cloud-storage) saves to Google Cloud Storage
* [ghost-oss-store](https://github.com/MT-Libraries/ghost-oss-store) saves to Aliyun OSS
* [ghost-b2](https://github.com/martiendt/ghost-storage-adapter-b2) saves to Backblaze B2
* [ghost-github](https://github.com/ifvictr/ghost-github) saves to GitHub
* [pages-store](https://github.com/zce/pages-store) saves to GitHub Pages or other pages service, e.g. Coding Pages
* [WebDAV Storage](https://github.com/bartt/ghost-webdav-storage-adapter) saves to a WebDAV server.
* [ghost-qcloud-cos](https://github.com/ZhelinCheng/ghost-qcloud-cos) saves to Tencent Cloud COS.
* [ghost-bunny-cdn-storage](https://github.com/betschki/ghost-bunny-cdn-storage/) saves to BunnyCDN.
#### Creating a custom storage adapter
To replace the storage module with a custom solution, use the requirements detailed below. You can also take a look at our [default local storage implementation](https://github.com/TryGhost/Ghost/blob/fa1861aad3ba4e5e1797cec346f775c5931ca856/ghost/core/core/server/adapters/storage/LocalFilesStorage.js).
**Location**
1. Create a new folder named `storage` inside `content/adapters`
2. Inside of `content/adapters/storage`, create a file or a folder: `content/adapters/storage/my-module.js` or `content/adapters/storage/my-module` — if using a folder, create a file called `index.js` inside it.
**Base adapter class inheritance**
A custom storage adapter must inherit from the base storage adapter. By default, the base storage adapter is installed by Ghost and available in your custom adapter.
```js
const BaseAdapter = require('ghost-storage-base');
class MyCustomAdapter extends BaseAdapter{
constructor() {
super();
}
}
module.exports = MyCustomAdapter;
```
**Required methods**
Your custom storage adapter must implement five required functions:
* `save` - The `.save()` method stores the image and returns a promise which resolves the path from which the image should be requested in future.
* `exists` - Used by the base storage adapter to check whether a file exists or not
* `serve` - Ghost calls `.serve()` as part of its middleware stack, and mounts the returned function as the middleware for serving images
* `delete`
* `read`
```js
const BaseAdapter = require('ghost-storage-base');
class MyCustomAdapter extends BaseAdapter{
constructor() {
super();
}
exists() {
}
save() {
}
serve() {
return function customServe(req, res, next) {
next();
}
}
delete() {
}
read() {
}
}
module.exports = MyCustomAdapter;
```
### Cache adapters
The cache layer is used for storing data that needs to be quickly accessible in a format requiring no additional processing. For example, the “imageSizes” cache stores images generated at different sizes based on the fetched URL. This request is a relatively expensive operation, which would otherwise slow down the response time of the Ghost server. Having calculated image sizes cached per image URL makes the image size lookup almost instant with only a little overhead on the initial image fetch.
By default, Ghost keeps caches in memory. The upsides of this approach are:
* no need for external dependencies
* very fast access to data
The downsides are:
* Having no persistence between Ghost restarts — cache has to be repopulated on every restart
* RAM is a limited resource that can be depleted by too many cached values
With custom cache adapters, like Redis storage, the cache can expand its size independently of the server’s system memory and persist its values between Ghost restarts.
#### Ghost’s built-in Redis cache adapter
Ghost’s built-in Redis cache adapter solves the downsides named above by persisting across Ghost restarts and not being limited by the Ghost instance’s RAM capacity. [Implementing a Redis cache](https://redis.io/docs/getting-started/installation/) is a good solution for sites with high load and complicated templates, ones using lots of `get` helpers. Note that this adapter requires Redis to be set up and running in addition to Ghost.
To use the Redis cache adapter, change the value for the cache adapter from “Memory” to “Redis” in the site’s configuration file. In the following example, image sizes and the tags Content API endpoint are cached in Redis for optimized performance.
```json
"adapters": {
"cache": {
"imageSizes": {
"adapter": "Redis",
"ttl": 3600,
"keyPrefix": "image-sizes:"
}
}
},
```
Note that the `ttl` value is in seconds.
#### Custom cache adapters
To use a custom cache adapter, update your custom configuration file. At the moment, only the `imageSizes` feature supports full customization. Configuration is as follows:
```json
"cache": {
"imageSizes": "my-cache-module",
"my-cache-module": {
"key": "cache_module_value"
}
}
```
The `cache` block should have 2 items:
* A feature key, `"imageSizes"`, which contains the name of your custom caching module
* A `key` that reflects the name of your caching module, containing any config your module needs
#### Creating a custom cache adapter
To replace the caching module, use the requirements below. You can also take a look at our [default in-memory caching implementation](https://github.com/TryGhost/Ghost/blob/eb6534bd7fd905b9f402c1f446c87bff455b6f17/ghost/core/core/server/adapters/cache/Memory.js).
#### Location
1. Create a new folder named `cache` inside `content/adapters`
2. Inside of `content/adapters/cache`, create a file or a folder: `content/adapters/cache/my-cache-module.js` or `content/adapters/cache/my-cache-module` - if using a folder, create a file called `index.js` inside it.
#### Base cache adapter class inheritance
A custom cache adapter must inherit from the base cache adapter. By default the base cache adapter is installed by Ghost and available in your custom adapter.
```js
const BaseCacheAdapter = require('@tryghost/adapter-base-cache');
class MyCustomCacheAdapter extends BaseCacheAdapter{
constructor() {
super();
}
}
module.exports = MyCustomCacheAdapter;
```
#### Required methods
Your custom cache adapter must implement the following required functions:
* `get` - fetches the stored value based on the key value (`.get('some_key')`). It’s an async method - the implementation returns a `Promise` that resolves with the stored value.
* `set` - sets the value in the underlying cache based on key and value parameters. It’s an async method - the implementation returns a `Promise` that resolves once the value is stored.
* `keys` - fetches all keys present in the cache. It’s an async method — the implementation returns a `Promise` that resolves with an array of strings.
* `reset` - clears the cache. This method is not meant to be used in production code - it’s here for test suite purposes *only*.
```js
const BaseCacheAdapter = require('@tryghost/adapter-base-cache');
class MyCustomCacheAdapter extends BaseCacheAdapter {
constructor(config) {
super();
}
/**
* @param {String} key
*/
async get(key) {
}
/**
* @param {String} key
* @param {*} value
*/
async set(key, value) {
}
/**
* @returns {Promise>} all keys present in the cache
*/
async keys() {
}
/**
* @returns {Promise<*>} clears the cache. Not meant for production
*/
async reset() {
}
}
module.exports = MyCustomCacheAdapter;
```
#### Redis cache adapter
### Logging
Configure how Ghost should log, for example:
```json
"logging": {
"path": "something/",
"useLocalTime": true,
"level": "info",
"rotation": {
"enabled": true,
"count": 15,
"period": "1d"
},
"transports": ["stdout", "file"]
}
```
#### `level`
The default log level is `info` which prints all info, warning and error logs. Set it to `error` to only print errors.
#### `rotation`
Tell Ghost to rotate your log files. By default Ghost keeps 10 log files and rotates every day. Rotation is enabled by default in production and disabled in development.
#### `transports`
Define where Ghost should log to. By default Ghost writes to stdout and into file for production, and to stdout only for development.
#### `path`
Log your content path, e.g. `content/logs/`. Set any path but ensure the permissions are correct to write into this folder.
#### `useLocalTime`
Configure log timestamps to use the local timezone. Defaults to `false`.
### Spam
Tell Ghost how to treat [spam requests](https://github.com/TryGhost/Ghost/blob/ff61b330491b594997b5b156215417b5d7687743/ghost/core/core/shared/config/defaults.json#L64).
### Caching
Configure [HTTP caching](https://developer.mozilla.org/en-US/docs/Web/HTTP/Caching) for HTTP responses served from Ghost.
`caching` configuration is available for responses containing `public` value in `Cache-Control` header. Each key under `caching` section contains `maxAge` property that controls the `max-age` value in `Cache-Control` header. For example, the following configuration:
```json
"caching": {
"contentAPI": {
"maxAge": 10
}
}
```
Adds `Cache-Control: public, max-age=10` header with all Content API responses, which might be useful to set for high-volume sites where content does not change often.
The following configuration keys are available with default `maxAge` values:
* “frontend” - with `"maxAge": 0`, controls responses coming from public Ghost pages (like the homepage)
* “contentAPI” - with `"maxAge": 0`, controls responses coming from [Content API](/content-api/)
* “robotstxt” - with `"maxAge": 3600`, controls responses for `robots.txt` [files](/themes/structure/#robotstxt)
* “sitemap” - with `"maxAge": 3600`, controls responses for `sitemap.xml` [files](https://ghost.org/changelog/xml-sitemaps/)
* “sitemapXSL” - with `"maxAge": 86400`, controls responses for `sitemap.xsl` files
* “wellKnown” - with `"maxAge": 86400`, controls responses coming from `*/.wellknown/*` endpoints
* “cors” - with `"maxAge": 86400`, controls responses for `OPTIONS` [CORS](https://developer.mozilla.org/en-US/docs/Web/HTTP/CORS) requests
* “publicAssets” - with `"maxAge": 31536000`, controls responses for public assets like `public/ghost.css`, `public/cards.min.js`, etc.
* “301” - with `"maxAge": 31536000`, controls 301 redirect responses
* “customRedirects” - with `"maxAge": 31536000`, controls redirects coming from [custom redirects](/themes/routing/#redirects)
### Compress
The compression flag is turned on by default using `"compress": true`. Alternatively, you can turn it off with `"compress": false`.
### Image optimization
When uploading images into the Ghost editor, they are automatically processed and compressed by default. This can be disabled in your `config.[env].json` file using:
```json
"imageOptimization": {
"resize": false
}
```
Image compression details:
* Resize the image to 2000px max width
* JPEGs are compressed to 80% quality.
* Metadata is removed
The original image is kept with the suffix `_o`.
### OpenSea
When creating NFT embeds, Ghost fetches the information from the [OpenSea](https://opensea.io) API. This API is rate limited, and OpenSea request that you use an API key in production environments.
You can [request an OpenSea API key](https://docs.opensea.io/reference/api-keys) from them directly, without needing an account.
```json
"opensea": {
"privateReadOnlyApiKey": "..."
}
```
### Tenor
To enable searching for GIFs directly in the editor, provide an API key for [Tenor](https://tenor.com).
You can [request a Tenor API key](https://developers.google.com/tenor/guides/quickstart) from Google’s cloud console, for free.
```json
"tenor": {
"googleApiKey": "..."
}
```
### Twitter
In order to display Twitter cards in newsletter emails, Ghost needs to be able to fetch data from the Twitter API and requires a Bearer Token to do so.
You can [request Twitter API access](https://developer.twitter.com) from them via their developer portal.
```json
"twitter": {
"privateReadOnlyToken": "..."
}
```
### Pintura
[Pintura](https://pqina.nl/pintura/) is an image editor that integrates with Ghost. After purchasing a license, upload the JS and CSS files via **Integrations** → **Pintura**.
In addition to this information, you’ll need the password, which can be obtained by clicking the **Reset Password** button. Keep these details for future reference.
Mailgun provides options for using their own subdomains for sending emails, as well as custom domains for a [competitive price](/faq/mailgun-newsletters/#did-you-know-mailgun-doesn-t-have-free-accounts-anymore).
#### Add credentials to `config.production.json`
Open your production config file in any code editor and add the following mail configuration, making sure to update the values to the same credentials shown in your own Mailgun SMTP settings:
```json
// config.production.json
"mail": {
"transport": "SMTP",
"options": {
"service": "Mailgun",
"auth": {
"user": "postmaster@example.mailgun.org",
"pass": "1234567890"
}
}
},
```
Once you are finished, hit save and then run `ghost restart` for your changes to take effect. These same credentials can be used for development environments, by adding them to the `config.development.json` file.
Mailgun provides a sandbox mode, which restricts emails to authorized recipients. Once sandbox mode is enabled, add and verify the email addresses you want to send emails to prior to testing.
#### Secure connection
Depending on your Mailgun settings you may want to force a secure SMTP connection. Update your `config.production.json` with the following for a secure connection:
```json
// config.production.json
"mail": {
"transport": "SMTP",
"options": {
"service": "Mailgun",
"host": "smtp.mailgun.org",
"port": 465,
"secure": true,
"auth": {
"user": "postmaster@example.mailgun.org",
"pass": "1234567890"
}
}
},
```
As always, hit save and run `ghost restart` for your changes to take effect.
#### Amazon SES
It’s also possible to use [Amazon Simple Email Service](https://aws.amazon.com/ses/). Use the SMTP username and password given when signing up and configure your `config.[env].json` file as follows:
```json
"mail": {
"transport": "SMTP",
"options": {
"host": "YOUR-SES-SERVER-NAME",
"port": 465,
"service": "SES",
"auth": {
"user": "YOUR-SES-SMTP-ACCESS-KEY-ID",
"pass": "YOUR-SES-SMTP-SECRET-ACCESS-KEY"
}
}
}
```
#### Email addresses
**Default email address**
Ghost uses the value set in `mail.from` as the default email address:
```json
"mail": {
"from": "support@example.com",
}
```
A custom name can also optionally be provided:
```json
"mail": {
"from": "'Acme Support' ",
}
```
Try to use a real, working email address - as this greatly improves delivery rates for important emails sent by Ghost (Like password reset requests and user invitations). If you have a company support email address, this is a good place to use it.
**Support email address**
When setting a custom support email address via **Settings** → **Portal settings** → **Account page**, you override the default email address for member communications like sign-in/sign-up emails and member notifications.
**Newsletter addresses**
It’s also possible to set a separate sender and reply-to address per newsletter, which will be used instead of the default. Configure these addresses via **Settings** → **Newsletters**.
The table below shows which email is used based on email type. In the table, if an address is not, it falls back to the next available address until reaching the default.
| Email type | Address used | Examples |
| -------------------- | ------------------- | ---------------------------------- |
| Member notifications | Support, Default | Signup/sign links, comment replies |
| Newsletters | Newsletter, Default | Configurable per newsletter |
| Staff notifications | Default | Recommendations, signups |
Irrespective of how you configure email addresses, maximize deliverability by ensuring DKIM, SPF, and DMARC records are configured for your sending domains.
### Admin URL
Admin can be used to specify a different protocol for your admin panel or a different hostname (domain name). It can’t affect the path at which the admin panel is served (this is always /ghost/).
```json
"admin": {
"url": "http://example.com"
}
```
### Server
The server host and port are the IP address and port number that Ghost listens on for requests. By default, requests are routed from port 80 to Ghost by nginx (recommended), or Apache.
```json
"server": {
"host": "127.0.0.1",
"port": 2368
}
```
### Privacy
All features inside the privacy.md file are enabled by default. It is possible to turn these off in order to protect privacy:
* Update check
* Gravatar
* RPC ping
* Structured data
For more information about the features, read the [privacy.md page](https://github.com/TryGhost/Ghost/blob/2f09dd888024f143d28a0d81bede1b53a6db9557/PRIVACY.md).
To turn off **all** of the features, use:
```json
"privacy": {
"useTinfoil": true
}
```
Alternatively, configure each feature individually:
```json
"privacy": {
"useUpdateCheck": false,
"useGravatar": false,
"useRpcPing": false,
"useStructuredData": false
}
```
### Security
By default Ghost will email an auth code when it detects a login from a new device. To disable this feature, use:
```json
"security": {
"staffDeviceVerification": false
}
```
Note: if you want to force 2FA for all staff logins, not just new devices, you can do so under the Settings > Staff in the admin panel
### Paths
The configuration of paths can be relative or absolute. To use a content directory that does not live inside the Ghost folder, specify a paths object with a new contentPath:
```json
"paths": {
"contentPath": "content/"
},
```
When using a custom content path, the content directory must exist and contain subdirectories for data, images, themes, logs, and adapters.
If using a SQLite database, you’ll also need to update the path to your database to match the new location of the data folder.
### Referrer Policy
Set the value of the content attribute of the meta referrer HTML tag by adding referrerPolicy to your config. `origin-when-crossorigin` is the default. Read through all possible [options](https://www.w3.org/TR/referrer-policy/#referrer-policies/).
## Adapters
Ghost allows for customizations at multiple layers through an adapter system. Customizable layers include: `storage`, `caching`, `sso`, and `scheduling`.
Use the `adapters` configuration block with “storage”, “caching”, “sso,” or “scheduling” keys to initialize a custom adapter. For example, the following configuration uses `storage-module-name` to handle all `storage` capabilities in Ghost. Note that the `active` key indicates a default adapter used for all features if no other adapters are declared.
```json
"adapters": {
"storage": {
"active": "storage-module-name",
"storage-module-name": {
"key": "value"
}
}
}
```
Customize parts of Ghost’s features by declaring adapters at the feature level. For example, to use a custom `cache` adapter only for the `imageSizes` feature, configure the cache adapter as follows:
```json
"adapters": {
"cache": {
"custom-redis-cache-adapter": {
"host": "localhost",
"port": 6379,
"password": "secret_password"
},
"imageSizes": {
"adapter": "custom-redis-cache-adapter",
"ttl": 3600
}
}
}
```
The above declaration uses the `custom-redis-cache-adapter` only for the `imageSizes` cache feature with these values:
```json
{
"host": "localhost",
"port": 6379,
"password": "secret_password",
"ttl": 3600
}
```
### Storage adapters
The storage layer is used to store images uploaded from the Ghost Admin UI, API, or when images are included in a zip file uploaded via the importer. Using a custom storage module allows you to change where images are stored without changing Ghost core.
By default, Ghost stores uploaded images in the file system. The default location is the Ghost content path in your Ghost folder under `content/images` or an alternative custom content path that’s been configured.
To use a custom storage adapter, your custom configuration file needs to be updated to provide configuration for your new storage module and set it as active:
```json
"storage": {
"active": "my-module",
"my-module": {
"key": "abcdef"
}
}
```
The storage block should have 2 items:
* An active key, which contains the name\* of your module
* A key that reflects the name\* of your module, containing any config your module needs
#### Available storage features
* `images` - storage of image files uploaded through `POST '/images/upload'` endpoint
* `media` - storage of media files uploaded through `POST '/media/upload'` and `POST/media/thumbnail/upload` endpoints
* `files` - storage of generic files uploaded through `POST '/files/upload'` endpoint
#### Available custom storage adapters
* [local-file-store](https://github.com/TryGhost/Ghost/blob/fa1861aad3ba4e5e1797cec346f775c5931ca856/ghost/core/core/server/adapters/storage/LocalFilesStorage.js) (default) saves images to the local filesystem
* [http-store](https://gist.github.com/ErisDS/559e11bf3e84b89a9594) passes image requests through to an HTTP endpoint
* [s3-store](https://github.com/spanishdict/ghost-s3-compat) saves to Amazon S3 and proxies requests to S3
* [s3-store](https://github.com/colinmeinke/ghost-storage-adapter-s3) saves to Amazon S3 and works with 0.10+
* [qn-store](https://github.com/Minwe/qn-store) saves to Qiniu
* [ghost-cloudinary-store](https://github.com/mmornati/ghost-cloudinary-store) saves to Cloudinary
* [ghost-storage-cloudinary](https://github.com/eexit/ghost-storage-cloudinary) saves to Cloudinary with RetinaJS support
* [upyun-ghost-store](https://github.com/sanddudu/upyun-ghost-store) saves to Upyun
* [ghost-upyun-store](https://github.com/pupboss/ghost-upyun-store) saves to Upyun
* [ghost-google-drive](https://github.com/robincsamuel/ghost-google-drive) saves to Google Drive
* [ghost-azure-storage](https://github.com/tparnell8/ghost-azurestorage) saves to Azure Storage
* [ghost-imgur](https://github.com/wrenth04/ghost-imgur) saves to Imgur
* [google-cloud-storage](https://github.com/thombuchi/ghost-google-cloud-storage) saves to Google Cloud Storage
* [ghost-oss-store](https://github.com/MT-Libraries/ghost-oss-store) saves to Aliyun OSS
* [ghost-b2](https://github.com/martiendt/ghost-storage-adapter-b2) saves to Backblaze B2
* [ghost-github](https://github.com/ifvictr/ghost-github) saves to GitHub
* [pages-store](https://github.com/zce/pages-store) saves to GitHub Pages or other pages service, e.g. Coding Pages
* [WebDAV Storage](https://github.com/bartt/ghost-webdav-storage-adapter) saves to a WebDAV server.
* [ghost-qcloud-cos](https://github.com/ZhelinCheng/ghost-qcloud-cos) saves to Tencent Cloud COS.
* [ghost-bunny-cdn-storage](https://github.com/betschki/ghost-bunny-cdn-storage/) saves to BunnyCDN.
#### Creating a custom storage adapter
To replace the storage module with a custom solution, use the requirements detailed below. You can also take a look at our [default local storage implementation](https://github.com/TryGhost/Ghost/blob/fa1861aad3ba4e5e1797cec346f775c5931ca856/ghost/core/core/server/adapters/storage/LocalFilesStorage.js).
**Location**
1. Create a new folder named `storage` inside `content/adapters`
2. Inside of `content/adapters/storage`, create a file or a folder: `content/adapters/storage/my-module.js` or `content/adapters/storage/my-module` — if using a folder, create a file called `index.js` inside it.
**Base adapter class inheritance**
A custom storage adapter must inherit from the base storage adapter. By default, the base storage adapter is installed by Ghost and available in your custom adapter.
```js
const BaseAdapter = require('ghost-storage-base');
class MyCustomAdapter extends BaseAdapter{
constructor() {
super();
}
}
module.exports = MyCustomAdapter;
```
**Required methods**
Your custom storage adapter must implement five required functions:
* `save` - The `.save()` method stores the image and returns a promise which resolves the path from which the image should be requested in future.
* `exists` - Used by the base storage adapter to check whether a file exists or not
* `serve` - Ghost calls `.serve()` as part of its middleware stack, and mounts the returned function as the middleware for serving images
* `delete`
* `read`
```js
const BaseAdapter = require('ghost-storage-base');
class MyCustomAdapter extends BaseAdapter{
constructor() {
super();
}
exists() {
}
save() {
}
serve() {
return function customServe(req, res, next) {
next();
}
}
delete() {
}
read() {
}
}
module.exports = MyCustomAdapter;
```
### Cache adapters
The cache layer is used for storing data that needs to be quickly accessible in a format requiring no additional processing. For example, the “imageSizes” cache stores images generated at different sizes based on the fetched URL. This request is a relatively expensive operation, which would otherwise slow down the response time of the Ghost server. Having calculated image sizes cached per image URL makes the image size lookup almost instant with only a little overhead on the initial image fetch.
By default, Ghost keeps caches in memory. The upsides of this approach are:
* no need for external dependencies
* very fast access to data
The downsides are:
* Having no persistence between Ghost restarts — cache has to be repopulated on every restart
* RAM is a limited resource that can be depleted by too many cached values
With custom cache adapters, like Redis storage, the cache can expand its size independently of the server’s system memory and persist its values between Ghost restarts.
#### Ghost’s built-in Redis cache adapter
Ghost’s built-in Redis cache adapter solves the downsides named above by persisting across Ghost restarts and not being limited by the Ghost instance’s RAM capacity. [Implementing a Redis cache](https://redis.io/docs/getting-started/installation/) is a good solution for sites with high load and complicated templates, ones using lots of `get` helpers. Note that this adapter requires Redis to be set up and running in addition to Ghost.
To use the Redis cache adapter, change the value for the cache adapter from “Memory” to “Redis” in the site’s configuration file. In the following example, image sizes and the tags Content API endpoint are cached in Redis for optimized performance.
```json
"adapters": {
"cache": {
"imageSizes": {
"adapter": "Redis",
"ttl": 3600,
"keyPrefix": "image-sizes:"
}
}
},
```
Note that the `ttl` value is in seconds.
#### Custom cache adapters
To use a custom cache adapter, update your custom configuration file. At the moment, only the `imageSizes` feature supports full customization. Configuration is as follows:
```json
"cache": {
"imageSizes": "my-cache-module",
"my-cache-module": {
"key": "cache_module_value"
}
}
```
The `cache` block should have 2 items:
* A feature key, `"imageSizes"`, which contains the name of your custom caching module
* A `key` that reflects the name of your caching module, containing any config your module needs
#### Creating a custom cache adapter
To replace the caching module, use the requirements below. You can also take a look at our [default in-memory caching implementation](https://github.com/TryGhost/Ghost/blob/eb6534bd7fd905b9f402c1f446c87bff455b6f17/ghost/core/core/server/adapters/cache/Memory.js).
#### Location
1. Create a new folder named `cache` inside `content/adapters`
2. Inside of `content/adapters/cache`, create a file or a folder: `content/adapters/cache/my-cache-module.js` or `content/adapters/cache/my-cache-module` - if using a folder, create a file called `index.js` inside it.
#### Base cache adapter class inheritance
A custom cache adapter must inherit from the base cache adapter. By default the base cache adapter is installed by Ghost and available in your custom adapter.
```js
const BaseCacheAdapter = require('@tryghost/adapter-base-cache');
class MyCustomCacheAdapter extends BaseCacheAdapter{
constructor() {
super();
}
}
module.exports = MyCustomCacheAdapter;
```
#### Required methods
Your custom cache adapter must implement the following required functions:
* `get` - fetches the stored value based on the key value (`.get('some_key')`). It’s an async method - the implementation returns a `Promise` that resolves with the stored value.
* `set` - sets the value in the underlying cache based on key and value parameters. It’s an async method - the implementation returns a `Promise` that resolves once the value is stored.
* `keys` - fetches all keys present in the cache. It’s an async method — the implementation returns a `Promise` that resolves with an array of strings.
* `reset` - clears the cache. This method is not meant to be used in production code - it’s here for test suite purposes *only*.
```js
const BaseCacheAdapter = require('@tryghost/adapter-base-cache');
class MyCustomCacheAdapter extends BaseCacheAdapter {
constructor(config) {
super();
}
/**
* @param {String} key
*/
async get(key) {
}
/**
* @param {String} key
* @param {*} value
*/
async set(key, value) {
}
/**
* @returns {Promise>} all keys present in the cache
*/
async keys() {
}
/**
* @returns {Promise<*>} clears the cache. Not meant for production
*/
async reset() {
}
}
module.exports = MyCustomCacheAdapter;
```
#### Redis cache adapter
### Logging
Configure how Ghost should log, for example:
```json
"logging": {
"path": "something/",
"useLocalTime": true,
"level": "info",
"rotation": {
"enabled": true,
"count": 15,
"period": "1d"
},
"transports": ["stdout", "file"]
}
```
#### `level`
The default log level is `info` which prints all info, warning and error logs. Set it to `error` to only print errors.
#### `rotation`
Tell Ghost to rotate your log files. By default Ghost keeps 10 log files and rotates every day. Rotation is enabled by default in production and disabled in development.
#### `transports`
Define where Ghost should log to. By default Ghost writes to stdout and into file for production, and to stdout only for development.
#### `path`
Log your content path, e.g. `content/logs/`. Set any path but ensure the permissions are correct to write into this folder.
#### `useLocalTime`
Configure log timestamps to use the local timezone. Defaults to `false`.
### Spam
Tell Ghost how to treat [spam requests](https://github.com/TryGhost/Ghost/blob/ff61b330491b594997b5b156215417b5d7687743/ghost/core/core/shared/config/defaults.json#L64).
### Caching
Configure [HTTP caching](https://developer.mozilla.org/en-US/docs/Web/HTTP/Caching) for HTTP responses served from Ghost.
`caching` configuration is available for responses containing `public` value in `Cache-Control` header. Each key under `caching` section contains `maxAge` property that controls the `max-age` value in `Cache-Control` header. For example, the following configuration:
```json
"caching": {
"contentAPI": {
"maxAge": 10
}
}
```
Adds `Cache-Control: public, max-age=10` header with all Content API responses, which might be useful to set for high-volume sites where content does not change often.
The following configuration keys are available with default `maxAge` values:
* “frontend” - with `"maxAge": 0`, controls responses coming from public Ghost pages (like the homepage)
* “contentAPI” - with `"maxAge": 0`, controls responses coming from [Content API](/content-api/)
* “robotstxt” - with `"maxAge": 3600`, controls responses for `robots.txt` [files](/themes/structure/#robotstxt)
* “sitemap” - with `"maxAge": 3600`, controls responses for `sitemap.xml` [files](https://ghost.org/changelog/xml-sitemaps/)
* “sitemapXSL” - with `"maxAge": 86400`, controls responses for `sitemap.xsl` files
* “wellKnown” - with `"maxAge": 86400`, controls responses coming from `*/.wellknown/*` endpoints
* “cors” - with `"maxAge": 86400`, controls responses for `OPTIONS` [CORS](https://developer.mozilla.org/en-US/docs/Web/HTTP/CORS) requests
* “publicAssets” - with `"maxAge": 31536000`, controls responses for public assets like `public/ghost.css`, `public/cards.min.js`, etc.
* “301” - with `"maxAge": 31536000`, controls 301 redirect responses
* “customRedirects” - with `"maxAge": 31536000`, controls redirects coming from [custom redirects](/themes/routing/#redirects)
### Compress
The compression flag is turned on by default using `"compress": true`. Alternatively, you can turn it off with `"compress": false`.
### Image optimization
When uploading images into the Ghost editor, they are automatically processed and compressed by default. This can be disabled in your `config.[env].json` file using:
```json
"imageOptimization": {
"resize": false
}
```
Image compression details:
* Resize the image to 2000px max width
* JPEGs are compressed to 80% quality.
* Metadata is removed
The original image is kept with the suffix `_o`.
### OpenSea
When creating NFT embeds, Ghost fetches the information from the [OpenSea](https://opensea.io) API. This API is rate limited, and OpenSea request that you use an API key in production environments.
You can [request an OpenSea API key](https://docs.opensea.io/reference/api-keys) from them directly, without needing an account.
```json
"opensea": {
"privateReadOnlyApiKey": "..."
}
```
### Tenor
To enable searching for GIFs directly in the editor, provide an API key for [Tenor](https://tenor.com).
You can [request a Tenor API key](https://developers.google.com/tenor/guides/quickstart) from Google’s cloud console, for free.
```json
"tenor": {
"googleApiKey": "..."
}
```
### Twitter
In order to display Twitter cards in newsletter emails, Ghost needs to be able to fetch data from the Twitter API and requires a Bearer Token to do so.
You can [request Twitter API access](https://developer.twitter.com) from them via their developer portal.
```json
"twitter": {
"privateReadOnlyToken": "..."
}
```
### Pintura
[Pintura](https://pqina.nl/pintura/) is an image editor that integrates with Ghost. After purchasing a license, upload the JS and CSS files via **Integrations** → **Pintura**.
 ### Portal
Ghost automatically loads the scripts for Portal from jsDelivr.net. The default configuration is shown below.
The script can be relocated by changing the URL, or disabled entirely by setting `"url": false`.
```json
"portal": {
"url": "https://cdn.jsdelivr.net/npm/@tryghost/portal@~{version}/umd/portal.min.js"
}
```
### Search
Ghost automatically loads the scripts & styles for search from jsDelivr.net. The default configuration is shown below.
The script and stylesheet can be relocated by changing the URLs, or disabled entirely by setting `"url": false`.
```json
"sodoSearch": {
"url": "https://cdn.jsdelivr.net/npm/@tryghost/sodo-search@~{version}/umd/sodo-search.min.js",
"styles": "https://cdn.jsdelivr.net/npm/@tryghost/sodo-search@~{version}/umd/main.css"
},
```
### Comments
Ghost automatically loads the scripts & styles for comments from jsDelivr.net. The default configuration is shown below.
The script and stylesheet can be relocated by changing the URLs, or disabled entirely by setting `"url": false`.
```json
"comments": {
"url": "https://cdn.jsdelivr.net/npm/@tryghost/comments-ui@~{version}/umd/comments-ui.min.js",
"styles": "https://cdn.jsdelivr.net/npm/@tryghost/comments-ui@~{version}/umd/main.css"
}
```
# Overview
Source: https://docs.ghost.org/content-api
Ghost’s RESTful Content API delivers published content to the world and can be accessed in a read-only manner by any client to render in a website, app, or other embedded media.
***
Access control is managed via an API key, and even the most complex filters are made simple with our SDK. The Content API is designed to be fully cachable, meaning you can fetch data as often as you like without limitation.
***
## API Clients
### JavaScript Client Library
We’ve developed an [API client for JavaScript](/content-api/javascript/) that will allow you to quickly and easily interact with the Content API. The client is an advanced wrapper on top of our REST API - everything that can be done with the Content API can be done using the client, with no need to deal with the details of authentication or the request & response format.
***
## URL
`https://{admin_domain}/ghost/api/content/`
Your admin domain can be different to your site domain. Using the correct domain and protocol are critical to getting consistent behaviour, particularly when dealing with CORS in the browser. All Ghost(Pro) blogs have a `*.ghost.io domain` as their admin domain and require https.
### Key
`?key={key}`
Content API keys are provided via a query parameter in the URL. These keys are safe for use in browsers and other insecure environments, as they only ever provide access to public data. Sites in private mode should consider where they share any keys they create.
Obtain the Content API URL and key by creating a new `Custom Integration` under the **Integrations** screen in Ghost Admin.
### Accept-Version Header
`Accept-Version: v{major}.{minor}`
Use the `Accept-Version` header to indicate the minimum version of Ghost’s API to operate with. See [API Versioning](/faq/api-versioning/) for more details.
### Working Example
```bash
# cURL
# Real endpoint - copy and paste to see!
curl -H "Accept-Version: v5.0" "https://demo.ghost.io/ghost/api/content/posts/?key=22444f78447824223cefc48062"
```
***
## Endpoints
The Content API provides access to Posts, Pages, Tags, Authors, Tiers, and Settings. All endpoints return JSON and are considered [stable](/faq/api-versioning/).
### Working Example
| Verb | Path | Method |
| ---- | ---------------------------------------------- | --------------------- |
| GET | [/posts/](/content-api/posts) | Browse posts |
| GET | [/posts/\{id}/](/content-api/posts) | Read a post by ID |
| GET | [/posts/slug/\{slug}/](/content-api/posts) | Read a post by slug |
| GET | [/authors/](/content-api/authors) | Browse authors |
| GET | [/authors/\{id}/](/content-api/authors) | Read an author by ID |
| GET | [/authors/slug/\{slug}/](/content-api/authors) | Read a author by slug |
| GET | [/tags/](/content-api/tags) | Browse tags |
| GET | [/tags/\{id}/](/content-api/tags) | Read a tag by ID |
| GET | [/tags/slug/\{slug}/](/content-api/tags) | Read a tag by slug |
| GET | [/pages/](/content-api/pages) | Browse pages |
| GET | [/pages/\{id}/](/content-api/pages) | Read a page by ID |
| GET | [/pages/slug/\{slug}/](/content-api/pages) | Read a page by slug |
| GET | [/tiers/](/content-api/tiers) | Browse tiers |
| GET | [/settings/](/content-api/settings) | Browse settings |
The Content API supports two types of request: Browse and Read. Browse endpoints allow you to fetch lists of resources, whereas Read endpoints allow you to fetch a single resource.
***
## Resources
The API will always return valid JSON in the same structure:
```json
{
"resource_type": [{
...
}],
"meta": {}
}
```
* `resource_type`: will always match the resource name in the URL. All resources are returned wrapped in an array, with the exception of `/site/` and `/settings/`.
* `meta`: contains [pagination](/content-api/pagination) information for browse requests.
# Authors
Source: https://docs.ghost.org/content-api/authors
Authors are a subset of [users](/staff/) who have published posts associated with them.
```js
GET /content/authors/
GET /content/authors/{id}/
GET /content/authors/slug/{slug}/
```
Authors that are not associated with a post are not returned. You can supply `include=count.posts` to retrieve the number of posts associated with an author.
```json
{
"authors": [
{
"slug": "cameron",
"id": "5ddc9b9510d8970038255d02",
"name": "Cameron Almeida",
"profile_image": "https://docs.ghost.io/content/images/2019/03/1c2f492a-a5d0-4d2d-b350-cdcdebc7e413.jpg",
"cover_image": null,
"bio": "Editor at large.",
"website": "https://example.com",
"location": "Cape Town",
"facebook": "example",
"twitter": "@example",
"meta_title": null,
"meta_description": null,
"url": "https://docs.ghost.io/author/cameron/"
}
]
}
```
# Errors
Source: https://docs.ghost.org/content-api/errors
The Content API will generate errors for the following cases:
* Status 400: Badly formed queries e.g. filter parameters that are not correctly encoded
* Status 401: Authentication failures e.g. unrecognized keys
* Status 403: Permissions errors e.g. under-privileged users
* Status 404: Unknown resources e.g. data which is not public
* Status 500: Server errors e.g. where something has gone
Errors are also formatted in JSON, as an array of error objects. The HTTP status code of the response along with the `errorType` property indicate the type of error.
The `message` field is designed to provide clarity on what exactly has gone wrong.
```json
{
"errors": [
{
"message": "Unknown Content API Key",
"errorType": "UnauthorizedError"
}
]
}
```
# Filtering
Source: https://docs.ghost.org/content-api/filtering
Ghost uses a query language called NQL to allow filtering API results. You can filter any field or included field using matches, greater/less than or negation, as well as combining with and/or. NQL doesn’t yet support ’like’ or partial matches.
Filter strings must be URL encoded. The [\{\{get}}](/themes/helpers/functional/get/) helper and [client library](/content-api/javascript/) handle this for you.
At it’s most simple, filtering works the same as in GMail, GitHub or Slack - you provide a field and a value, separated by a colon.
### Syntax Reference
#### Filter Expressions
A **filter expression** is a string which provides the **property**, **operator** and **value** in the form **property:*operator*value**:
* **property** - a path representing the field to filter on
* **:** - separator between **property** and an **operator**-**value** expression
* **operator** (optional) - how to compare values (`:` on its own is roughly `=`)
* **value** - the value to match against
#### Property
Matches: `[a-zA-Z_][a-zA-Z0-9_.]`
* can contain only alpha-numeric characters and `_`
* cannot contain whitespace
* must start with a letter
* supports `.` separated paths, E.g. `authors.slug` or `posts.count`
* is always lowercase, but accepts and converts uppercase
#### Value
Can be one of the following
* **null**
* **true**
* **false**
* a ***number*** (integer)
* a **literal**
* Any character string which follows these rules:
* Cannot start with `-` but may contain it
* Cannot contain any of these symbols: `'"+,()><=[]` unless they are escaped
* Cannot contain whitespace
* a **string**
* `'` string here `'` Any character except a single or double quote surrounded by single quotes
* Single or Double quote \_\_MUST \_\_be escaped\*
* Can contain whitespace
* A string can contain a date any format that can be understood by `new Date()`
* a **relative date**
* Uses the pattern now-30d
* Must start with now
* Can use - or +
* Any integer can be used for the size of the interval
* Supports the following intervals: d, w, M, y, h, m, s
#### Operators
* `-` - not
* `>` - greater than
* `>=` - greater than or equals
* `<` - less than
* `<=` - less than or equals
* `~` - contains
* `~^` - starts with
* `~$` - ends with
* `[` value, value, … `]` - “in” group, can be negated with `-`
#### Combinations
* `+` - represents and
* `,` - represents or
* `(` filter expression `)` - overrides operator precedence
#### Strings vs Literals
Most of the time, there’s no need to put quotes around strings when building filters in Ghost. If you filter based on slugs, slugs are always compatible with literals. However, in some cases you may need to use a string that contains one of the other characters used in the filter syntax, e.g. dates & times contain`:`. Use single-quotes for these.
# Pages
Source: https://docs.ghost.org/content-api/pages
Pages are static resources that are not included in channels or collections on the Ghost front-end. The API will only return pages that were created as resources and will not contain routes created with [dynamic routing](/themes/routing/).
```js
GET /content/pages/
GET /content/pages/{id}/
GET /content/pages/slug/{slug}/
```
Pages are structured identically to posts. The response object will look the same, only the resource key will be `pages`.
By default, pages are ordered by title when fetching more than one.
# Pagination
Source: https://docs.ghost.org/content-api/pagination
All browse endpoints are paginated, returning 15 records by default. You can use the [page](/content-api/parameters#page) and [limit](/content-api/parameters#limit) parameters to move through the pages of records. The response object contains a `meta.pagination` key with information on the current location within the records:
```json
"meta":{
"pagination":{
"page":1,
"limit":2,
"pages":1,
"total":1,
"next":null,
"prev":null
}
}
```
# Parameters
Source: https://docs.ghost.org/content-api/parameters
Query parameters provide fine-grained control over responses. All endpoints accept `include` and `fields`. Browse endpoints additionally accept `filter`, `limit`, `page` and `order`.
The values provided as query parameters MUST be url encoded when used directly. The [client libraries](/content-api/javascript/) will handle this for you.
### Include
Tells the API to return additional data related to the resource you have requested. The following includes are available:
* Posts & Pages: `authors`, `tags`
* Authors: `count.posts`
* Tags: `count.posts`
* Tiers: `monthly_price`, `yearly_price`, `benefits`
Includes can be combined with a comma, e.g., `&include=authors,tags`.
For posts and pages:
* `&include=authors` will add `"authors": [{...},]` and `"primary_author": {...}`
* `&include=tags` will add `"tags": [{...},]` and `"primary_tag": {...}`
For authors and tags:
* `&include=count.posts` will add `"count": {"posts": 7}` to the response.
For tiers:
* `&include=monthly_price,yearly_price,benefits` will add monthly price, yearly price, and benefits data.
### Fields
Limit the fields returned in the response object. Useful for optimizing queries, but does not play well with include.
E.g. for posts `&fields=title,url` would return:
```json
{
"posts": [
{
"id": "5b7ada404f87d200b5b1f9c8",
"title": "Welcome to Ghost",
"url": "https://demo.ghost.io/welcome/"
}
]
}
```
### Formats
(Posts and Pages only)
By default, only `html` is returned, however each post and page in Ghost has 2 available formats: `html` and `plaintext`.
* `&formats=html,plaintext` will additionally return the plaintext format.
### Filter
(Browse requests only)
Apply fine-grained filters to target specific data.
* `&filter=featured:true` on posts returns only those marked featured.
* `&filter=tag:getting-started` on posts returns those with the tag slug that matches `getting-started`.
* `&filter=visibility:public` on tiers returns only those marked as publicly visible.
The possibilities are extensive! Query strings are explained in detail in the [filtering](/content-api/filtering) section.
### Limit
(Browse requests only)
By default, only 15 records are returned at once.
* `&limit=5` would return only 5 records.
* `&limit=all` will return all records - use carefully!
### Page
(Browse requests only)
By default, the first 15 records are returned.
* `&page=2` will return the second set of 15 records.
### Order
(Browse requests only)
Different resources have a different default sort order:
* Posts: `published_at DESC` (newest post first)
* Pages: `title ASC` (alphabetically by title)
* Tags: `name ASC` (alphabetically by name)
* Authors: `name ASC` (alphabetically by name)
* Tiers: `monthly_price ASC` (from lowest to highest monthly price)
The syntax for modifying this follows SQL order by syntax:
* `&order=published_at%20asc` would return posts with the newest post last
# Posts
Source: https://docs.ghost.org/content-api/posts
Posts are the primary resource in a Ghost site. Using the posts endpoint it is possible to get lists of posts filtered by various criteria.
```js
GET /content/posts/
GET /content/posts/{id}/
GET /content/posts/slug/{slug}/
```
By default, posts are returned in reverse chronological order by published date when fetching more than one.
The most common gotcha when fetching posts from the Content API is not using the [include](/content-api/parameters#include) parameter to request related data such as tags and authors. By default, the response for a post will not include these:
```json
{
"posts": [
{
"slug": "welcome-short",
"id": "5ddc9141c35e7700383b2937",
"uuid": "a5aa9bd8-ea31-415c-b452-3040dae1e730",
"title": "Welcome",
"html": "
### Portal
Ghost automatically loads the scripts for Portal from jsDelivr.net. The default configuration is shown below.
The script can be relocated by changing the URL, or disabled entirely by setting `"url": false`.
```json
"portal": {
"url": "https://cdn.jsdelivr.net/npm/@tryghost/portal@~{version}/umd/portal.min.js"
}
```
### Search
Ghost automatically loads the scripts & styles for search from jsDelivr.net. The default configuration is shown below.
The script and stylesheet can be relocated by changing the URLs, or disabled entirely by setting `"url": false`.
```json
"sodoSearch": {
"url": "https://cdn.jsdelivr.net/npm/@tryghost/sodo-search@~{version}/umd/sodo-search.min.js",
"styles": "https://cdn.jsdelivr.net/npm/@tryghost/sodo-search@~{version}/umd/main.css"
},
```
### Comments
Ghost automatically loads the scripts & styles for comments from jsDelivr.net. The default configuration is shown below.
The script and stylesheet can be relocated by changing the URLs, or disabled entirely by setting `"url": false`.
```json
"comments": {
"url": "https://cdn.jsdelivr.net/npm/@tryghost/comments-ui@~{version}/umd/comments-ui.min.js",
"styles": "https://cdn.jsdelivr.net/npm/@tryghost/comments-ui@~{version}/umd/main.css"
}
```
# Overview
Source: https://docs.ghost.org/content-api
Ghost’s RESTful Content API delivers published content to the world and can be accessed in a read-only manner by any client to render in a website, app, or other embedded media.
***
Access control is managed via an API key, and even the most complex filters are made simple with our SDK. The Content API is designed to be fully cachable, meaning you can fetch data as often as you like without limitation.
***
## API Clients
### JavaScript Client Library
We’ve developed an [API client for JavaScript](/content-api/javascript/) that will allow you to quickly and easily interact with the Content API. The client is an advanced wrapper on top of our REST API - everything that can be done with the Content API can be done using the client, with no need to deal with the details of authentication or the request & response format.
***
## URL
`https://{admin_domain}/ghost/api/content/`
Your admin domain can be different to your site domain. Using the correct domain and protocol are critical to getting consistent behaviour, particularly when dealing with CORS in the browser. All Ghost(Pro) blogs have a `*.ghost.io domain` as their admin domain and require https.
### Key
`?key={key}`
Content API keys are provided via a query parameter in the URL. These keys are safe for use in browsers and other insecure environments, as they only ever provide access to public data. Sites in private mode should consider where they share any keys they create.
Obtain the Content API URL and key by creating a new `Custom Integration` under the **Integrations** screen in Ghost Admin.
### Accept-Version Header
`Accept-Version: v{major}.{minor}`
Use the `Accept-Version` header to indicate the minimum version of Ghost’s API to operate with. See [API Versioning](/faq/api-versioning/) for more details.
### Working Example
```bash
# cURL
# Real endpoint - copy and paste to see!
curl -H "Accept-Version: v5.0" "https://demo.ghost.io/ghost/api/content/posts/?key=22444f78447824223cefc48062"
```
***
## Endpoints
The Content API provides access to Posts, Pages, Tags, Authors, Tiers, and Settings. All endpoints return JSON and are considered [stable](/faq/api-versioning/).
### Working Example
| Verb | Path | Method |
| ---- | ---------------------------------------------- | --------------------- |
| GET | [/posts/](/content-api/posts) | Browse posts |
| GET | [/posts/\{id}/](/content-api/posts) | Read a post by ID |
| GET | [/posts/slug/\{slug}/](/content-api/posts) | Read a post by slug |
| GET | [/authors/](/content-api/authors) | Browse authors |
| GET | [/authors/\{id}/](/content-api/authors) | Read an author by ID |
| GET | [/authors/slug/\{slug}/](/content-api/authors) | Read a author by slug |
| GET | [/tags/](/content-api/tags) | Browse tags |
| GET | [/tags/\{id}/](/content-api/tags) | Read a tag by ID |
| GET | [/tags/slug/\{slug}/](/content-api/tags) | Read a tag by slug |
| GET | [/pages/](/content-api/pages) | Browse pages |
| GET | [/pages/\{id}/](/content-api/pages) | Read a page by ID |
| GET | [/pages/slug/\{slug}/](/content-api/pages) | Read a page by slug |
| GET | [/tiers/](/content-api/tiers) | Browse tiers |
| GET | [/settings/](/content-api/settings) | Browse settings |
The Content API supports two types of request: Browse and Read. Browse endpoints allow you to fetch lists of resources, whereas Read endpoints allow you to fetch a single resource.
***
## Resources
The API will always return valid JSON in the same structure:
```json
{
"resource_type": [{
...
}],
"meta": {}
}
```
* `resource_type`: will always match the resource name in the URL. All resources are returned wrapped in an array, with the exception of `/site/` and `/settings/`.
* `meta`: contains [pagination](/content-api/pagination) information for browse requests.
# Authors
Source: https://docs.ghost.org/content-api/authors
Authors are a subset of [users](/staff/) who have published posts associated with them.
```js
GET /content/authors/
GET /content/authors/{id}/
GET /content/authors/slug/{slug}/
```
Authors that are not associated with a post are not returned. You can supply `include=count.posts` to retrieve the number of posts associated with an author.
```json
{
"authors": [
{
"slug": "cameron",
"id": "5ddc9b9510d8970038255d02",
"name": "Cameron Almeida",
"profile_image": "https://docs.ghost.io/content/images/2019/03/1c2f492a-a5d0-4d2d-b350-cdcdebc7e413.jpg",
"cover_image": null,
"bio": "Editor at large.",
"website": "https://example.com",
"location": "Cape Town",
"facebook": "example",
"twitter": "@example",
"meta_title": null,
"meta_description": null,
"url": "https://docs.ghost.io/author/cameron/"
}
]
}
```
# Errors
Source: https://docs.ghost.org/content-api/errors
The Content API will generate errors for the following cases:
* Status 400: Badly formed queries e.g. filter parameters that are not correctly encoded
* Status 401: Authentication failures e.g. unrecognized keys
* Status 403: Permissions errors e.g. under-privileged users
* Status 404: Unknown resources e.g. data which is not public
* Status 500: Server errors e.g. where something has gone
Errors are also formatted in JSON, as an array of error objects. The HTTP status code of the response along with the `errorType` property indicate the type of error.
The `message` field is designed to provide clarity on what exactly has gone wrong.
```json
{
"errors": [
{
"message": "Unknown Content API Key",
"errorType": "UnauthorizedError"
}
]
}
```
# Filtering
Source: https://docs.ghost.org/content-api/filtering
Ghost uses a query language called NQL to allow filtering API results. You can filter any field or included field using matches, greater/less than or negation, as well as combining with and/or. NQL doesn’t yet support ’like’ or partial matches.
Filter strings must be URL encoded. The [\{\{get}}](/themes/helpers/functional/get/) helper and [client library](/content-api/javascript/) handle this for you.
At it’s most simple, filtering works the same as in GMail, GitHub or Slack - you provide a field and a value, separated by a colon.
### Syntax Reference
#### Filter Expressions
A **filter expression** is a string which provides the **property**, **operator** and **value** in the form **property:*operator*value**:
* **property** - a path representing the field to filter on
* **:** - separator between **property** and an **operator**-**value** expression
* **operator** (optional) - how to compare values (`:` on its own is roughly `=`)
* **value** - the value to match against
#### Property
Matches: `[a-zA-Z_][a-zA-Z0-9_.]`
* can contain only alpha-numeric characters and `_`
* cannot contain whitespace
* must start with a letter
* supports `.` separated paths, E.g. `authors.slug` or `posts.count`
* is always lowercase, but accepts and converts uppercase
#### Value
Can be one of the following
* **null**
* **true**
* **false**
* a ***number*** (integer)
* a **literal**
* Any character string which follows these rules:
* Cannot start with `-` but may contain it
* Cannot contain any of these symbols: `'"+,()><=[]` unless they are escaped
* Cannot contain whitespace
* a **string**
* `'` string here `'` Any character except a single or double quote surrounded by single quotes
* Single or Double quote \_\_MUST \_\_be escaped\*
* Can contain whitespace
* A string can contain a date any format that can be understood by `new Date()`
* a **relative date**
* Uses the pattern now-30d
* Must start with now
* Can use - or +
* Any integer can be used for the size of the interval
* Supports the following intervals: d, w, M, y, h, m, s
#### Operators
* `-` - not
* `>` - greater than
* `>=` - greater than or equals
* `<` - less than
* `<=` - less than or equals
* `~` - contains
* `~^` - starts with
* `~$` - ends with
* `[` value, value, … `]` - “in” group, can be negated with `-`
#### Combinations
* `+` - represents and
* `,` - represents or
* `(` filter expression `)` - overrides operator precedence
#### Strings vs Literals
Most of the time, there’s no need to put quotes around strings when building filters in Ghost. If you filter based on slugs, slugs are always compatible with literals. However, in some cases you may need to use a string that contains one of the other characters used in the filter syntax, e.g. dates & times contain`:`. Use single-quotes for these.
# Pages
Source: https://docs.ghost.org/content-api/pages
Pages are static resources that are not included in channels or collections on the Ghost front-end. The API will only return pages that were created as resources and will not contain routes created with [dynamic routing](/themes/routing/).
```js
GET /content/pages/
GET /content/pages/{id}/
GET /content/pages/slug/{slug}/
```
Pages are structured identically to posts. The response object will look the same, only the resource key will be `pages`.
By default, pages are ordered by title when fetching more than one.
# Pagination
Source: https://docs.ghost.org/content-api/pagination
All browse endpoints are paginated, returning 15 records by default. You can use the [page](/content-api/parameters#page) and [limit](/content-api/parameters#limit) parameters to move through the pages of records. The response object contains a `meta.pagination` key with information on the current location within the records:
```json
"meta":{
"pagination":{
"page":1,
"limit":2,
"pages":1,
"total":1,
"next":null,
"prev":null
}
}
```
# Parameters
Source: https://docs.ghost.org/content-api/parameters
Query parameters provide fine-grained control over responses. All endpoints accept `include` and `fields`. Browse endpoints additionally accept `filter`, `limit`, `page` and `order`.
The values provided as query parameters MUST be url encoded when used directly. The [client libraries](/content-api/javascript/) will handle this for you.
### Include
Tells the API to return additional data related to the resource you have requested. The following includes are available:
* Posts & Pages: `authors`, `tags`
* Authors: `count.posts`
* Tags: `count.posts`
* Tiers: `monthly_price`, `yearly_price`, `benefits`
Includes can be combined with a comma, e.g., `&include=authors,tags`.
For posts and pages:
* `&include=authors` will add `"authors": [{...},]` and `"primary_author": {...}`
* `&include=tags` will add `"tags": [{...},]` and `"primary_tag": {...}`
For authors and tags:
* `&include=count.posts` will add `"count": {"posts": 7}` to the response.
For tiers:
* `&include=monthly_price,yearly_price,benefits` will add monthly price, yearly price, and benefits data.
### Fields
Limit the fields returned in the response object. Useful for optimizing queries, but does not play well with include.
E.g. for posts `&fields=title,url` would return:
```json
{
"posts": [
{
"id": "5b7ada404f87d200b5b1f9c8",
"title": "Welcome to Ghost",
"url": "https://demo.ghost.io/welcome/"
}
]
}
```
### Formats
(Posts and Pages only)
By default, only `html` is returned, however each post and page in Ghost has 2 available formats: `html` and `plaintext`.
* `&formats=html,plaintext` will additionally return the plaintext format.
### Filter
(Browse requests only)
Apply fine-grained filters to target specific data.
* `&filter=featured:true` on posts returns only those marked featured.
* `&filter=tag:getting-started` on posts returns those with the tag slug that matches `getting-started`.
* `&filter=visibility:public` on tiers returns only those marked as publicly visible.
The possibilities are extensive! Query strings are explained in detail in the [filtering](/content-api/filtering) section.
### Limit
(Browse requests only)
By default, only 15 records are returned at once.
* `&limit=5` would return only 5 records.
* `&limit=all` will return all records - use carefully!
### Page
(Browse requests only)
By default, the first 15 records are returned.
* `&page=2` will return the second set of 15 records.
### Order
(Browse requests only)
Different resources have a different default sort order:
* Posts: `published_at DESC` (newest post first)
* Pages: `title ASC` (alphabetically by title)
* Tags: `name ASC` (alphabetically by name)
* Authors: `name ASC` (alphabetically by name)
* Tiers: `monthly_price ASC` (from lowest to highest monthly price)
The syntax for modifying this follows SQL order by syntax:
* `&order=published_at%20asc` would return posts with the newest post last
# Posts
Source: https://docs.ghost.org/content-api/posts
Posts are the primary resource in a Ghost site. Using the posts endpoint it is possible to get lists of posts filtered by various criteria.
```js
GET /content/posts/
GET /content/posts/{id}/
GET /content/posts/slug/{slug}/
```
By default, posts are returned in reverse chronological order by published date when fetching more than one.
The most common gotcha when fetching posts from the Content API is not using the [include](/content-api/parameters#include) parameter to request related data such as tags and authors. By default, the response for a post will not include these:
```json
{
"posts": [
{
"slug": "welcome-short",
"id": "5ddc9141c35e7700383b2937",
"uuid": "a5aa9bd8-ea31-415c-b452-3040dae1e730",
"title": "Welcome",
"html": "👋 Welcome, it's great to have you here.
",
"comment_id": "5ddc9141c35e7700383b2937",
"feature_image": "https://static.ghost.org/v3.0.0/images/welcome-to-ghost.png",
"feature_image_alt": null,
"feature_image_caption": null,
"featured": false,
"visibility": "public",
"created_at": "2019-11-26T02:43:13.000+00:00",
"updated_at": "2019-11-26T02:44:17.000+00:00",
"published_at": "2019-11-26T02:44:17.000+00:00",
"custom_excerpt": null,
"codeinjection_head": null,
"codeinjection_foot": null,
"custom_template": null,
"canonical_url": null,
"url": "https://docs.ghost.io/welcome-short/",
"excerpt": "👋 Welcome, it's great to have you here.",
"reading_time": 0,
"access": true,
"og_image": null,
"og_title": null,
"og_description": null,
"twitter_image": null,
"twitter_title": null,
"twitter_description": null,
"meta_title": null,
"meta_description": null,
"email_subject": null
}
]
}
```
Posts allow you to include `authors` and `tags` using `&include=authors,tags`, which will add an `authors` and `tags` array to the response, as well as both a `primary_author` and `primary_tag` object.
```bash Request
# cURL
# Real endpoint - copy and paste to see!
curl "https://demo.ghost.io/ghost/api/content/posts/?key=22444f78447824223cefc48062&include=tags,authors"
```
```json Response
{
"posts": [
{
"slug": "welcome-short",
"id": "5c7ece47da174000c0c5c6d7",
"uuid": "3a033ce7-9e2d-4b3b-a9ef-76887efacc7f",
"title": "Welcome",
"html": "👋 Welcome, it's great to have you here.
",
"comment_id": "5c7ece47da174000c0c5c6d7",
"feature_image": "https://casper.ghost.org/v2.0.0/images/welcome-to-ghost.jpg",
"feature_image_alt": null,
"feature_image_caption": null,
"featured": false,
"meta_title": null,
"meta_description": null,
"created_at": "2019-03-05T19:30:15.000+00:00",
"updated_at": "2019-03-26T19:45:31.000+00:00",
"published_at": "2012-11-27T15:30:00.000+00:00",
"custom_excerpt": "Welcome, it's great to have you here.",
"codeinjection_head": null,
"codeinjection_foot": null,
"og_image": null,
"og_title": null,
"og_description": null,
"twitter_image": null,
"twitter_title": null,
"twitter_description": null,
"custom_template": null,
"canonical_url": null,
"authors": [
{
"id": "5951f5fca366002ebd5dbef7",
"name": "Ghost",
"slug": "ghost",
"profile_image": "https://demo.ghost.io/content/images/2017/07/ghost-icon.png",
"cover_image": null,
"bio": "The professional publishing platform",
"website": "https://ghost.org",
"location": null,
"facebook": "ghost",
"twitter": "@tryghost",
"meta_title": null,
"meta_description": null,
"url": "https://demo.ghost.io/author/ghost/"
}
],
"tags": [
{
"id": "59799bbd6ebb2f00243a33db",
"name": "Getting Started",
"slug": "getting-started",
"description": null,
"feature_image": null,
"visibility": "public",
"meta_title": null,
"meta_description": null,
"url": "https://demo.ghost.io/tag/getting-started/"
}
],
"primary_author": {
"id": "5951f5fca366002ebd5dbef7",
"name": "Ghost",
"slug": "ghost",
"profile_image": "https://demo.ghost.io/content/images/2017/07/ghost-icon.png",
"cover_image": null,
"bio": "The professional publishing platform",
"website": "https://ghost.org",
"location": null,
"facebook": "ghost",
"twitter": "@tryghost",
"meta_title": null,
"meta_description": null,
"url": "https://demo.ghost.io/author/ghost/"
},
"primary_tag": {
"id": "59799bbd6ebb2f00243a33db",
"name": "Getting Started",
"slug": "getting-started",
"description": null,
"feature_image": null,
"visibility": "public",
"meta_title": null,
"meta_description": null,
"url": "https://demo.ghost.io/tag/getting-started/"
},
"url": "https://demo.ghost.io/welcome-short/",
"excerpt": "Welcome, it's great to have you here."
}
]
}
```
# Settings
Source: https://docs.ghost.org/content-api/settings
Settings contain the global settings for a site.
```js
GET /content/settings/
```
The settings endpoint is a special case. You will receive a single object, rather than an array. This endpoint doesn’t accept any query parameters.
```json
{
"settings": {
"title": "Ghost",
"description": "The professional publishing platform",
"logo": "https://docs.ghost.io/content/images/2014/09/Ghost-Transparent-for-DARK-BG.png",
"icon": "https://docs.ghost.io/content/images/2017/07/favicon.png",
"accent_color": null,
"cover_image": "https://docs.ghost.io/content/images/2019/10/publication-cover.png",
"facebook": "ghost",
"twitter": "@tryghost",
"lang": "en",
"timezone": "Etc/UTC",
"codeinjection_head": null,
"codeinjection_foot": "",
"navigation": [
{
"label": "Home",
"url": "/"
},
{
"label": "About",
"url": "/about/"
},
{
"label": "Getting Started",
"url": "/tag/getting-started/"
},
{
"label": "Try Ghost",
"url": "https://ghost.org"
}
],
"secondary_navigation": [],
"meta_title": null,
"meta_description": null,
"og_image": null,
"og_title": null,
"og_description": null,
"twitter_image": null,
"twitter_title": null,
"twitter_description": null,
"members_support_address": "noreply@docs.ghost.io",
"url": "https://docs.ghost.io/"
}
}
```
# Tags
Source: https://docs.ghost.org/content-api/tags
Tags are the [primary taxonomy](/publishing/#tags) within a Ghost site.
```js
GET /content/tags/
GET /content/tags/{id}/
GET /content/tags/slug/{slug}/
```
By default, internal tags are always included, use `filter=visibility:public` to limit the response directly or use the [tags helper](/themes/helpers/data/tags/) to handle filtering and outputting the response.
Tags that are not associated with a post are not returned. You can supply `include=count.posts` to retrieve the number of posts associated with a tag.
```json
{
"tags": [
{
"slug": "getting-started",
"id": "5ddc9063c35e7700383b27e0",
"name": "Getting Started",
"description": null,
"feature_image": null,
"visibility": "public",
"meta_title": null,
"meta_description": null,
"og_image": null,
"og_title": null,
"og_description": null,
"twitter_image": null,
"twitter_title": null,
"twitter_description": null,
"codeinjection_head": null,
"codeinjection_foot": null,
"canonical_url": null,
"accent_color": null,
"url": "https://docs.ghost.io/tag/getting-started/"
}
]
}
```
By default, tags are ordered by name when fetching more than one.
# Tiers
Source: https://docs.ghost.org/content-api/tiers
Tiers allow publishers to create multiple options for an audience to become paid subscribers. Each tier can have its own price points, benefits, and content access levels. Ghost connects tiers directly to the publication’s Stripe account.
#### Usage
The tiers endpoint returns a list of tiers for the site, filtered by their visibility criteria.
```js
GET /content/tiers/
```
Tiers are returned in order of increasing monthly price.
```json
{
"tiers": [
{
"id": "62307cc71b4376a976734037",
"name": "Free",
"description": null,
"slug": "free",
"active": true,
"type": "free",
"welcome_page_url": null,
"created_at": "2022-03-15T11:47:19.000Z",
"updated_at": "2022-03-15T11:47:19.000Z",
"stripe_prices": null,
"benefits": null,
"visibility": "public"
},
{
"id": "6230d7c8c62265c44f24a594",
"name": "Gold",
"description": null,
"slug": "gold",
"active": true,
"type": "paid",
"welcome_page_url": "/welcome-to-gold",
"created_at": "2022-03-15T18:15:36.000Z",
"updated_at": "2022-03-15T18:16:00.000Z",
"stripe_prices": null,
"benefits": null,
"visibility": "public"
}
]
}
```
```bash
# cURL
# Real endpoint - copy and paste to see!
curl "https://demo.ghost.io/ghost/api/content/tiers/?key=22444f78447824223cefc48062&include=benefits,monthly_price,yearly_price"
```
```json
{
"tiers": [
{
"id": "61ee7f5c5a6309002e738c41",
"name": "Free",
"description": null,
"slug": "61ee7f5c5a6309002e738c41",
"active": true,
"type": "free",
"welcome_page_url": "/",
"created_at": "2022-01-24T10:28:44.000Z",
"updated_at": null,
"stripe_prices": null,
"monthly_price": null,
"yearly_price": null,
"benefits": [],
"visibility": "public"
},
{
"id": "60815dbe9af732002f9e02fa",
"name": "Ghost Subscription",
"description": null,
"slug": "ghost-subscription",
"active": true,
"type": "paid",
"welcome_page_url": "/",
"created_at": "2021-04-22T12:27:58.000Z",
"updated_at": "2022-01-12T17:22:29.000Z",
"stripe_prices": null,
"monthly_price": 500,
"yearly_price": 5000,
"currency": "usd",
"benefits": [],
"visibility": "public"
}
],
"meta": {
"pagination": {
"page": 1,
"limit": 15,
"pages": 1,
"total": 2,
"next": null,
"prev": null
}
}
}
```
# Versioning
Source: https://docs.ghost.org/content-api/versioning
See [API versioning](/faq/api-versioning/) for full details of the API versions and their stability levels.
# Contributing To Ghost
Source: https://docs.ghost.org/contributing
Ghost is completely open source software built almost entirely by volunteer contributors who use it every day.
***
The best part about structuring a software project this way is that not only does everyone get to own the source code without restriction, but as people all over the world help to improve it: Everyone benefits.
## Core team
In addition to [full time product team](https://ghost.org/about/) working for Ghost Foundation, there are a number of community members who have contributed to the project for a lengthy period of time and are considered part of the core team. They are:
* [Austin Burdine](https://github.com/acburdine) - Ghost-CLI
* [Felix Rieseberg](https://github.com/felixrieseberg) - Ghost Desktop
* [Vicky Chijwani](https://github.com/vickychijwani) - Ghost Mobile
* [David Balderston](https://github.com/dbalders) - Community
#### How core team members are added
People typically invited to join the Core Team officially after an extended period of successful contribution to Ghost and demonstrating good judgement. In particular, this means having humility, being open to feedback and changing their mind, knowing the limits of their abilities and being able to communicate all of these things such that it is noticed. Good judgement is what produces trust, not quality, quantity or pure technical skill.
When we believe a core contributor would make a great ambassador for Ghost and feel able to trust them to make good decisions about its future - that’s generally when we’ll ask them to become a member of the formal Core Team.
Core Team members are granted commit rights to Ghost projects, access to the Ghost Foundation private Slack, and occasionally join our international team retreats.
## Community guidelines
All participation in the Ghost community is subject to our incredibly straightforward [code of conduct](https://ghost.org/conduct/) and wider [community guidelines](https://forum.ghost.org/t/faq-guidelines/5).
The vast majority of the Ghost community is incredible, and we work hard to make sure it stays that way. We always welcome people who are friendly and participate constructively, but we outright ban anyone who is behaving in a poisonous manner.
## Ghost Trademark
**Ghost** is a registered trademark of Ghost Foundation Ltd. We’re happy to extend a flexible usage license of the Ghost trademark to community projects, companies and individuals, however it please read the **[Ghost trademark usage policy](https://ghost.org/trademark/)** before using the Ghost name in your project.
## Development guide
If you’re a developer looking to help, but you’re not sure where to begin: Check out the [good first issue](https://github.com/TryGhost/Ghost/labels/good%20first%20issue) label on GitHub, which contains small pieces of work that have been specifically flagged as being friendly to new contributors.
Or, if you’re looking for something a little more challenging to sink your teeth into, there’s a broader [help wanted](https://github.com/TryGhost/Ghost/labels/help%20wanted) label encompassing issues which need some love.
When you’re ready, check out the full **[Ghost Contributing Guide](https://github.com/TryGhost/Ghost/blob/main/.github/CONTRIBUTING.md)** for detailed instructions about how to hack on Ghost Core and send changes upstream.
Ghost is currently hiring Product Engineers! Check out what it’s like to be part of the team and see our open roles at [careers.ghost.org](https://careers.ghost.org/)
## Other ways to help
The primary way to contribute to Ghost is by writing code, but if you’re not a developer there are still ways you can help. We always need help with:
* Helping our Ghost users on [the forum](https://forum.ghost.org)
* Creating tutorials and guides
* Testing and quality assurance
* Hosting local events or meetups
* Promoting Ghost to others
There are lots of ways to make discovering and using Ghost a better experience.
## Donations
As a non-profit organisation we’re always grateful to receive any and all donations to help our work, and allow us to employ more people to work on Ghost directly.
#### Partnerships
We’re very [happy to partner](https://ghost.org/partners/) with startups and companies who are able to provide Ghost with credit, goods and services which help us build free, open software for everyone. Please reach out to us `hello@ghost.org` if you’re interested in partnering with us to help Ghost.
#### Open Collective
**New:** We have a number of ongoing donation and sponsorship opportunities for individuals or companies looking to make ongoing contributions to the open source software which they use on [Open Collective](https://opencollective.com/ghost).
#### Bitcoin
For those who prefer to make a one time donation, we’re very happy to accept BTC. Unless you explicitly want your donation to be anonymous, please send us a tweet or an email and let us know who you are! We’d love to say thank you.
 **Ghost BTC Address:**\
`3CrQfpWaZPFfD4kAT7kh6avbW7bGBHiBq9`
# Ghost Developer FAQs
Source: https://docs.ghost.org/faq
Frequently asked questions and answers about running Ghost
Ghost ships with a mature set of APIs. Each API endpoint has a status, which indicates suitability for production use. Read more about Ghost’s [architecture](/architecture/).
Ghost doesn’t support load-balanced clustering or multi-server setups of any description, there should only be *one* Ghost instance per site.
Working with more complex iterations of the filter property in the routes.yaml file can cause conflicts or unexpected behaviour. Here are the most common issues.
Learn how to backup your self-hosted Ghost install
If an error occurs when trying to run `ghost start` or `ghost restart`, try using `ghost run` first to check that Ghost can start successfully. The `start` and `restart` commands are talking to your process manager (e.g. systemd) which can hide underlying errors from Ghost.
Image uploads can be affected by the default max upload size of 50mb. If you need more, you’ll need to increase the limit by editing your nginx config file, and setting the limit manually.
There’s a known issue that Google Cloud Platform does NOT allow any traffic on port 25 on a [Compute Engine instance](https://cloud.google.com/compute/docs/tutorials/sending-mail/).
Major version release dates and end of life support for Ghost.
Open rates that are 0% may indicate that the connection between Ghost and Mailgun has stalled, which prevents Ghost from fetching your newsletter analytics.
After installing Ghost a url for your site is set. This is the URL people will use to access your publication.
Ghost is designed to have a reverse proxy in front of it. If you use Ghost-CLI to install Ghost, this will be setup for you using nginx. If you configure your own proxy, you’ll need to make sure the proxy is configured correctly.
A fix for root user permissions problems
Analysis and retrospective of the critical Salt vulnerability on Ghost(Pro)
Ghost’s current recommended Node version is Node v20 LTS.
We recommend using Digital Ocean who provide a stable option on which Ghost can be installed and have a very active community and an official [**Ghost One-Click Application**](https://marketplace.digitalocean.com/apps/ghost).
Creators from all over the world use Ghost. Publications abound in German, French, Spanish, Sinhalese, and Arabic—and the list keeps going!
If your MySQL database is not correctly configured for Ghost, then you may run into some issues.
If the sqlite3 database file is not readable or writable by the user running Ghost, then you’ll run into some errors.
If you’re running Ghost 0.x versions, your site must be updated to Ghost 1.0 before it can be successfully updated to Ghost 2.0 and beyond.
When managing your self-hosted Ghost publication using the recommended `ghost-cli` tooling, you should update your CLI version. If you are using a deprecated version and need to update in order to update or manage your Ghost site, some extra steps may be required.
The tag and author taxonomies must be present in routes.yaml otherwise the URLs will not exist. By default, Ghost installs with the following:
If you’ve added Cloudflare to your self-hosted Ghost publication and find that Ghost Admin doesn’t load after updates you may run into some errors in the JavaScript console:
This guide explains how to use `nvm` with local and production Ghost installs.
MySQL 8 is the only supported database in production.
Ghost has the ability to deliver posts as email newsletters natively. A bulk-mail provider is required to use this feature and SMTP cannot be used — read more about [mail config](/config/#mail).
# Ghost CLI
Source: https://docs.ghost.org/ghost-cli
A fully loaded tool to help you get Ghost installed and configured and to make it super easy to keep your Ghost install up to date.
***
Ghost-CLI is to makes it possible to install or update Ghost with a *single command*. In addition, it performs useful operations to assist with maintaining your environment, such as:
* Checking for common environment problems
* Creating a **logical folder structure**
* Providing for production or development installs
* Allowing for **upgrades and rollbacks**
* Handling **user management and permissions**
* Configuring Ghost
* Configuring **NGINX**
* Setting up **MySQL**
* Configuring **systemd**
* Accessing Ghost log files
* Managing existing Ghost installs
***
## Install & update
Ghost-CLI is an npm module that can be installed via either npm.
```bash
# On a production server using a non-root user:
sudo npm install -g ghost-cli@latest
```
Locally, you likely don’t need sudo. Using `@latest` means this command with either install or update ghost-cli and you only have to remember the one command for both ✨
## Useful options
There are some global flags you may find useful when using `ghost-cli`:
```bash
# Output usage information for Ghost-CLI
ghost --help, ghost -h, ghost help, ghost [command] --help
# Enables the verbose logging output for debugging
ghost --verbose, ghost -V
# Print your CLI version and Ghost version
ghost --version, ghost -v, ghost version
# Run the command in a different directory
ghost --dir path/to/directory
# Runs command without asking for any input
ghost --no-prompt
# Runs command without using colours
ghost --no-color
```
## Commands
Below are the available commands in Ghost-CLI. You can always run `ghost --help` or `ghost [command] --help` to get more detail, or inline help for available options.
### Ghost config
`ghost config` accepts two optional arguments: `key` and `value`. Here are the three different combinations and what happens on each of them:
```bash
# Create a new config file for the particular env
ghost config
# Find and return the value in the config for the key passed
ghost config [key]
# Set a key and a value in the config file
ghost config [key] [value]
# Set the url for your site
ghost config url https://mysite.com
```
The `ghost config` command only affects the configuration files. In order for your new config to be used, run `ghost restart`.
#### Options
If you’re using `ghost config` to generate a configuration file, you can supply multiple key-value pairs in the form of options to avoid being prompted for that value.
All of these options can also be passed to `ghost install` and `ghost setup` , as these commands call `ghost config`.
See the [config guide](/config/) or run `ghost config --help` for more detailed information.
**Application options**
```bash
# URL of the site including protocol
--url https://mysite.com
# Admin URL of the site
--admin-url https://admin.mysite.com
# Port that Ghost should listen on
--port 2368
# IP to listen on
--ip 127.0.0.1
# Transport to send log output to
--log ["file","stdout"]
```
**Database options**
```bash
# Type of database to use (SQLite3 or MySQL)
--db
# For SQLite3 we just need a path to database file
--dbpath content/data/ghost_dev.db
# For MySQL we need full credentials:
--dbhost localhost
# Database user name
--dbuser ghost
# Database password
--dbpass ****
# Database name
--dbname ghost_dev
```
**Mail options**
```bash
# Mail transport, E.g SMTP, Sendmail or Direct
--mail SMTP
# Mail service (used with SMTP transport), E.g. Mailgun, Sendgrid, Gmail, SES...
--mailservice Mailgun
# Mail auth user (used with SMTP transport)
--mailuser postmaster@something.mailgun.org
# Mail auth pass (used with SMTP transport)
--mailpass ****
# Mail host (used with SMTP transport)
--mailhost smtp.eu.mailgun.org
# Mail port (used with SMTP transport)
--mailport 465
```
**Service options**
```bash
# Process manager to run with (local, systemd)
--process local
```
#### Debugging
In order for your new config to be used, run `ghost restart`.
***
### Ghost install
The `ghost install` command is your one-stop-shop to get a running production install of Ghost.
This command includes the necessary mysql, nginx and systemd configuration to get your publication online, and provides a series of setup questions to configure your new publication. The end result is a fully installed and configured instance ✨
Not ready for production yet? `ghost install local` installs ghost in development mode using sqlite3 and a local process manager. Read more about [local installs](/install/local/).
#### How it works
The `ghost install` command runs a nested command structure, but you only ever have to enter a single command.
First, it will run `ghost doctor` to check your environment is compatible. If checks pass, a local folder is setup, and Ghost is then downloaded from npm and installed.
Next, `ghost setup` runs, which will provide [prompts](/install/ubuntu/#install-questions) for you to configure your new publication via the `ghost config` command, including creating a MySQL user, initialising a database, configure nginx and sets up SSL.
Finally, the CLI will prompt to see if you want to run Ghost and if you choose yes `ghost start` will run.
#### Arguments
```bash
# Install a specific version (1.0.0 or higher)
ghost install [version]
# Install version 2.15.0
ghost install 2.15.0
# Install locally for development
ghost install local
# Install version 2.15.0, locally for development
ghost install 2.15.0 --local
```
#### Options
As `ghost install` runs nested commands, it also accepts options for the `ghost doctor`, `ghost config`, `ghost setup` and `ghost start` commands.
See the individual command docs, or run `ghost install --help` for more detailed information.
```bash
# Get more information before running the command
ghost install --help
# Install in development mode for a staging env
ghost install --development, ghost install -D
# Select the directory to install Ghost in
ghost install --dir path/to/dir
# Install Ghost from a specific archive (useful for testing or custom builds)
ghost install --archive path/to/file.tgz
# Disable stack checks
ghost install --no-stack
# Install without running setup
ghost install --no-setup
# Install without starting Ghost
ghost install --no-start
# Tells the process manager not to restart Ghost on server reboot
ghost setup --no-enable
# Install without prompting (disable setup, or pass all required parameters as arguments)
ghost install --no-prompt
```
#### Directory structure
When you install Ghost using Ghost-CLI, the local directory will be setup with a set of folders designed to keep the various parts of your install separate. After installing Ghost, you will have a folder structure like this which should not be changed:
```bash
.
├── .config.[env].json # The config file for your Ghost instance
├── .ghost-cli # Utility system file for Ghost CLI, don't modify
├── /content # Themes/images/content, not changed during updates
├── /current # A symlink to the currently active version of Ghost
├── /system # NGINX/systemd/SSL files on production installs
└── /versions # Installed versions of Ghost available roll forward/back to
```
***
### Ghost setup
`ghost setup` is the most useful feature of Ghost-CLI. In most cases you will never need to run it yourself, as it’s called automatically as a part of `ghost install`.
#### How it works
Setup configures your server ready for running Ghost in production. It assumes the [recommended stack](/install/ubuntu/#prerequisites/) and leaves your site in a production-ready state. Setup is broken down into stages:
* **mysql** - create a specific MySQL user that is used only for talking to Ghost’s database.
* **nginx** - creates an nginx configuration
* **ssl** - setup SSL with letsencrypt, using [acme.sh](https://github.com/Neilpang/acme.sh)
* **migrate** - initialises the database
* **linux-user** - creates a special low-privilege `ghost` user for running Ghost
#### What if I want to do something else?
The `Ghost-CLI` tool is designed to work with the recommended stack and is the only supported install method. However, since Ghost is a fully open-source project, and many users have different requirements, it is possible to setup and configure your site manually.
The CLI tool is flexible and each stage can be run individually by running `ghost setup ` or skipped by passing the `--no-setup-` flag.
#### Arguments
```bash
# Run ghost setup with specific stages
ghost setup [stages...]
# Creates a new mysql user with minimal privileges
ghost setup mysql
# Creates an nginx config file in `./system/files/` and adds a symlink to `/etc/nginx/sites-enabled/`
ghost setup nginx
# Creates an SSL service for Ghost
ghost setup ssl
# Create an nginx and ssl setup together
ghost setup nginx ssl
# Creates a low-privileged linux user called `ghost`
ghost setup linux-user
# Creates a systemd unit file for your site
ghost setup systemd
# Runs a database migration
ghost setup migrate
```
#### Options
As `ghost setup` runs nested commands, it also accepts options for the `ghost config`, `ghost start` and `ghost doctor` commands. Run `ghost setup --help` for more detailed information.
```bash
# Skips a setup stage
ghost setup --no-setup-mysql
ghost setup --no-setup-nginx
ghost setup --no-setup-ssl
ghost setup --no-setup-systemd
ghost setup --no-setup-linux-user
ghost setup --no-setup-migrate
# Configure a custom process name should be (default: ghost-local)
ghost setup --pname my-process
# Disable stack checks
ghost setup --no-stack
# Setup without starting Ghost
ghost setup --no-start
# Tells the process manager not to restart Ghost on server reboot
ghost setup --no-enable
# Install without prompting (must pass all required parameters as arguments)
ghost setup --no-prompt
```
***
### Ghost start
Running `ghost start` will start your site in background using the configured process manager. The default process manager is **systemd**, or local for local installs.
The command must be executed in the directory where the Ghost instance you are trying to start lives, or passed the correct directory using the `--dir` option.
#### Options
```bash
# Start running the Ghost instance in a specific directory
ghost start --dir /path/to/site/
# Start ghost in development mode
ghost start -D, ghost start --development
# Tells the process manager to restart Ghost on server reboot
ghost start --enable
# Tells the process manager not to restart Ghost on server reboot
ghost start --no-enable
# Disable memory availability checks in ghost doctor
ghost start --no-check-mem
```
#### Debugging
If running `ghost start` gives an error, try use `ghost run` to start Ghost without using the configured process manager. This runs Ghost directly, similar to `node index.js`. All the output from Ghost will be written directly to your terminal, showing up any uncaught errors or other output that might not appear in log files.
***
### Ghost stop
Running `ghost stop` stops the instance of Ghost running in the current directory. Alternatively it can be passed the name of a particular ghost instance or directory. You can always discover running Ghost instances using `ghost ls`.
#### Arguments
```bash
# Stop Ghost in the current folder
ghost stop
# Stop a specific Ghost instance (use ghost ls to find the name)
ghost stop [name]
# Stop the Ghost instance called ghost-local
ghost stop ghost-local
```
#### Options
```bash
# Stop all running Ghost instances
ghost stop --all
# Stop running the Ghost instance in a specific directory
ghost stop --dir /path/to/site/
# Tells the process manager that Ghost should not start on server reboot
ghost stop --disable
```
***
### Ghost restart
Running `ghost restart` will stop and then start your site using the configured process manager. The default process manager is systemd, or local for local installs.
The command must be executed in the directory where the Ghost instance you are trying to start lives, or passed the correct directory using the `--dir` option.
#### Options
```bash
# Start running the Ghost instance in a specific directory
ghost restart --dir /path/to/site/
```
#### Debugging
If running `ghost restart` gives an error, try using `ghost run` to debug the error.
***
### Ghost update
Run `ghost update` to upgraded to new versions of Ghost, which are typically released every 1-2 weeks.
#### Arguments
```bash
# Update to the latest version
ghost update
# Update to a specific version (1.0.0 or higher)
ghost update [version]
# Update to version 2.15.0
ghost update 2.15.0
```
#### Options
```bash
# If an upgrade goes wrong, use the rollback flag
ghost update --rollback
# Install and re-download the latest version of Ghost
ghost update --force
# Force install a specific version of Ghost
ghost update [version] --force
# Updates to the latest within v1
ghost update --v1
# Don't restart after upgrading
ghost update --no-restart
# Disable the automatic rollback on failure
ghost update --no-auto-rollback
# Upgrade Ghost from a specific zip (useful for testing or custom builds)
ghost update --zip path/to/file.zip
# Disable memory availability checks in ghost doctor
ghost update --no-check-mem
```
#### Major updates
Every 12-18 months we release a [major version](/faq/major-versions-lts/) which breaks backwards compatibility and requires a more involved upgrade process, including backups and theme compatibility.
Use the [update documentation](/update/) as a guide to the necessary steps for a smooth upgrade experience.
#### Debugging
If running `ghost update` gives an error, try using `ghost run` to debug the error.
***
### Ghost backup
Run `ghost backup` to generate a zip file backup of your site data.
#### How it works
When performing manual updates it’s recommended to make frequent backups, so if anything goes wrong, you’ll still have all your data. This is especially important when [updating](/update/) to the latest major version.
This command creates a full backup of your site data, including:
* Your content in JSON format
* A full member CSV export
* All themes that have been installed including your current active theme
* Images, files, and media (video and audio)
* A copy of `routes.yaml` and `redirects.yaml` or `redirects.json`
Read more about how to [manually download your site data](/faq/manual-backup/).
***
### Ghost doctor
Running `ghost doctor` will check the system for potential hiccups when installing or updating Ghost.
This command allows you to use `ghost-cli` as a diagnostic tool to find potential issues for your Ghost install, and provides information about what needs to be resolved if any issues arise.
The CLI automatically runs this command when installing, updating, starting or setting up ghost - and you can use is manually with `ghost doctor`.
#### Arguments
```bash
# Check is the required config file exists and validates it's values
ghost doctor startup
# Check if the setup process was successful
ghost doctor setup
```
#### Options
Run `ghost doctor --help` for more detailed information.
```bash
# Disable the memory availability checks
ghost doctor --no-check-mem
```
***
### Ghost ls
The `ghost ls` command lists all Ghost sites and their status from the `~/.ghost/config` file. This is useful if you can’t remember where you installed a particular instance of Ghost, or are working with multiple instances (local, production, staging and so on).
#### Output
```bash
# Development
> ghost ls
┌────────────────┬─────────────────────────────────┬─────────┬─────────────────────-─┬─────┬──────-┬─────────────────┐
│ Name │ Location │ Version │ Status │ URL │ Port │ Process Manager │
├────────────────┼─────────────────────────────────┼─────────┼─────────────────────-─┼─────┼──────-┼─────────────────┤
│ ghost-local │ ~/Sites/cli-test │ 1.22.1 │ stopped │ n/a │ n/a │ n/a │
├────────────────┼─────────────────────────────────┼─────────┼─────────────────────-─┼─────┼──────-┼─────────────────┤
│ ghost-local-2 │ ~/Sites/theme-dev │ 2.12.0 │ stopped │ n/a │ n/a │ n/a │
├────────────────┼─────────────────────────────────┼─────────┼─────────────────────-─┼─────┼──────-┼─────────────────┤
│ ghost-local-3 │ ~/Sites/new-theme │ 2.20.0 │ running (development) │ │ 2368 │ local │
└────────────────┴─────────────────────────────────┴─────────┴──────────────────────-┴─────┴─────-─┴─────────────────┘
```
```bash
# Production
> ghost ls
+ sudo systemctl is-active ghost_my-ghost-site
┌───────────────┬────────────────┬─────────┬──────────────────────┬─────────────────────────--┬──────┬─────────────────┐
│ Name │ Location │ Version │ Status │ URL │ Port │ Process Manager │
├───────────────┼────────────────┼─────────┼──────────────────────┼─────────────────────────--┼──────┼─────────────────┤
│ my-ghost-site │ /var/www/ghost │ 2.1.2 │ running (production) │ https://my-ghost-site.org │ 2368 │ systemd │
└───────────────┴────────────────┴─────────┴──────────────────────┴─────────────────────────--┴──────┴─────────────────┘
```
***
### Ghost log
View the access and error logs from your Ghost site (not the CLI). By default `ghost log` outputs the last 20 lines from the access log file for the site in the current folder.
Ghost’s default log config creates log files in the `content/logs` directory, and creates two different files:
1. An **access log** that contains all log levels, named e.g. `[site_descriptor].log`
2. An **error log** that contains error-level logs *only*, named e.g. `[site_descriptor].error.log`
The site descriptor follows the pattern `[proto]__[url]__[env]` e.g. `http__localhost_2368__development` or `https__mysite_com__production`. The files are be rotated, therefore you may see many numbered files in the `content/logs` directory.
#### Arguments
```bash
# View last 20 lines of access logs
ghost log
# View logs for a specific Ghost instance (use ghost ls to find the name)
ghost log [name]
# View logs for the Ghost instance called ghost-local
ghost log ghost-local
```
#### Options
```bash
# Show 100 log lines
ghost log -n 100, ghost log --number 100
# Show only the error logs
ghost log -e, ghost log --error
# Show 50 lines of the error log
ghost log -n 50 -e
# Follow the logs (e.g like tail -f)
ghost log -f, ghost log --follow
# Follow the error log
ghost log -fe
# Show logs for the Ghost instance in a specific directory
ghost log --dir /path/to/site/
```
#### Debugging
There may be some output from Ghost that doesn’t appear in the log files, so for debugging purposes you may also want to try the [ghost run](/ghost-cli#ghost-run) command.
If you have a custom log configuration the `ghost log` command may not work for you. In particular the `ghost log` command requires that file logging is enabled. See the [logging configuration docs](/config/#logging) for more information.
***
### Ghost uninstall
**Use with caution** - this command completely removes a Ghost install along with all of its related data and config. There is no recovery from this if you have no backups.
The command `ghost uninstall` must be executed in the directory containing the Ghost install that you would like to remove. The following tasks are performed:
* stop ghost
* disable systemd if necessary
* remove the `content` folder
* remove any related systemd or nginx configuration
* remove the remaining files inside the install folder
Running `ghost uninstall --no-prompt` or `ghost uninstall --force` will skip the warning and remove Ghost without a prompt.
***
### Ghost help
Use the help command to access a list of possible `ghost-cli` commands when required.
This command is your port of call when you want to discover a list of available commands in the Ghost-CLI. You can call it at any time ✨
#### Output
```bash
Commands:
ghost buster Who ya gonna call? (Runs `yarn cache clean`)
ghost config [key] [value] View or edit Ghost configuration
ghost doctor [categories..] Check the system for any potential hiccups when installing/updating
Ghost
ghost install [version] Install a brand new instance of Ghost
ghost log [name] View the logs of a Ghost instance
ghost ls View running ghost processes
ghost migrate Run system migrations on a Ghost instance
ghost restart Restart the Ghost instance
ghost run Run a Ghost instance directly (used by process managers and for
debugging)
ghost setup [stages..] Setup an installation of Ghost (after it is installed)
ghost start Start an instance of Ghost
ghost stop [name] Stops an instance of Ghost
ghost uninstall Remove a Ghost instance and any related configuration files
ghost update [version] Update a Ghost instance
ghost version Prints out Ghost-CLI version (and Ghost version if one exists)
Global Options:
--help Show help [boolean]
-d, --dir Folder to run command in
-D, --development Run in development mode [boolean]
-V, --verbose Enable verbose output [boolean]
--prompt [--no-prompt] Allow/Disallow UI prompting [boolean] [default: true]
--color [--no-color] Allow/Disallow colorful logging [boolean] [default: true]
--auto Automatically run as much as possible [boolean] [default: false]
```
#### Options
It’s also possible to run `ghost install --help` and `ghost setup --help` to get a specific list of commands and help for the install and setup processes. Don’t worry - you got this! 💪
***
## Knowledgebase
### SSL
The CLI generates a free SSL certificate from [Let’s Encrypt](#lets-encrypt) using [acme.sh](#lets-encrypt) and a secondary NGINX config file to serve https traffic via port 443.
**SSL configuration**
After a successful ssl setup, you can find your ssl certificate in `/etc/letsencrypt`.
**SSL for additional domains**
You may wish to have multiple domains that redirect to your site, e.g. to have an extra TLD or to support [www](http://www). domains. **Ghost itself can only ever have one domain pointed at it.** This is intentional for SEO purposes, however you can always redirect extra domains to your Ghost install using nginx.
If you want to redirect an HTTPS domain, you must have a certificate for it. If you want to use Ghost-CLI to generate an extra SSL setup, follow this guide:
```bash
# Determine your secondary URL
ghost config url https://my-second-domain.com
# Get Ghost-CLI to generate an SSL setup for you:
ghost setup nginx ssl
# Change your config back to your canonical domain
ghost config url https://my-canonical-domain.com
# Edit the nginx config files for your second domain to redirect to your canonical domain. In both files replace the content of the first location block with:
return 301 https://my-canonical-domain.com$request_uri;
# Get nginx to verify your config
sudo nginx -t
# Reload nginx with your new config
sudo nginx -s reload
```
**Let’s Encrypt**
[Let’s Encrypt](https://letsencrypt.org/) provides SSL certificates that are accepted by browsers free of charge! This is provided by the non-profit Internet Security Research Group (ISRG). The Ghost-CLI will offer you to generate a free SSL certificate as well as renew it every 60 days.
Ghost uses [acme.sh](https://github.com/Neilpang/acme.sh) for provisioning and renewing SSL certificates from Let’s Encrypt. You can call `acme.sh` manually if you need to perform extra tasks. The following command will output all available options:
```bash
/etc/letsencrypt/acme.sh --home "/etc/letsencrypt"
```
### Systemd
`systemd` is the default way of starting and stopping applications on Ubuntu. The advantage is that if Ghost crashes, `systemd` will restart your instance. This is the default recommended process manager.
### Permissions
Ghost-CLI will create a new system user and user-group called `ghost` during the installation process. The `ghost` user will be used to run your Ghost process in `systemd`.
This means that Ghost will run with a user that has no system-wide permissions or a shell that can be used (similar to other services such as NGINX). Sudo is required to modify files in the The `/content/`.
To prevent accidental permissions changes, it’s advisable to execute tasks such as image upload or theme upload using Ghost admin.
#### File Permissions
The `ghost-cli` enforces default linux permissions (via `ghost doctor` hooks) for installations.
* For normal users, default directory permissions are 775, and default file permissions are 664.
* For root users, default directory permissions are 755, and default file permissions are 644.
Running ghost install as the non-root user will result in directories created with 775 (`drwxrwxr-x`) permissions and file with 664 (`-rw-rw-r--`) permissions.
These file permissions don’t need to be changed. The only change that is executed by ghost-cli is changing ownership, file permissions stay untouched.
If permissions were changed, the following two commands will revert file and directory permissions to the ones of a non-root user.
```bash
sudo find /var/www/ghost/* -type d -exec chmod 775 {} \;
sudo find /var/www/ghost/* -type f -exec chmod 664 {} \;
```
The cli doesn’t support directory flags such as `setuid` and `setguid`). If your commands keep failing because of file permissions, ensure your directories have no flags!
# Hosting Ghost
Source: https://docs.ghost.org/hosting
A short guide to running Ghost in a production environment and setting up an independent publication to serve traffic at scale.
***
Ghost is open source software, and can be installed and maintained relatively easily on just about any VPS hosting provider. Additionally, we run an official PaaS for Ghost called [Ghost(Pro)](https://ghost.org/pricing/), where you can have a fully managed instance set up in a couple of clicks. All revenue from Ghost(Pro) goes toward funding the future development of Ghost itself, so by using our official hosting you’ll also be funding developers to continue to improve the core product for you.
## Ghost(Pro) vs Self-hosting
A common question we get from developers is whether they should use our official platform, or host the codebase on their own server independently. Deciding which option is best for you comes with some nuance, so below is a breakdown of the differences to help you decide what will fit your needs best.
| | Ghost(Pro) | Self-Hosting |
| ------------------------------- | --------------------- | ------------------- |
| 🎛 Product features | Identical | Identical |
| ⚙️ Base hosting cost | From **\$9**/mo | From **\$10**/mo |
| 🌍 Worldwide Fastly CDN | Included | From **\$50**/mo |
| 💌 Email newsletter sending | Included | From **\$35**/mo |
| 📦 Full site backups | Included | From **\$5**/mo |
| 🖼️ Built-in image editor | Included | From **\$12**/mo |
| 💵 Payment processing fees | 0% | 0% |
| 🖥 Install & setup | ✅ | Manual |
| 🔄 Weekly updates | ✅ | Manual |
| 🚧 Server maintenance & updates | ✅ | Manual |
| 🔒 SSL Certificate | ✅ | Manual |
| ⚠️ Threat & uptime management | ✅ | ❌ |
| 🥊 Enterprise-grade security | ✅ | ❌ |
| 🔀 Custom edge routing policies | ❌ | ✅ |
| 👩💻 Direct SSH & DB access | ❌ | ✅ |
| 🔨 Ability to modify core | ❌ | ✅ |
| 🚑 Ghost product support | Email | Forum |
| ❤️ Where your money goes | New features in Ghost | 3rd party companies |
### Which option is best for me?
**Self-hosting** is the best choice for teams who are comfortable managing servers, databases and Node.js apps who want full control over their environment. There’s more complexity involved, and you have to signup-for and pay for your own Mailgun account (email delivery) and CDN service (performance and scale) — but ultimately more flexibility around exactly how the software runs. For people sending lots of email newsletters, self-hosting generally works out to be more expensive compared to Ghost(Pro), but for people who aren’t using email functionality, it can work out to roughly the same price.
[See self-hosting guides & instructions →](/install/)
**Ghost(Pro)** is the best choice for most people who are focused on using the Ghost software, and don’t want to spend time managing servers. Setting up a new Ghost site takes around 20 seconds, and after that all weekly updates, backups, security and performance are managed for you. If your site ever goes down, our team gets woken up while you sleep peacefully. In most cases Ghost(Pro) ends up being lower cost than self-hosting once you add up the cost of the different service providers.
[See Ghost(Pro) pricing & plans →](https://ghost.org/pricing/)
**TLDR:** If you want the easiest, cheapest option: Ghost(Pro) is probably your best bet. If you have a technical team and you want maximum control and flexibility, you’ll get more out of self-hosting.
***
## Self-hosting details & configuration
Ghost has a [small team](/product/), so we optimize the software for a single, narrow, well defined stack which is heavily tested. This is the same stack that we use on Ghost(Pro), so we can generally guarantee that it’s going to work well. Ghost *can* also run successfully with different operating systems, databases and web servers, but these are not officially supported or widely adopted, so your mileage may (will) vary.
Our officially supported and recommended stack is as follows:
* **Ubuntu 16.04**, **18.04**, **20.04** or **22.04**
* MySQL 8.0
* NGINX
* Systemd
* [Recommended Node version](/faq/node-versions/) installed via NodeSource
* A server with at least 1GB memory
* A non-root user for running `ghost` commands
[See self-hosting guides & instructions →](/install/)
***
### Server hardening
After setting up a fresh Ubuntu install in production, it’s worth considering the following steps to make your new environment extra secure and resilient:
* **Use SSL** - Ghost should be configured to run over HTTPS. Ghost admin must be run over HTTPS. You can choose to [load admin on a separate domain](/hosting/#separate-admin-domain) for additional security
* **Secure MySQL** - We strongly recommend running `mysql_secure_installation` after successful setup to significantly improve the security of your database.
* **Set up a firewall** - Ubuntu 18.04, 20.04 and 22.04 servers can use the UFW firewall to make sure only connections to certain services are allowed. We recommend setting up UFW rules for `ssh`, `nginx`, `http`, and `https`. If you do use UFW, make sure you don’t use any other firewalls.
* **Disable SSH Root & password logins** - It’s a very good idea to disable SSH password based login and *only* connect to your server via proper SSH keys. It’s also a good idea to disable the root user.
* **Separate admin domain** - Configuring a separate [admin URL](/config/#admin-url) can help to guard against [privilege escalation](/security/#privilege-escalation-attacks) and reduces available attack vectors.
### Optimizing for scale
The correct way to scale Ghost is by adding a CDN and/or caching layer in front of your Ghost instance. **Clustering or sharding is not supported in any way.** Every day 2-5 of the top stories on Hacker News are published with Ghost, and to the best of our knowledge no Ghost site has ever fallen over as a result of a traffic spike. Minimal, sensible caching is more than enough.
### Staying up to date
Whenever running a public-facing production web server it’s **critically important** to keep all software up to date. If you don’t keep everything up to date, you place your site and your server at risk of numerous potential exploits and hacks.
If you can’t manage these things yourself, ensure that a systems administrator on your team is able to keep everything updated on your behalf.
# How To Install Ghost
Source: https://docs.ghost.org/install
The fastest way to get started is to set up a site on **Ghost(Pro)**. If you're running a self-hosted instance, we strongly recommend an Ubuntu server with at least 1GB of memory to run Ghost.
***
16.04, 18.04, 20.04, 22.04 LTS
Community image
MacOS, Windows & Linux
For working on Ghost Core
## Cloud hosting
Official managed hosting
Pre-built VPS image
Virtual private servers
# Introduction
Source: https://docs.ghost.org/introduction
Ghost is an open source, professional publishing platform built on a modern Node.js technology stack — designed for teams who need power, flexibility and performance.
***
Hitting the right balance of needs has led Ghost to be used in production by organisations including Apple, Sky News, DuckDuckGo, Mozilla, Kickstarter, Square, Cloudflare, Tinder, the Bitcoin Foundation and [many more](https://ghost.org/explore/).
Every day Ghost powers some of the most-read stories on the internet, serving hundreds of millions of requests across tens of thousands of sites.
## How is Ghost different?
The first question most people have is, of course, how is Ghost different from everything else out there? Here’s a table to give you a quick summary:
| | Ghost (That's us!) | Open platforms (eg. WordPress) | Closed platforms (eg. Substack) |
| ------------------------------------------------------------ | ------------------ | ------------------------------ | ------------------------------- |
| 🏎 Exceptionally fast | ✅ | ❌ | ✅ |
| 🔒 Reliably secure | ✅ | ❌ | ✅ |
| 🎨 Great design | ✅ | ❌ | ✅ |
| 👩🏼🚀 Modern technology | ✅ | ❌ | ✅ |
| ♻️ Open Source | ✅ | ✅ | ❌ |
| 🏰 Own your brand+data | ✅ | ✅ | ❌ |
| 🌍 Use a custom domain | ✅ | ✅ | ❌ |
| 🖼 Control your site design | ✅ | ✅ | ❌ |
| 🌱 Censorship-free | ✅ | ✅ | ❌ |
| ⭐️ Built-in SEO control | ✅ | ❌ | ❌ |
| 🚀 Native REST API | ✅ | ❌ | ❌ |
| 🛠 Comprehensive SDK | ✅ | ❌ | ❌ |
| 🛒 Built-in membership & subscription commerce features | ✅ | ❌ | ❌ |
| 🤝 Works with any front-end or static site framework | ✅ | ❌ | ❌ |
| ❤️ Non-profit organisation with a sustainable business model | ✅ | ❌ | ❌ |
**In short:** Other open platforms are generally old, slow and bloated, while other closed platforms give you absolutely no control or ownership of your content. Ghost provides the best of both worlds, and more.
Still after a more detailed comparison? We’ve got some in-depth articles comparing Ghost to [WordPress](https://ghost.org/vs/wordpress/), [Medium](https://ghost.org/vs/medium/) and [Tumblr](https://ghost.org/vs/tumblr/).
## Background
Ghost was created by [John O’Nolan](https://twitter.com/johnonolan) and [Hannah Wolfe](https://twitter.com/erisds) in 2013 following a runaway Kickstarter campaign to create a new, modern publishing platform to serve professional publishers.
Previously, John was a core contributor of WordPress and watched as the platform grew more complicated and less focused over time. Ghost started out as a little idea to be the antidote to that pain, and quickly grew in popularity as the demand for a modern open source solution became evident.
Today, Ghost is one of the most popular open source projects in the world - the **#1** CMS [on GitHub](https://github.com/tryghost/ghost) - and is used in production by millions of people.
More than anything, we approach building Ghost to create the product we’ve always wanted to use, the company we’ve always wanted to do business with, and the environment we’ve always wanted to work in.
So, we do things a little differently to most others:
#### Independent structure
Ghost is structured as a [non-profit organisation](https://ghost.org/about/) to ensure it can legally never be sold and will always remain independent, building products based on the needs of its users - *not* the whims of investors looking for 💰 returns.
#### Sustainable business
While the software we release is free, we also sell [premium managed hosting](https://ghost.org/pricing/) for it, which gives the non-profit organisation a sustainable business model and allows it to be 100% self-funded.
#### Distributed team
Having a sustainable business allows us to hire open source contributors to work on Ghost full-time, and we do this [entirely remotely](https://ghost.org/about/#careers). The core Ghost team is fully distributed and live wherever they choose.
#### Transparent by default
We share [our revenue](https://ghost.org/about/) transparently and [our code](https://github.com/tryghost) openly so anyone can verify what we do and how we do it. No cloaks or daggers.
#### Unconditional open source
All our projects are released under the permissive open source [MIT licence](https://en.wikipedia.org/wiki/MIT_License), so that even if the company were to fail, our code could still be picked up and carried on by anyone in the world without restriction.
## Features
Ghost comes with powerful features built directly into the core software which can be customised and configured based on the needs of each individual site.
Here’s a quick overview of the main features you’ll probably be interested in as you’re getting started. This isn’t an exhaustive list, just some highlights.
### Built-in memberships & subscriptions
Don’t just create content for anonymous visitors, Ghost lets you turn your audience into a business with native support for member signups and paid subscription commerce. It’s the only platform with memberships built in by default, and deeply integrated.
Check out our [membership guide](/members/) for more details.
### Developer-friendly API
At its core Ghost is a self-consuming, RESTful JSON API with decoupled admin client and front-end. We provide lots of tooling to get a site running as quickly as possible, but at the end of the day it’s **Just JSON** ™️, so if you want to use Ghost completely headless and write your own frontend or backend… you can!
Equally, Ghost is heavily designed for performance. There are 2-5 frontpage stories on HackerNews at any given time that are served by Ghost. It handles scale with ease and doesn’t fall over as a result of traffic spikes.
### A serious editor
Ghost has the rich editor that every writer wants, but under the hood it delivers far more power than you would expect. All content is stored in a standardised JSON-based document storage format called Lexical, which includes support for extensible rich media objects called Cards.
In simple terms you can think of it like having Slack integrations inside Medium’s editor, stored sanely and fully accessible via API.
### Custom site structures
Routing in Ghost is completely configurable based on your needs. Out of the box Ghost comes with a standard reverse chronological feed of posts with clean permalinks and basic pages, but that’s easy to change.
Whether you need a full **multi-language site** with `/en/` and `/de/` base URLs, or you want to build out specific directory structures for hierarchical data like `/europe/uk/london/` — Ghost’s routing layer can be manipulated in any number of ways to achieve your use case.
### Roles & permissions
Set up your site with sensible user roles and permissions built-in from the start.
* **Contributors:** Can log in and write posts, but cannot publish.
* **Authors:** Can create and publish new posts and tags.
* **Editors:** Can invite, manage and edit authors and contributors.
* **Administrators:** Have full permissions to edit all data and settings.
* **Owner:** An admin who cannot be deleted + has access to billing details.
### Custom themes
Ghost ships with a simple Handlebars.js front-end theme layer which is very straightforward to work with and surprisingly powerful. Many people stick with the default theme ([live demo](https://demo.ghost.io) / [source code](https://github.com/tryghost/casper)), which provides a clean magazine design - but this can be modified or entirely replaced.
The Ghost [Theme Marketplace](https://ghost.org/marketplace/) provides a selection of pre-made third-party themes which can be installed with ease. Of course you can also build your own [Handlebars Theme](/themes/) or use a [different front-end](/content-api/) altogether.
### Apps & integrations
Because Ghost is completely open source, built as a JSON API, has webhooks, and gives you full control over the front-end: It essentially integrates with absolutely everything. Some things are easier than others, but almost anything is possible with a little elbow grease. Or a metaphor more recent than 1803.
You can browse our large [directory of integrations](https://ghost.org/integrations/) with instructions, or build any manner of custom integration yourself by writing a little JavaScript and Markup to do whatever you want.
You don’t need janky broken plugins which slow your site down. Integrations are the modern way to achieve extended functionality with ease.
### Search engine optimisation
Ghost comes with world-class SEO and everything you need to ensure that your content shows up in search indexes quickly and consistently.
**No plugins needed**
Ghost has all the fundamental technical SEO optimisations built directly into core, without any need to rely on third party plugins. It also has a far superior speed and pageload performance thanks to Node.js.
**Automatic google XML sitemaps**
Ghost will automatically generate and link to a complete Google sitemap including every page on your site, to make sure search engines are able to index every URL.
**Automatic structured data + JSON-LD**
Ghost generates [JSON-LD](https://developers.google.com/search/docs/guides/intro-structured-data) based structured metadata about your pages so that you don’t have to rely on messy microformats in your markup to provide semantic context. Even if you change theme or front-end, your SEO remains perfectly intact. Ghost also adds automatic code for Facebook OpenGraph and Twitter Cards.
**Canonical tags**
Ghost automatically generates the correct `rel="canonical"` tag for each post and page so that search engines always prioritise one true link.
# Ghost On The JAMstack
Source: https://docs.ghost.org/jamstack
How to use Ghost as a headless CMS with popular static site generators
***
Ghost ships with a default front-end theme layer built with Handlebars, but based on its flexible [architecture](/architecture/) it also be used as a headless CMS with third party front-end frameworks. We have setup guides for most of the most popular frameworks and how to use Ghost with them.
## Tips for using Ghost headless
Something to keep in mind is that Ghost’s default front-end is not just a theme layer, but also contains a large subset of functionality that is commonly required by most publishers, including:
* Tag archives, routes and templates
* Author archives, routes and templates
* Generated sitemap.xml for SEO
* Intelligent output and fallbacks for SEO meta data
* Automatic Open Graph structured data
* Automatic support for Twitter Cards
* Custom routes and automatic pagination
* Front-end code injection from admin
When using a statically generated front-end, all of this functionality must be re-implemented. Getting a list of posts from the API is usually the easy part, while taking care of the long tail of extra features is the bulk of the work needed to make this work well.
### Memberships
Ghost’s membership functionality is **not** compatible with headless setups. To use features like our Stripe integration for paid subscriptions, content gating, comments, analytics, offers, complimentary plans, trials, and more — Ghost must be used with its frontend layer.
### Working with images
The Ghost API returns content HTML including image tags with absolute URLs, pointing at the origin of the Ghost install. This is intentional, because Ghost itself is designed (primarily) to be source of truth for serving optimised assets, and may also be installed in a subdirectory.
When using a static front-end, you can either treat the Ghost install as a CDN origin for uploaded assets, or you can write additional logic in your front-end build to download embedded images locally, and rewrite the returned HTML to point to the local references instead.
### Disabling Ghost’s default front-end
When using a headless front-end with Ghost, you’ll want to disable Ghost’s default front-end to prevent duplicate content issues where search engines would see the same content on two different domains. The easiest way to do this is to enable ‘Private Site Mode’ under `Settings > General` - which will put a password on your Ghost install’s front-end, disable all SEO features, and serve a `noindex` meta tag.
You can also use dynamic redirects, locally or at a DNS level, to forward traffic automatically from the Ghost front-end to your new headless front-end - but this is a more fragile setup. If you use Ghost’s built-in newsletter functionality, unsubscribe links in emails will point to the Ghost origin - and these URLs will break if redirected. Preview URLs and other dynamically generated paths may also behave unexpectedly when blanket redirects are used.
Usually ‘Private Site Mode’ is the better option.
# License
Source: https://docs.ghost.org/license
Ghost is free software released under the [MIT License](http://en.wikipedia.org/wiki/MIT_License), which pretty much means you can do anything you want with it. The MIT License is one of the most free and open licenses in the world, and does not restrict how you use the software which it’s applied to. We believe open source software should be free. As in free.
***
You are allowed to use Ghost however you like, but any copyright notices remain in tact. With the MIT license you have the same freedom to decide how you want to engage with Open Source software. You decide whether your theme or integration is MIT, GPL, or any license you like.
It’s up to you to determine what’s best for your project. We believe giving people a choice is the most powerful statement a license can make. The full license is embedded below, and ships with every single copy of Ghost.
***
## The Ghost software license
Copyright © 2013-2025 Ghost Foundation
Permission is hereby granted, free of charge, to any person obtaining a copy of this software and associated documentation files (the "Software"), to deal in the Software without restriction, including without limitation the rights to use, copy, modify, merge, publish, distribute, sublicense, and/or sell copies of the Software, and to permit persons to whom the Software is furnished to do so, subject to the following conditions:
The above copyright notice and this permission notice shall be included in all copies or substantial portions of the Software.
THE SOFTWARE IS PROVIDED "AS IS", WITHOUT WARRANTY OF ANY KIND, EXPRESS OR IMPLIED, INCLUDING BUT NOT LIMITED TO THE WARRANTIES OF MERCHANTABILITY, FITNESS FOR A PARTICULAR PURPOSE AND NONINFRINGEMENT. IN NO EVENT SHALL THE AUTHORS OR COPYRIGHT HOLDERS BE LIABLE FOR ANY CLAIM, DAMAGES OR OTHER LIABILITY, WHETHER IN AN ACTION OF CONTRACT, TORT OR OTHERWISE, ARISING FROM, OUT OF OR IN CONNECTION WITH THE SOFTWARE OR THE USE OR OTHER DEALINGS IN THE SOFTWARE.
# LLM
Source: https://docs.ghost.org/llm
Industry-standard files that help AI tools efficiently index and understand Ghost documentation structure and content
***
## llms.txt
The [llms.txt](https://docs.ghost.org/llms.txt) file is an industry standard that helps general-purpose LLMs index more efficiently, similar to how a sitemap helps search engines.
AI tools can use this file to understand the Ghost documentation structure and find relevant content to your prompts.
## llms-full.txt
The [llms-full.txt](https://docs.ghost.org/llms-full.txt) file combines all of the Ghost docs into a single file as context for AI tools.
# Logos
Source: https://docs.ghost.org/logos
The Ghost brand is our pride and joy. We’ve gone to great lengths to make it as beautiful as possible, so we care a great deal about keeping it that way! These guidelines provide all of our official assets and styles, along with details of how to correctly use them.
***
**Ghost BTC Address:**\
`3CrQfpWaZPFfD4kAT7kh6avbW7bGBHiBq9`
# Ghost Developer FAQs
Source: https://docs.ghost.org/faq
Frequently asked questions and answers about running Ghost
Ghost ships with a mature set of APIs. Each API endpoint has a status, which indicates suitability for production use. Read more about Ghost’s [architecture](/architecture/).
Ghost doesn’t support load-balanced clustering or multi-server setups of any description, there should only be *one* Ghost instance per site.
Working with more complex iterations of the filter property in the routes.yaml file can cause conflicts or unexpected behaviour. Here are the most common issues.
Learn how to backup your self-hosted Ghost install
If an error occurs when trying to run `ghost start` or `ghost restart`, try using `ghost run` first to check that Ghost can start successfully. The `start` and `restart` commands are talking to your process manager (e.g. systemd) which can hide underlying errors from Ghost.
Image uploads can be affected by the default max upload size of 50mb. If you need more, you’ll need to increase the limit by editing your nginx config file, and setting the limit manually.
There’s a known issue that Google Cloud Platform does NOT allow any traffic on port 25 on a [Compute Engine instance](https://cloud.google.com/compute/docs/tutorials/sending-mail/).
Major version release dates and end of life support for Ghost.
Open rates that are 0% may indicate that the connection between Ghost and Mailgun has stalled, which prevents Ghost from fetching your newsletter analytics.
After installing Ghost a url for your site is set. This is the URL people will use to access your publication.
Ghost is designed to have a reverse proxy in front of it. If you use Ghost-CLI to install Ghost, this will be setup for you using nginx. If you configure your own proxy, you’ll need to make sure the proxy is configured correctly.
A fix for root user permissions problems
Analysis and retrospective of the critical Salt vulnerability on Ghost(Pro)
Ghost’s current recommended Node version is Node v20 LTS.
We recommend using Digital Ocean who provide a stable option on which Ghost can be installed and have a very active community and an official [**Ghost One-Click Application**](https://marketplace.digitalocean.com/apps/ghost).
Creators from all over the world use Ghost. Publications abound in German, French, Spanish, Sinhalese, and Arabic—and the list keeps going!
If your MySQL database is not correctly configured for Ghost, then you may run into some issues.
If the sqlite3 database file is not readable or writable by the user running Ghost, then you’ll run into some errors.
If you’re running Ghost 0.x versions, your site must be updated to Ghost 1.0 before it can be successfully updated to Ghost 2.0 and beyond.
When managing your self-hosted Ghost publication using the recommended `ghost-cli` tooling, you should update your CLI version. If you are using a deprecated version and need to update in order to update or manage your Ghost site, some extra steps may be required.
The tag and author taxonomies must be present in routes.yaml otherwise the URLs will not exist. By default, Ghost installs with the following:
If you’ve added Cloudflare to your self-hosted Ghost publication and find that Ghost Admin doesn’t load after updates you may run into some errors in the JavaScript console:
This guide explains how to use `nvm` with local and production Ghost installs.
MySQL 8 is the only supported database in production.
Ghost has the ability to deliver posts as email newsletters natively. A bulk-mail provider is required to use this feature and SMTP cannot be used — read more about [mail config](/config/#mail).
# Ghost CLI
Source: https://docs.ghost.org/ghost-cli
A fully loaded tool to help you get Ghost installed and configured and to make it super easy to keep your Ghost install up to date.
***
Ghost-CLI is to makes it possible to install or update Ghost with a *single command*. In addition, it performs useful operations to assist with maintaining your environment, such as:
* Checking for common environment problems
* Creating a **logical folder structure**
* Providing for production or development installs
* Allowing for **upgrades and rollbacks**
* Handling **user management and permissions**
* Configuring Ghost
* Configuring **NGINX**
* Setting up **MySQL**
* Configuring **systemd**
* Accessing Ghost log files
* Managing existing Ghost installs
***
## Install & update
Ghost-CLI is an npm module that can be installed via either npm.
```bash
# On a production server using a non-root user:
sudo npm install -g ghost-cli@latest
```
Locally, you likely don’t need sudo. Using `@latest` means this command with either install or update ghost-cli and you only have to remember the one command for both ✨
## Useful options
There are some global flags you may find useful when using `ghost-cli`:
```bash
# Output usage information for Ghost-CLI
ghost --help, ghost -h, ghost help, ghost [command] --help
# Enables the verbose logging output for debugging
ghost --verbose, ghost -V
# Print your CLI version and Ghost version
ghost --version, ghost -v, ghost version
# Run the command in a different directory
ghost --dir path/to/directory
# Runs command without asking for any input
ghost --no-prompt
# Runs command without using colours
ghost --no-color
```
## Commands
Below are the available commands in Ghost-CLI. You can always run `ghost --help` or `ghost [command] --help` to get more detail, or inline help for available options.
### Ghost config
`ghost config` accepts two optional arguments: `key` and `value`. Here are the three different combinations and what happens on each of them:
```bash
# Create a new config file for the particular env
ghost config
# Find and return the value in the config for the key passed
ghost config [key]
# Set a key and a value in the config file
ghost config [key] [value]
# Set the url for your site
ghost config url https://mysite.com
```
The `ghost config` command only affects the configuration files. In order for your new config to be used, run `ghost restart`.
#### Options
If you’re using `ghost config` to generate a configuration file, you can supply multiple key-value pairs in the form of options to avoid being prompted for that value.
All of these options can also be passed to `ghost install` and `ghost setup` , as these commands call `ghost config`.
See the [config guide](/config/) or run `ghost config --help` for more detailed information.
**Application options**
```bash
# URL of the site including protocol
--url https://mysite.com
# Admin URL of the site
--admin-url https://admin.mysite.com
# Port that Ghost should listen on
--port 2368
# IP to listen on
--ip 127.0.0.1
# Transport to send log output to
--log ["file","stdout"]
```
**Database options**
```bash
# Type of database to use (SQLite3 or MySQL)
--db
# For SQLite3 we just need a path to database file
--dbpath content/data/ghost_dev.db
# For MySQL we need full credentials:
--dbhost localhost
# Database user name
--dbuser ghost
# Database password
--dbpass ****
# Database name
--dbname ghost_dev
```
**Mail options**
```bash
# Mail transport, E.g SMTP, Sendmail or Direct
--mail SMTP
# Mail service (used with SMTP transport), E.g. Mailgun, Sendgrid, Gmail, SES...
--mailservice Mailgun
# Mail auth user (used with SMTP transport)
--mailuser postmaster@something.mailgun.org
# Mail auth pass (used with SMTP transport)
--mailpass ****
# Mail host (used with SMTP transport)
--mailhost smtp.eu.mailgun.org
# Mail port (used with SMTP transport)
--mailport 465
```
**Service options**
```bash
# Process manager to run with (local, systemd)
--process local
```
#### Debugging
In order for your new config to be used, run `ghost restart`.
***
### Ghost install
The `ghost install` command is your one-stop-shop to get a running production install of Ghost.
This command includes the necessary mysql, nginx and systemd configuration to get your publication online, and provides a series of setup questions to configure your new publication. The end result is a fully installed and configured instance ✨
Not ready for production yet? `ghost install local` installs ghost in development mode using sqlite3 and a local process manager. Read more about [local installs](/install/local/).
#### How it works
The `ghost install` command runs a nested command structure, but you only ever have to enter a single command.
First, it will run `ghost doctor` to check your environment is compatible. If checks pass, a local folder is setup, and Ghost is then downloaded from npm and installed.
Next, `ghost setup` runs, which will provide [prompts](/install/ubuntu/#install-questions) for you to configure your new publication via the `ghost config` command, including creating a MySQL user, initialising a database, configure nginx and sets up SSL.
Finally, the CLI will prompt to see if you want to run Ghost and if you choose yes `ghost start` will run.
#### Arguments
```bash
# Install a specific version (1.0.0 or higher)
ghost install [version]
# Install version 2.15.0
ghost install 2.15.0
# Install locally for development
ghost install local
# Install version 2.15.0, locally for development
ghost install 2.15.0 --local
```
#### Options
As `ghost install` runs nested commands, it also accepts options for the `ghost doctor`, `ghost config`, `ghost setup` and `ghost start` commands.
See the individual command docs, or run `ghost install --help` for more detailed information.
```bash
# Get more information before running the command
ghost install --help
# Install in development mode for a staging env
ghost install --development, ghost install -D
# Select the directory to install Ghost in
ghost install --dir path/to/dir
# Install Ghost from a specific archive (useful for testing or custom builds)
ghost install --archive path/to/file.tgz
# Disable stack checks
ghost install --no-stack
# Install without running setup
ghost install --no-setup
# Install without starting Ghost
ghost install --no-start
# Tells the process manager not to restart Ghost on server reboot
ghost setup --no-enable
# Install without prompting (disable setup, or pass all required parameters as arguments)
ghost install --no-prompt
```
#### Directory structure
When you install Ghost using Ghost-CLI, the local directory will be setup with a set of folders designed to keep the various parts of your install separate. After installing Ghost, you will have a folder structure like this which should not be changed:
```bash
.
├── .config.[env].json # The config file for your Ghost instance
├── .ghost-cli # Utility system file for Ghost CLI, don't modify
├── /content # Themes/images/content, not changed during updates
├── /current # A symlink to the currently active version of Ghost
├── /system # NGINX/systemd/SSL files on production installs
└── /versions # Installed versions of Ghost available roll forward/back to
```
***
### Ghost setup
`ghost setup` is the most useful feature of Ghost-CLI. In most cases you will never need to run it yourself, as it’s called automatically as a part of `ghost install`.
#### How it works
Setup configures your server ready for running Ghost in production. It assumes the [recommended stack](/install/ubuntu/#prerequisites/) and leaves your site in a production-ready state. Setup is broken down into stages:
* **mysql** - create a specific MySQL user that is used only for talking to Ghost’s database.
* **nginx** - creates an nginx configuration
* **ssl** - setup SSL with letsencrypt, using [acme.sh](https://github.com/Neilpang/acme.sh)
* **migrate** - initialises the database
* **linux-user** - creates a special low-privilege `ghost` user for running Ghost
#### What if I want to do something else?
The `Ghost-CLI` tool is designed to work with the recommended stack and is the only supported install method. However, since Ghost is a fully open-source project, and many users have different requirements, it is possible to setup and configure your site manually.
The CLI tool is flexible and each stage can be run individually by running `ghost setup ` or skipped by passing the `--no-setup-` flag.
#### Arguments
```bash
# Run ghost setup with specific stages
ghost setup [stages...]
# Creates a new mysql user with minimal privileges
ghost setup mysql
# Creates an nginx config file in `./system/files/` and adds a symlink to `/etc/nginx/sites-enabled/`
ghost setup nginx
# Creates an SSL service for Ghost
ghost setup ssl
# Create an nginx and ssl setup together
ghost setup nginx ssl
# Creates a low-privileged linux user called `ghost`
ghost setup linux-user
# Creates a systemd unit file for your site
ghost setup systemd
# Runs a database migration
ghost setup migrate
```
#### Options
As `ghost setup` runs nested commands, it also accepts options for the `ghost config`, `ghost start` and `ghost doctor` commands. Run `ghost setup --help` for more detailed information.
```bash
# Skips a setup stage
ghost setup --no-setup-mysql
ghost setup --no-setup-nginx
ghost setup --no-setup-ssl
ghost setup --no-setup-systemd
ghost setup --no-setup-linux-user
ghost setup --no-setup-migrate
# Configure a custom process name should be (default: ghost-local)
ghost setup --pname my-process
# Disable stack checks
ghost setup --no-stack
# Setup without starting Ghost
ghost setup --no-start
# Tells the process manager not to restart Ghost on server reboot
ghost setup --no-enable
# Install without prompting (must pass all required parameters as arguments)
ghost setup --no-prompt
```
***
### Ghost start
Running `ghost start` will start your site in background using the configured process manager. The default process manager is **systemd**, or local for local installs.
The command must be executed in the directory where the Ghost instance you are trying to start lives, or passed the correct directory using the `--dir` option.
#### Options
```bash
# Start running the Ghost instance in a specific directory
ghost start --dir /path/to/site/
# Start ghost in development mode
ghost start -D, ghost start --development
# Tells the process manager to restart Ghost on server reboot
ghost start --enable
# Tells the process manager not to restart Ghost on server reboot
ghost start --no-enable
# Disable memory availability checks in ghost doctor
ghost start --no-check-mem
```
#### Debugging
If running `ghost start` gives an error, try use `ghost run` to start Ghost without using the configured process manager. This runs Ghost directly, similar to `node index.js`. All the output from Ghost will be written directly to your terminal, showing up any uncaught errors or other output that might not appear in log files.
***
### Ghost stop
Running `ghost stop` stops the instance of Ghost running in the current directory. Alternatively it can be passed the name of a particular ghost instance or directory. You can always discover running Ghost instances using `ghost ls`.
#### Arguments
```bash
# Stop Ghost in the current folder
ghost stop
# Stop a specific Ghost instance (use ghost ls to find the name)
ghost stop [name]
# Stop the Ghost instance called ghost-local
ghost stop ghost-local
```
#### Options
```bash
# Stop all running Ghost instances
ghost stop --all
# Stop running the Ghost instance in a specific directory
ghost stop --dir /path/to/site/
# Tells the process manager that Ghost should not start on server reboot
ghost stop --disable
```
***
### Ghost restart
Running `ghost restart` will stop and then start your site using the configured process manager. The default process manager is systemd, or local for local installs.
The command must be executed in the directory where the Ghost instance you are trying to start lives, or passed the correct directory using the `--dir` option.
#### Options
```bash
# Start running the Ghost instance in a specific directory
ghost restart --dir /path/to/site/
```
#### Debugging
If running `ghost restart` gives an error, try using `ghost run` to debug the error.
***
### Ghost update
Run `ghost update` to upgraded to new versions of Ghost, which are typically released every 1-2 weeks.
#### Arguments
```bash
# Update to the latest version
ghost update
# Update to a specific version (1.0.0 or higher)
ghost update [version]
# Update to version 2.15.0
ghost update 2.15.0
```
#### Options
```bash
# If an upgrade goes wrong, use the rollback flag
ghost update --rollback
# Install and re-download the latest version of Ghost
ghost update --force
# Force install a specific version of Ghost
ghost update [version] --force
# Updates to the latest within v1
ghost update --v1
# Don't restart after upgrading
ghost update --no-restart
# Disable the automatic rollback on failure
ghost update --no-auto-rollback
# Upgrade Ghost from a specific zip (useful for testing or custom builds)
ghost update --zip path/to/file.zip
# Disable memory availability checks in ghost doctor
ghost update --no-check-mem
```
#### Major updates
Every 12-18 months we release a [major version](/faq/major-versions-lts/) which breaks backwards compatibility and requires a more involved upgrade process, including backups and theme compatibility.
Use the [update documentation](/update/) as a guide to the necessary steps for a smooth upgrade experience.
#### Debugging
If running `ghost update` gives an error, try using `ghost run` to debug the error.
***
### Ghost backup
Run `ghost backup` to generate a zip file backup of your site data.
#### How it works
When performing manual updates it’s recommended to make frequent backups, so if anything goes wrong, you’ll still have all your data. This is especially important when [updating](/update/) to the latest major version.
This command creates a full backup of your site data, including:
* Your content in JSON format
* A full member CSV export
* All themes that have been installed including your current active theme
* Images, files, and media (video and audio)
* A copy of `routes.yaml` and `redirects.yaml` or `redirects.json`
Read more about how to [manually download your site data](/faq/manual-backup/).
***
### Ghost doctor
Running `ghost doctor` will check the system for potential hiccups when installing or updating Ghost.
This command allows you to use `ghost-cli` as a diagnostic tool to find potential issues for your Ghost install, and provides information about what needs to be resolved if any issues arise.
The CLI automatically runs this command when installing, updating, starting or setting up ghost - and you can use is manually with `ghost doctor`.
#### Arguments
```bash
# Check is the required config file exists and validates it's values
ghost doctor startup
# Check if the setup process was successful
ghost doctor setup
```
#### Options
Run `ghost doctor --help` for more detailed information.
```bash
# Disable the memory availability checks
ghost doctor --no-check-mem
```
***
### Ghost ls
The `ghost ls` command lists all Ghost sites and their status from the `~/.ghost/config` file. This is useful if you can’t remember where you installed a particular instance of Ghost, or are working with multiple instances (local, production, staging and so on).
#### Output
```bash
# Development
> ghost ls
┌────────────────┬─────────────────────────────────┬─────────┬─────────────────────-─┬─────┬──────-┬─────────────────┐
│ Name │ Location │ Version │ Status │ URL │ Port │ Process Manager │
├────────────────┼─────────────────────────────────┼─────────┼─────────────────────-─┼─────┼──────-┼─────────────────┤
│ ghost-local │ ~/Sites/cli-test │ 1.22.1 │ stopped │ n/a │ n/a │ n/a │
├────────────────┼─────────────────────────────────┼─────────┼─────────────────────-─┼─────┼──────-┼─────────────────┤
│ ghost-local-2 │ ~/Sites/theme-dev │ 2.12.0 │ stopped │ n/a │ n/a │ n/a │
├────────────────┼─────────────────────────────────┼─────────┼─────────────────────-─┼─────┼──────-┼─────────────────┤
│ ghost-local-3 │ ~/Sites/new-theme │ 2.20.0 │ running (development) │ │ 2368 │ local │
└────────────────┴─────────────────────────────────┴─────────┴──────────────────────-┴─────┴─────-─┴─────────────────┘
```
```bash
# Production
> ghost ls
+ sudo systemctl is-active ghost_my-ghost-site
┌───────────────┬────────────────┬─────────┬──────────────────────┬─────────────────────────--┬──────┬─────────────────┐
│ Name │ Location │ Version │ Status │ URL │ Port │ Process Manager │
├───────────────┼────────────────┼─────────┼──────────────────────┼─────────────────────────--┼──────┼─────────────────┤
│ my-ghost-site │ /var/www/ghost │ 2.1.2 │ running (production) │ https://my-ghost-site.org │ 2368 │ systemd │
└───────────────┴────────────────┴─────────┴──────────────────────┴─────────────────────────--┴──────┴─────────────────┘
```
***
### Ghost log
View the access and error logs from your Ghost site (not the CLI). By default `ghost log` outputs the last 20 lines from the access log file for the site in the current folder.
Ghost’s default log config creates log files in the `content/logs` directory, and creates two different files:
1. An **access log** that contains all log levels, named e.g. `[site_descriptor].log`
2. An **error log** that contains error-level logs *only*, named e.g. `[site_descriptor].error.log`
The site descriptor follows the pattern `[proto]__[url]__[env]` e.g. `http__localhost_2368__development` or `https__mysite_com__production`. The files are be rotated, therefore you may see many numbered files in the `content/logs` directory.
#### Arguments
```bash
# View last 20 lines of access logs
ghost log
# View logs for a specific Ghost instance (use ghost ls to find the name)
ghost log [name]
# View logs for the Ghost instance called ghost-local
ghost log ghost-local
```
#### Options
```bash
# Show 100 log lines
ghost log -n 100, ghost log --number 100
# Show only the error logs
ghost log -e, ghost log --error
# Show 50 lines of the error log
ghost log -n 50 -e
# Follow the logs (e.g like tail -f)
ghost log -f, ghost log --follow
# Follow the error log
ghost log -fe
# Show logs for the Ghost instance in a specific directory
ghost log --dir /path/to/site/
```
#### Debugging
There may be some output from Ghost that doesn’t appear in the log files, so for debugging purposes you may also want to try the [ghost run](/ghost-cli#ghost-run) command.
If you have a custom log configuration the `ghost log` command may not work for you. In particular the `ghost log` command requires that file logging is enabled. See the [logging configuration docs](/config/#logging) for more information.
***
### Ghost uninstall
**Use with caution** - this command completely removes a Ghost install along with all of its related data and config. There is no recovery from this if you have no backups.
The command `ghost uninstall` must be executed in the directory containing the Ghost install that you would like to remove. The following tasks are performed:
* stop ghost
* disable systemd if necessary
* remove the `content` folder
* remove any related systemd or nginx configuration
* remove the remaining files inside the install folder
Running `ghost uninstall --no-prompt` or `ghost uninstall --force` will skip the warning and remove Ghost without a prompt.
***
### Ghost help
Use the help command to access a list of possible `ghost-cli` commands when required.
This command is your port of call when you want to discover a list of available commands in the Ghost-CLI. You can call it at any time ✨
#### Output
```bash
Commands:
ghost buster Who ya gonna call? (Runs `yarn cache clean`)
ghost config [key] [value] View or edit Ghost configuration
ghost doctor [categories..] Check the system for any potential hiccups when installing/updating
Ghost
ghost install [version] Install a brand new instance of Ghost
ghost log [name] View the logs of a Ghost instance
ghost ls View running ghost processes
ghost migrate Run system migrations on a Ghost instance
ghost restart Restart the Ghost instance
ghost run Run a Ghost instance directly (used by process managers and for
debugging)
ghost setup [stages..] Setup an installation of Ghost (after it is installed)
ghost start Start an instance of Ghost
ghost stop [name] Stops an instance of Ghost
ghost uninstall Remove a Ghost instance and any related configuration files
ghost update [version] Update a Ghost instance
ghost version Prints out Ghost-CLI version (and Ghost version if one exists)
Global Options:
--help Show help [boolean]
-d, --dir Folder to run command in
-D, --development Run in development mode [boolean]
-V, --verbose Enable verbose output [boolean]
--prompt [--no-prompt] Allow/Disallow UI prompting [boolean] [default: true]
--color [--no-color] Allow/Disallow colorful logging [boolean] [default: true]
--auto Automatically run as much as possible [boolean] [default: false]
```
#### Options
It’s also possible to run `ghost install --help` and `ghost setup --help` to get a specific list of commands and help for the install and setup processes. Don’t worry - you got this! 💪
***
## Knowledgebase
### SSL
The CLI generates a free SSL certificate from [Let’s Encrypt](#lets-encrypt) using [acme.sh](#lets-encrypt) and a secondary NGINX config file to serve https traffic via port 443.
**SSL configuration**
After a successful ssl setup, you can find your ssl certificate in `/etc/letsencrypt`.
**SSL for additional domains**
You may wish to have multiple domains that redirect to your site, e.g. to have an extra TLD or to support [www](http://www). domains. **Ghost itself can only ever have one domain pointed at it.** This is intentional for SEO purposes, however you can always redirect extra domains to your Ghost install using nginx.
If you want to redirect an HTTPS domain, you must have a certificate for it. If you want to use Ghost-CLI to generate an extra SSL setup, follow this guide:
```bash
# Determine your secondary URL
ghost config url https://my-second-domain.com
# Get Ghost-CLI to generate an SSL setup for you:
ghost setup nginx ssl
# Change your config back to your canonical domain
ghost config url https://my-canonical-domain.com
# Edit the nginx config files for your second domain to redirect to your canonical domain. In both files replace the content of the first location block with:
return 301 https://my-canonical-domain.com$request_uri;
# Get nginx to verify your config
sudo nginx -t
# Reload nginx with your new config
sudo nginx -s reload
```
**Let’s Encrypt**
[Let’s Encrypt](https://letsencrypt.org/) provides SSL certificates that are accepted by browsers free of charge! This is provided by the non-profit Internet Security Research Group (ISRG). The Ghost-CLI will offer you to generate a free SSL certificate as well as renew it every 60 days.
Ghost uses [acme.sh](https://github.com/Neilpang/acme.sh) for provisioning and renewing SSL certificates from Let’s Encrypt. You can call `acme.sh` manually if you need to perform extra tasks. The following command will output all available options:
```bash
/etc/letsencrypt/acme.sh --home "/etc/letsencrypt"
```
### Systemd
`systemd` is the default way of starting and stopping applications on Ubuntu. The advantage is that if Ghost crashes, `systemd` will restart your instance. This is the default recommended process manager.
### Permissions
Ghost-CLI will create a new system user and user-group called `ghost` during the installation process. The `ghost` user will be used to run your Ghost process in `systemd`.
This means that Ghost will run with a user that has no system-wide permissions or a shell that can be used (similar to other services such as NGINX). Sudo is required to modify files in the The `/content/`.
To prevent accidental permissions changes, it’s advisable to execute tasks such as image upload or theme upload using Ghost admin.
#### File Permissions
The `ghost-cli` enforces default linux permissions (via `ghost doctor` hooks) for installations.
* For normal users, default directory permissions are 775, and default file permissions are 664.
* For root users, default directory permissions are 755, and default file permissions are 644.
Running ghost install as the non-root user will result in directories created with 775 (`drwxrwxr-x`) permissions and file with 664 (`-rw-rw-r--`) permissions.
These file permissions don’t need to be changed. The only change that is executed by ghost-cli is changing ownership, file permissions stay untouched.
If permissions were changed, the following two commands will revert file and directory permissions to the ones of a non-root user.
```bash
sudo find /var/www/ghost/* -type d -exec chmod 775 {} \;
sudo find /var/www/ghost/* -type f -exec chmod 664 {} \;
```
The cli doesn’t support directory flags such as `setuid` and `setguid`). If your commands keep failing because of file permissions, ensure your directories have no flags!
# Hosting Ghost
Source: https://docs.ghost.org/hosting
A short guide to running Ghost in a production environment and setting up an independent publication to serve traffic at scale.
***
Ghost is open source software, and can be installed and maintained relatively easily on just about any VPS hosting provider. Additionally, we run an official PaaS for Ghost called [Ghost(Pro)](https://ghost.org/pricing/), where you can have a fully managed instance set up in a couple of clicks. All revenue from Ghost(Pro) goes toward funding the future development of Ghost itself, so by using our official hosting you’ll also be funding developers to continue to improve the core product for you.
## Ghost(Pro) vs Self-hosting
A common question we get from developers is whether they should use our official platform, or host the codebase on their own server independently. Deciding which option is best for you comes with some nuance, so below is a breakdown of the differences to help you decide what will fit your needs best.
| | Ghost(Pro) | Self-Hosting |
| ------------------------------- | --------------------- | ------------------- |
| 🎛 Product features | Identical | Identical |
| ⚙️ Base hosting cost | From **\$9**/mo | From **\$10**/mo |
| 🌍 Worldwide Fastly CDN | Included | From **\$50**/mo |
| 💌 Email newsletter sending | Included | From **\$35**/mo |
| 📦 Full site backups | Included | From **\$5**/mo |
| 🖼️ Built-in image editor | Included | From **\$12**/mo |
| 💵 Payment processing fees | 0% | 0% |
| 🖥 Install & setup | ✅ | Manual |
| 🔄 Weekly updates | ✅ | Manual |
| 🚧 Server maintenance & updates | ✅ | Manual |
| 🔒 SSL Certificate | ✅ | Manual |
| ⚠️ Threat & uptime management | ✅ | ❌ |
| 🥊 Enterprise-grade security | ✅ | ❌ |
| 🔀 Custom edge routing policies | ❌ | ✅ |
| 👩💻 Direct SSH & DB access | ❌ | ✅ |
| 🔨 Ability to modify core | ❌ | ✅ |
| 🚑 Ghost product support | Email | Forum |
| ❤️ Where your money goes | New features in Ghost | 3rd party companies |
### Which option is best for me?
**Self-hosting** is the best choice for teams who are comfortable managing servers, databases and Node.js apps who want full control over their environment. There’s more complexity involved, and you have to signup-for and pay for your own Mailgun account (email delivery) and CDN service (performance and scale) — but ultimately more flexibility around exactly how the software runs. For people sending lots of email newsletters, self-hosting generally works out to be more expensive compared to Ghost(Pro), but for people who aren’t using email functionality, it can work out to roughly the same price.
[See self-hosting guides & instructions →](/install/)
**Ghost(Pro)** is the best choice for most people who are focused on using the Ghost software, and don’t want to spend time managing servers. Setting up a new Ghost site takes around 20 seconds, and after that all weekly updates, backups, security and performance are managed for you. If your site ever goes down, our team gets woken up while you sleep peacefully. In most cases Ghost(Pro) ends up being lower cost than self-hosting once you add up the cost of the different service providers.
[See Ghost(Pro) pricing & plans →](https://ghost.org/pricing/)
**TLDR:** If you want the easiest, cheapest option: Ghost(Pro) is probably your best bet. If you have a technical team and you want maximum control and flexibility, you’ll get more out of self-hosting.
***
## Self-hosting details & configuration
Ghost has a [small team](/product/), so we optimize the software for a single, narrow, well defined stack which is heavily tested. This is the same stack that we use on Ghost(Pro), so we can generally guarantee that it’s going to work well. Ghost *can* also run successfully with different operating systems, databases and web servers, but these are not officially supported or widely adopted, so your mileage may (will) vary.
Our officially supported and recommended stack is as follows:
* **Ubuntu 16.04**, **18.04**, **20.04** or **22.04**
* MySQL 8.0
* NGINX
* Systemd
* [Recommended Node version](/faq/node-versions/) installed via NodeSource
* A server with at least 1GB memory
* A non-root user for running `ghost` commands
[See self-hosting guides & instructions →](/install/)
***
### Server hardening
After setting up a fresh Ubuntu install in production, it’s worth considering the following steps to make your new environment extra secure and resilient:
* **Use SSL** - Ghost should be configured to run over HTTPS. Ghost admin must be run over HTTPS. You can choose to [load admin on a separate domain](/hosting/#separate-admin-domain) for additional security
* **Secure MySQL** - We strongly recommend running `mysql_secure_installation` after successful setup to significantly improve the security of your database.
* **Set up a firewall** - Ubuntu 18.04, 20.04 and 22.04 servers can use the UFW firewall to make sure only connections to certain services are allowed. We recommend setting up UFW rules for `ssh`, `nginx`, `http`, and `https`. If you do use UFW, make sure you don’t use any other firewalls.
* **Disable SSH Root & password logins** - It’s a very good idea to disable SSH password based login and *only* connect to your server via proper SSH keys. It’s also a good idea to disable the root user.
* **Separate admin domain** - Configuring a separate [admin URL](/config/#admin-url) can help to guard against [privilege escalation](/security/#privilege-escalation-attacks) and reduces available attack vectors.
### Optimizing for scale
The correct way to scale Ghost is by adding a CDN and/or caching layer in front of your Ghost instance. **Clustering or sharding is not supported in any way.** Every day 2-5 of the top stories on Hacker News are published with Ghost, and to the best of our knowledge no Ghost site has ever fallen over as a result of a traffic spike. Minimal, sensible caching is more than enough.
### Staying up to date
Whenever running a public-facing production web server it’s **critically important** to keep all software up to date. If you don’t keep everything up to date, you place your site and your server at risk of numerous potential exploits and hacks.
If you can’t manage these things yourself, ensure that a systems administrator on your team is able to keep everything updated on your behalf.
# How To Install Ghost
Source: https://docs.ghost.org/install
The fastest way to get started is to set up a site on **Ghost(Pro)**. If you're running a self-hosted instance, we strongly recommend an Ubuntu server with at least 1GB of memory to run Ghost.
***
16.04, 18.04, 20.04, 22.04 LTS
Community image
MacOS, Windows & Linux
For working on Ghost Core
## Cloud hosting
Official managed hosting
Pre-built VPS image
Virtual private servers
# Introduction
Source: https://docs.ghost.org/introduction
Ghost is an open source, professional publishing platform built on a modern Node.js technology stack — designed for teams who need power, flexibility and performance.
***
Hitting the right balance of needs has led Ghost to be used in production by organisations including Apple, Sky News, DuckDuckGo, Mozilla, Kickstarter, Square, Cloudflare, Tinder, the Bitcoin Foundation and [many more](https://ghost.org/explore/).
Every day Ghost powers some of the most-read stories on the internet, serving hundreds of millions of requests across tens of thousands of sites.
## How is Ghost different?
The first question most people have is, of course, how is Ghost different from everything else out there? Here’s a table to give you a quick summary:
| | Ghost (That's us!) | Open platforms (eg. WordPress) | Closed platforms (eg. Substack) |
| ------------------------------------------------------------ | ------------------ | ------------------------------ | ------------------------------- |
| 🏎 Exceptionally fast | ✅ | ❌ | ✅ |
| 🔒 Reliably secure | ✅ | ❌ | ✅ |
| 🎨 Great design | ✅ | ❌ | ✅ |
| 👩🏼🚀 Modern technology | ✅ | ❌ | ✅ |
| ♻️ Open Source | ✅ | ✅ | ❌ |
| 🏰 Own your brand+data | ✅ | ✅ | ❌ |
| 🌍 Use a custom domain | ✅ | ✅ | ❌ |
| 🖼 Control your site design | ✅ | ✅ | ❌ |
| 🌱 Censorship-free | ✅ | ✅ | ❌ |
| ⭐️ Built-in SEO control | ✅ | ❌ | ❌ |
| 🚀 Native REST API | ✅ | ❌ | ❌ |
| 🛠 Comprehensive SDK | ✅ | ❌ | ❌ |
| 🛒 Built-in membership & subscription commerce features | ✅ | ❌ | ❌ |
| 🤝 Works with any front-end or static site framework | ✅ | ❌ | ❌ |
| ❤️ Non-profit organisation with a sustainable business model | ✅ | ❌ | ❌ |
**In short:** Other open platforms are generally old, slow and bloated, while other closed platforms give you absolutely no control or ownership of your content. Ghost provides the best of both worlds, and more.
Still after a more detailed comparison? We’ve got some in-depth articles comparing Ghost to [WordPress](https://ghost.org/vs/wordpress/), [Medium](https://ghost.org/vs/medium/) and [Tumblr](https://ghost.org/vs/tumblr/).
## Background
Ghost was created by [John O’Nolan](https://twitter.com/johnonolan) and [Hannah Wolfe](https://twitter.com/erisds) in 2013 following a runaway Kickstarter campaign to create a new, modern publishing platform to serve professional publishers.
Previously, John was a core contributor of WordPress and watched as the platform grew more complicated and less focused over time. Ghost started out as a little idea to be the antidote to that pain, and quickly grew in popularity as the demand for a modern open source solution became evident.
Today, Ghost is one of the most popular open source projects in the world - the **#1** CMS [on GitHub](https://github.com/tryghost/ghost) - and is used in production by millions of people.
More than anything, we approach building Ghost to create the product we’ve always wanted to use, the company we’ve always wanted to do business with, and the environment we’ve always wanted to work in.
So, we do things a little differently to most others:
#### Independent structure
Ghost is structured as a [non-profit organisation](https://ghost.org/about/) to ensure it can legally never be sold and will always remain independent, building products based on the needs of its users - *not* the whims of investors looking for 💰 returns.
#### Sustainable business
While the software we release is free, we also sell [premium managed hosting](https://ghost.org/pricing/) for it, which gives the non-profit organisation a sustainable business model and allows it to be 100% self-funded.
#### Distributed team
Having a sustainable business allows us to hire open source contributors to work on Ghost full-time, and we do this [entirely remotely](https://ghost.org/about/#careers). The core Ghost team is fully distributed and live wherever they choose.
#### Transparent by default
We share [our revenue](https://ghost.org/about/) transparently and [our code](https://github.com/tryghost) openly so anyone can verify what we do and how we do it. No cloaks or daggers.
#### Unconditional open source
All our projects are released under the permissive open source [MIT licence](https://en.wikipedia.org/wiki/MIT_License), so that even if the company were to fail, our code could still be picked up and carried on by anyone in the world without restriction.
## Features
Ghost comes with powerful features built directly into the core software which can be customised and configured based on the needs of each individual site.
Here’s a quick overview of the main features you’ll probably be interested in as you’re getting started. This isn’t an exhaustive list, just some highlights.
### Built-in memberships & subscriptions
Don’t just create content for anonymous visitors, Ghost lets you turn your audience into a business with native support for member signups and paid subscription commerce. It’s the only platform with memberships built in by default, and deeply integrated.
Check out our [membership guide](/members/) for more details.
### Developer-friendly API
At its core Ghost is a self-consuming, RESTful JSON API with decoupled admin client and front-end. We provide lots of tooling to get a site running as quickly as possible, but at the end of the day it’s **Just JSON** ™️, so if you want to use Ghost completely headless and write your own frontend or backend… you can!
Equally, Ghost is heavily designed for performance. There are 2-5 frontpage stories on HackerNews at any given time that are served by Ghost. It handles scale with ease and doesn’t fall over as a result of traffic spikes.
### A serious editor
Ghost has the rich editor that every writer wants, but under the hood it delivers far more power than you would expect. All content is stored in a standardised JSON-based document storage format called Lexical, which includes support for extensible rich media objects called Cards.
In simple terms you can think of it like having Slack integrations inside Medium’s editor, stored sanely and fully accessible via API.
### Custom site structures
Routing in Ghost is completely configurable based on your needs. Out of the box Ghost comes with a standard reverse chronological feed of posts with clean permalinks and basic pages, but that’s easy to change.
Whether you need a full **multi-language site** with `/en/` and `/de/` base URLs, or you want to build out specific directory structures for hierarchical data like `/europe/uk/london/` — Ghost’s routing layer can be manipulated in any number of ways to achieve your use case.
### Roles & permissions
Set up your site with sensible user roles and permissions built-in from the start.
* **Contributors:** Can log in and write posts, but cannot publish.
* **Authors:** Can create and publish new posts and tags.
* **Editors:** Can invite, manage and edit authors and contributors.
* **Administrators:** Have full permissions to edit all data and settings.
* **Owner:** An admin who cannot be deleted + has access to billing details.
### Custom themes
Ghost ships with a simple Handlebars.js front-end theme layer which is very straightforward to work with and surprisingly powerful. Many people stick with the default theme ([live demo](https://demo.ghost.io) / [source code](https://github.com/tryghost/casper)), which provides a clean magazine design - but this can be modified or entirely replaced.
The Ghost [Theme Marketplace](https://ghost.org/marketplace/) provides a selection of pre-made third-party themes which can be installed with ease. Of course you can also build your own [Handlebars Theme](/themes/) or use a [different front-end](/content-api/) altogether.
### Apps & integrations
Because Ghost is completely open source, built as a JSON API, has webhooks, and gives you full control over the front-end: It essentially integrates with absolutely everything. Some things are easier than others, but almost anything is possible with a little elbow grease. Or a metaphor more recent than 1803.
You can browse our large [directory of integrations](https://ghost.org/integrations/) with instructions, or build any manner of custom integration yourself by writing a little JavaScript and Markup to do whatever you want.
You don’t need janky broken plugins which slow your site down. Integrations are the modern way to achieve extended functionality with ease.
### Search engine optimisation
Ghost comes with world-class SEO and everything you need to ensure that your content shows up in search indexes quickly and consistently.
**No plugins needed**
Ghost has all the fundamental technical SEO optimisations built directly into core, without any need to rely on third party plugins. It also has a far superior speed and pageload performance thanks to Node.js.
**Automatic google XML sitemaps**
Ghost will automatically generate and link to a complete Google sitemap including every page on your site, to make sure search engines are able to index every URL.
**Automatic structured data + JSON-LD**
Ghost generates [JSON-LD](https://developers.google.com/search/docs/guides/intro-structured-data) based structured metadata about your pages so that you don’t have to rely on messy microformats in your markup to provide semantic context. Even if you change theme or front-end, your SEO remains perfectly intact. Ghost also adds automatic code for Facebook OpenGraph and Twitter Cards.
**Canonical tags**
Ghost automatically generates the correct `rel="canonical"` tag for each post and page so that search engines always prioritise one true link.
# Ghost On The JAMstack
Source: https://docs.ghost.org/jamstack
How to use Ghost as a headless CMS with popular static site generators
***
Ghost ships with a default front-end theme layer built with Handlebars, but based on its flexible [architecture](/architecture/) it also be used as a headless CMS with third party front-end frameworks. We have setup guides for most of the most popular frameworks and how to use Ghost with them.
## Tips for using Ghost headless
Something to keep in mind is that Ghost’s default front-end is not just a theme layer, but also contains a large subset of functionality that is commonly required by most publishers, including:
* Tag archives, routes and templates
* Author archives, routes and templates
* Generated sitemap.xml for SEO
* Intelligent output and fallbacks for SEO meta data
* Automatic Open Graph structured data
* Automatic support for Twitter Cards
* Custom routes and automatic pagination
* Front-end code injection from admin
When using a statically generated front-end, all of this functionality must be re-implemented. Getting a list of posts from the API is usually the easy part, while taking care of the long tail of extra features is the bulk of the work needed to make this work well.
### Memberships
Ghost’s membership functionality is **not** compatible with headless setups. To use features like our Stripe integration for paid subscriptions, content gating, comments, analytics, offers, complimentary plans, trials, and more — Ghost must be used with its frontend layer.
### Working with images
The Ghost API returns content HTML including image tags with absolute URLs, pointing at the origin of the Ghost install. This is intentional, because Ghost itself is designed (primarily) to be source of truth for serving optimised assets, and may also be installed in a subdirectory.
When using a static front-end, you can either treat the Ghost install as a CDN origin for uploaded assets, or you can write additional logic in your front-end build to download embedded images locally, and rewrite the returned HTML to point to the local references instead.
### Disabling Ghost’s default front-end
When using a headless front-end with Ghost, you’ll want to disable Ghost’s default front-end to prevent duplicate content issues where search engines would see the same content on two different domains. The easiest way to do this is to enable ‘Private Site Mode’ under `Settings > General` - which will put a password on your Ghost install’s front-end, disable all SEO features, and serve a `noindex` meta tag.
You can also use dynamic redirects, locally or at a DNS level, to forward traffic automatically from the Ghost front-end to your new headless front-end - but this is a more fragile setup. If you use Ghost’s built-in newsletter functionality, unsubscribe links in emails will point to the Ghost origin - and these URLs will break if redirected. Preview URLs and other dynamically generated paths may also behave unexpectedly when blanket redirects are used.
Usually ‘Private Site Mode’ is the better option.
# License
Source: https://docs.ghost.org/license
Ghost is free software released under the [MIT License](http://en.wikipedia.org/wiki/MIT_License), which pretty much means you can do anything you want with it. The MIT License is one of the most free and open licenses in the world, and does not restrict how you use the software which it’s applied to. We believe open source software should be free. As in free.
***
You are allowed to use Ghost however you like, but any copyright notices remain in tact. With the MIT license you have the same freedom to decide how you want to engage with Open Source software. You decide whether your theme or integration is MIT, GPL, or any license you like.
It’s up to you to determine what’s best for your project. We believe giving people a choice is the most powerful statement a license can make. The full license is embedded below, and ships with every single copy of Ghost.
***
## The Ghost software license
Copyright © 2013-2025 Ghost Foundation
Permission is hereby granted, free of charge, to any person obtaining a copy of this software and associated documentation files (the "Software"), to deal in the Software without restriction, including without limitation the rights to use, copy, modify, merge, publish, distribute, sublicense, and/or sell copies of the Software, and to permit persons to whom the Software is furnished to do so, subject to the following conditions:
The above copyright notice and this permission notice shall be included in all copies or substantial portions of the Software.
THE SOFTWARE IS PROVIDED "AS IS", WITHOUT WARRANTY OF ANY KIND, EXPRESS OR IMPLIED, INCLUDING BUT NOT LIMITED TO THE WARRANTIES OF MERCHANTABILITY, FITNESS FOR A PARTICULAR PURPOSE AND NONINFRINGEMENT. IN NO EVENT SHALL THE AUTHORS OR COPYRIGHT HOLDERS BE LIABLE FOR ANY CLAIM, DAMAGES OR OTHER LIABILITY, WHETHER IN AN ACTION OF CONTRACT, TORT OR OTHERWISE, ARISING FROM, OUT OF OR IN CONNECTION WITH THE SOFTWARE OR THE USE OR OTHER DEALINGS IN THE SOFTWARE.
# LLM
Source: https://docs.ghost.org/llm
Industry-standard files that help AI tools efficiently index and understand Ghost documentation structure and content
***
## llms.txt
The [llms.txt](https://docs.ghost.org/llms.txt) file is an industry standard that helps general-purpose LLMs index more efficiently, similar to how a sitemap helps search engines.
AI tools can use this file to understand the Ghost documentation structure and find relevant content to your prompts.
## llms-full.txt
The [llms-full.txt](https://docs.ghost.org/llms-full.txt) file combines all of the Ghost docs into a single file as context for AI tools.
# Logos
Source: https://docs.ghost.org/logos
The Ghost brand is our pride and joy. We’ve gone to great lengths to make it as beautiful as possible, so we care a great deal about keeping it that way! These guidelines provide all of our official assets and styles, along with details of how to correctly use them.
***


 ### Ghost colours
Light backgrounds and tinted greys, accented with Ghost Green.
Ghost Green
* \$green
* RGB 48, 207, 67
* \#30cf43
White
* RGB 255, 255, 255
* \#ffffff
Light Grey
* \$lightgrey
* RGB 206, 212, 217
* \#CED4D9
Mid Grey
* \$midgrey
* RGB 124, 139, 154
* \#7C8B9A
Dark Grey
* \$darkgrey
* RGB 21, 33, 42
* \#15171A
Any use of Ghost brand materials constitutes acceptance of the Ghost [Terms of Service](https://ghost.org/terms/), [Trademark Policy](/trademark/) and these Brand Guidelines, which may be updated from time to time. You fully acknowledge that Ghost Foundation is the sole owner of Ghost trademarks, promise not to interfere with Ghost's rights, and acknowledge that goodwill derived from their use accrues only to Ghost. Ghost may review or terminate use of brand materials at any time.
# Memberships
Source: https://docs.ghost.org/members
The native Members feature in Ghost makes it possible to launch a membership business from any Ghost publication, with member signup, paid subscriptions and email newsletters built-in.
***
## Overview
Any publisher who wants to offer a way for their audience to support their work can use the Members feature to share content, build an audience, and generate an income from a membership business.
### Ghost colours
Light backgrounds and tinted greys, accented with Ghost Green.
Ghost Green
* \$green
* RGB 48, 207, 67
* \#30cf43
White
* RGB 255, 255, 255
* \#ffffff
Light Grey
* \$lightgrey
* RGB 206, 212, 217
* \#CED4D9
Mid Grey
* \$midgrey
* RGB 124, 139, 154
* \#7C8B9A
Dark Grey
* \$darkgrey
* RGB 21, 33, 42
* \#15171A
Any use of Ghost brand materials constitutes acceptance of the Ghost [Terms of Service](https://ghost.org/terms/), [Trademark Policy](/trademark/) and these Brand Guidelines, which may be updated from time to time. You fully acknowledge that Ghost Foundation is the sole owner of Ghost trademarks, promise not to interfere with Ghost's rights, and acknowledge that goodwill derived from their use accrues only to Ghost. Ghost may review or terminate use of brand materials at any time.
# Memberships
Source: https://docs.ghost.org/members
The native Members feature in Ghost makes it possible to launch a membership business from any Ghost publication, with member signup, paid subscriptions and email newsletters built-in.
***
## Overview
Any publisher who wants to offer a way for their audience to support their work can use the Members feature to share content, build an audience, and generate an income from a membership business.
 The concepts and components that enable you to turn a Ghost site into a members publication are surprisingly simple and can be broken down into two concepts:
## 1. Memberships
A member of a Ghost site is someone who has opted to subscribe, and confirmed their subscription by clicking the link sent to their inbox. Members are stored in Ghost, to make tracking, managing and supporting an audience a breeze.
### Secure authentication
Ghost uses passwordless JWT email-link based logins for your members. It’s fast, reliable, and incredible for security. Secure email authentication is used for both member sign up and sign in.
### Access levels
Once a visitor has entered their email address and confirmed membership, you can share protected content with them on your Ghost publication. Logged in members are able to access any content that matches their tier.
The following access levels are available to select from the post settings in the editor:
* **Public**
* **Members only**
* **Paid-members only**
* **Specific tier(s)**
Content is securely protected at server level and there is no way to circumvent gated content without being a logged-in member.
### Managing members
Members are stored in Ghost with the following attributes:
* `email` (required)
* `name`
* `note`
* `subscribed_to_emails`
* `stripe_customer_id`
* `status` (free/paid/complimentary)
* `labels`
* `created_at`
### Imports
It’s possible to import Members from any other platform. If you have a list of email addresses, this can be ported into Ghost via CSV, Zapier, or the API.
## 2. Subscriptions
Members in Ghost can be free members, or become paid members with a direct Stripe integration for fast, global payments.
### Connect to Stripe
We’ve built a direct [integration with Stripe](https://ghost.org/integrations/stripe/) which allows publishers to connect their Ghost site to their own billing account using Stripe Connect.
The concepts and components that enable you to turn a Ghost site into a members publication are surprisingly simple and can be broken down into two concepts:
## 1. Memberships
A member of a Ghost site is someone who has opted to subscribe, and confirmed their subscription by clicking the link sent to their inbox. Members are stored in Ghost, to make tracking, managing and supporting an audience a breeze.
### Secure authentication
Ghost uses passwordless JWT email-link based logins for your members. It’s fast, reliable, and incredible for security. Secure email authentication is used for both member sign up and sign in.
### Access levels
Once a visitor has entered their email address and confirmed membership, you can share protected content with them on your Ghost publication. Logged in members are able to access any content that matches their tier.
The following access levels are available to select from the post settings in the editor:
* **Public**
* **Members only**
* **Paid-members only**
* **Specific tier(s)**
Content is securely protected at server level and there is no way to circumvent gated content without being a logged-in member.
### Managing members
Members are stored in Ghost with the following attributes:
* `email` (required)
* `name`
* `note`
* `subscribed_to_emails`
* `stripe_customer_id`
* `status` (free/paid/complimentary)
* `labels`
* `created_at`
### Imports
It’s possible to import Members from any other platform. If you have a list of email addresses, this can be ported into Ghost via CSV, Zapier, or the API.
## 2. Subscriptions
Members in Ghost can be free members, or become paid members with a direct Stripe integration for fast, global payments.
### Connect to Stripe
We’ve built a direct [integration with Stripe](https://ghost.org/integrations/stripe/) which allows publishers to connect their Ghost site to their own billing account using Stripe Connect.
 Payments are handled by Stripe and billing information is stored securely inside your own Stripe account.
### Transaction fees
Ghost takes **0%** of your revenue. Whatever you generate from a paid blog, newsletter or community is yours to keep. Standard Stripe processing fees still apply.
### Portability
All membership, customer and business data is controlled by you. Your members list can be exported any time and since subscriptions and billing takes place inside your own Stripe account, you retain full ownership of it.
If you’re migrating an existing membership business from another platform, check our our [migration docs](/migration/).
### Alternative payment gateways
To begin with, Stripe is the only natively supported payment provider with Ghost. We’re aware that not everyone has access to Stripe, and we plan to add further payment providers in future.
In the meantime, it is possible to create new members via an external provider, such as [Patreon](https://ghost.org/integrations/patreon/) or [PayPal](https://ghost.org/integrations/paypal/). You can set up any third party payments system and create members in Ghost via API, or using automation tools like Zapier.
### I have ideas / suggestions / problems / feedback
Great! We set up a dedicated [forum category](https://forum.ghost.org/c/members) for feedback about the members feature, we appreciate your input!
We’re continuously shipping improvements and new features at Ghost which you can follow over on [GitHub](https://github.com/tryghost/ghost), or on our [Changelog](https://ghost.org/changelog/).
# Migrating To Ghost
Source: https://docs.ghost.org/migration
If you're a Ghost(Pro) customer, our team may be able to help you migrate your content and subscribers.
Payments are handled by Stripe and billing information is stored securely inside your own Stripe account.
### Transaction fees
Ghost takes **0%** of your revenue. Whatever you generate from a paid blog, newsletter or community is yours to keep. Standard Stripe processing fees still apply.
### Portability
All membership, customer and business data is controlled by you. Your members list can be exported any time and since subscriptions and billing takes place inside your own Stripe account, you retain full ownership of it.
If you’re migrating an existing membership business from another platform, check our our [migration docs](/migration/).
### Alternative payment gateways
To begin with, Stripe is the only natively supported payment provider with Ghost. We’re aware that not everyone has access to Stripe, and we plan to add further payment providers in future.
In the meantime, it is possible to create new members via an external provider, such as [Patreon](https://ghost.org/integrations/patreon/) or [PayPal](https://ghost.org/integrations/paypal/). You can set up any third party payments system and create members in Ghost via API, or using automation tools like Zapier.
### I have ideas / suggestions / problems / feedback
Great! We set up a dedicated [forum category](https://forum.ghost.org/c/members) for feedback about the members feature, we appreciate your input!
We’re continuously shipping improvements and new features at Ghost which you can follow over on [GitHub](https://github.com/tryghost/ghost), or on our [Changelog](https://ghost.org/changelog/).
# Migrating To Ghost
Source: https://docs.ghost.org/migration
If you're a Ghost(Pro) customer, our team may be able to help you migrate your content and subscribers.
 **Substack**
 **BeeHiiv**
 **WordPress**
 **Newspack**
 **Medium**
 **SquareSpace**
 **Kit**
 **MailChimp**
 **Patreon**
 **Buttondown**
 **Memberful**
 **Gumroad**
 **Jekyll**
 **Ghost**
 **Other platforms**
# Migrating from BeeHiiv
Source: https://docs.ghost.org/migration/beehiiv
Migrate from BeeHiiv and import your content to Ghost with this guide
If you're a Ghost(Pro) customer, our team may be able to help you migrate your content and subscribers. Learn more about our [Concierge service](https://ghost.org/concierge/).
## Exporting your subscribers
To get started, [download your full subscriber list](https://support.beehiiv.com/hc/en-us/articles/12234988536215-How-to-export-subscribers) (**Export Subscribers (Full)**) from BeeHiiv.
**Other platforms**
# Migrating from BeeHiiv
Source: https://docs.ghost.org/migration/beehiiv
Migrate from BeeHiiv and import your content to Ghost with this guide
If you're a Ghost(Pro) customer, our team may be able to help you migrate your content and subscribers. Learn more about our [Concierge service](https://ghost.org/concierge/).
## Exporting your subscribers
To get started, [download your full subscriber list](https://support.beehiiv.com/hc/en-us/articles/12234988536215-How-to-export-subscribers) (**Export Subscribers (Full)**) from BeeHiiv.

 ## Import subscribers to Ghost
If all of your subscribers are free, you can import this into Ghost directly.
## Import subscribers to Ghost
If all of your subscribers are free, you can import this into Ghost directly.
 If you have paid subscribers, you need to relate Stripe Customer IDs with your subscribers emails.
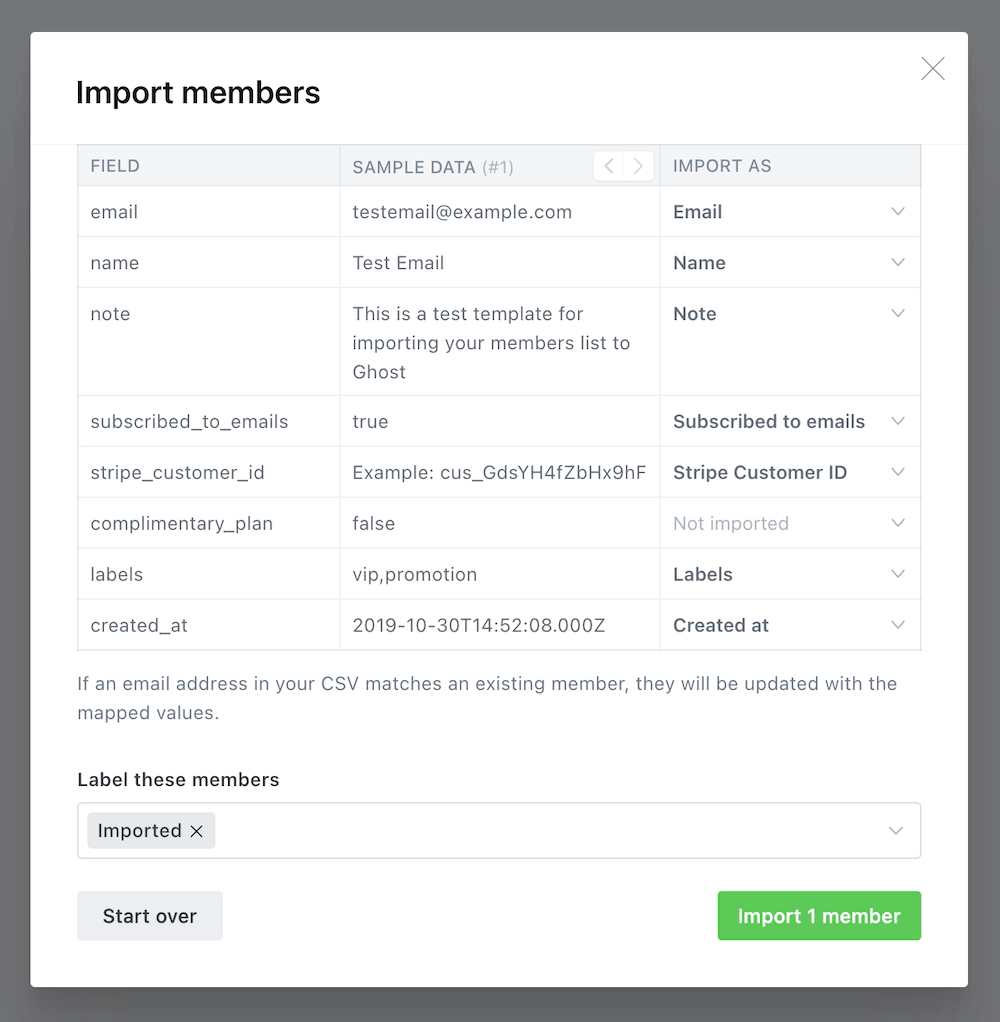 If you cannot connect your Ghost site to the same Stripe account you used with BeeHiiv, you may need to migrate customer data, products, prices, coupons to a new Stripe account, and then recreate the subscriptions before importing into your Ghost site. The [Ghost Concierge](https://ghost.org/concierge/) team can help with this.
## Migrating Content
Developers can migrate content from BeeHiiv to Ghost using our [migration CLI tools](https://github.com/TryGhost/migrate/tree/main/packages/mg-beehiiv).
You will first need to [export your posts](https://support.beehiiv.com/hc/en-us/articles/12258595483543-How-to-export-your-post-content) from BeeHiiv. This will be a CSV file which includes all post content, titles, dates, etc.
If you cannot connect your Ghost site to the same Stripe account you used with BeeHiiv, you may need to migrate customer data, products, prices, coupons to a new Stripe account, and then recreate the subscriptions before importing into your Ghost site. The [Ghost Concierge](https://ghost.org/concierge/) team can help with this.
## Migrating Content
Developers can migrate content from BeeHiiv to Ghost using our [migration CLI tools](https://github.com/TryGhost/migrate/tree/main/packages/mg-beehiiv).
You will first need to [export your posts](https://support.beehiiv.com/hc/en-us/articles/12258595483543-How-to-export-your-post-content) from BeeHiiv. This will be a CSV file which includes all post content, titles, dates, etc.

 First, make sure the CLI is installed.
```sh
# Install CLI
npm install --global @tryghost/migrate
# Verify it's installed
migrate
```
To run a basic migration with the default commands:
```sh
# Basic migration
migrate beehiiv --posts /path/to/posts.csv --url https://example.com
```
There are [more options](https://github.com/TryGhost/migrate/tree/main/packages/mg-beehiiv#usage), such as the ability define a default author name and choose where `/subscribe` links go to.
Once the CLI task has finished, it creates a new ZIP file which you can [import into Ghost](https://ghost.org/help/imports/).
### Using custom domains
If you’re using a custom domain on BeeHiiv, you’ll need to implement redirects in Ghost to prevent broken links.
BeeHiiv uses `/p/` as part of the public post URL, where as Ghost uses it in the URL for post previews. This means the redirect regular expression is quite complex, but necessary so that post previews in Ghost function correctly.
```yaml
# redirects.yaml
301:
^\/p\/(?![0-9a-fA-F]{8}-[0-9a-fA-F]{4}-[0-9a-fA-F]{4}-[0-9a-fA-F]{4}-[0-9a-fA-F]{12})(.*): /$1
^\/polls\/[0-9a-fA-F]{8}-[0-9a-fA-F]{4}-[0-9a-fA-F]{4}-[0-9a-fA-F]{4}-[0-9a-fA-F]{12}(.*): /
^\/t\/(.*): /tag/$1
302:
```
This means that if a visitor or crawler goes to `https://mysite.com/p/awesome-post`, they will automatically be redirected to `https://mysite.com/awesome-post`.
***
## Summary
Congratulations on your migration to Ghost 🙌. All that’s left to do is check over your content to ensure the migration has worked as expected. We also have a guide on [how to implement redirects](https://ghost.org/tutorials/implementing-redirects/) to make your transition smoother.
# Migrating from Buttondown
Source: https://docs.ghost.org/migration/buttondown
Migrate from Buttondown and import your content to Ghost with this guide
If you're a Ghost(Pro) customer, our team may be able to help you migrate your content and subscribers. Learn more about our [Concierge service](https://ghost.org/concierge/).
## Export your subscribers
To get started, export your current subscribers in CSV format.
## Import subscribers to Ghost
Under the Ghost Admin members settings, select the import option from the settings menu.
Upload your CSV file to Ghost, and map each of the fields contained in your export file to the corresponding fields in Ghost. The **email** field is required in order to create members in Ghost, while the other fields are optional.
To import paid members with an existing Stripe subscription, you must import their **Stripe customer ID**.
Once the import has completed, all your subscribers will be migrated to Ghost. There’s nothing else you need to do, members can now log into your site and receive email newsletters.
# Developer Migration Docs
Source: https://docs.ghost.org/migration/custom
If no export tools exist for your current blogging system you’ll need to create one that generates a JSON file as described here. There is a full example at the end of this file. Please note that your final JSON file should have no comments in the final format. Those are only included here for readability and explanatory purposes.
### JSON file structure
First and foremost, your JSON file must contain valid JSON. You can test your file is valid using the [JSONLint](https://jsonlint.com/) online tool.
The file structure can optionally be wrapped in:
```json
{
"db": [...contents here...]
}
```
Both with and without are valid Ghost JSON files. But you must include a `meta` and a `data` object.
### The meta object
```json
"meta": {
"exported_on":1408552443891,
"version":"2.14.0"
}
```
The `meta` block expects two keys, `exported_on` and `version`. `exported_on` should be an epoch timestamp in milliseconds, version should be the Ghost version the import is valid for.
### The data block
Ghost’s JSON format mirrors the underlying database structure, rather than the API, as it allows you to override fields that the API would ignore.
```json
"data": {
"posts": [{...}, ...],
"tags": [],
"users": [],
"posts_tags": [],
"posts_authors": [],
"roles_users": []
}
```
The data block contains all of the individual post, tag, and user resources that you want to import into your site, as well as the relationships between all of these resources. Each item that you include should be an array of objects.
Relationships can be defined between posts and tags, posts and users (authors) and between users and their roles.
IDs inside the file are relative to the file only, so if you have a `post` with `id: 1` and a `posts_tags` object which references `post_id: 1`, then those two things will be linked, but they do not relate to the `post` with `id: 1` in your database.
## Example
```json
{
"meta":{
// epoch time in milliseconds
"exported_on": 1388805572000,
"version": "2.14.0"
},
"data":{
"posts": [
{
"id": 1,
"title": "my blog post title",
"slug": "my-blog-post-title", // Optional, will be generated by Ghost if missing
// Lexical is used to represent your content
"lexical": "{\"root\":{\"children\":[{\"children\":[{\"detail\":0,\"format\":0,\"mode\":\"normal\",\"style\":\"\",\"text\":\"Hello, beautiful world! 👋\",\"type\":\"extended-text\",\"version\":1}],\"direction\":\"ltr\",\"format\":\"\",\"indent\":0,\"type\":\"paragraph\",\"version\":1}],\"direction\":\"ltr\",\"format\":\"\",\"indent\":0,\"type\":\"root\",\"version\":1}}",
"feature_image": null,
"feature_image_alt": null,
"feature_image_caption": null,
"featured": 0, // boolean indicating featured status
"page": 0, // boolean indicating if this is a page or post
"status": "published", // or draft
"published_at": 1283780649000, // epoch time in milliseconds
"published_by": 1, // the first user created has an id of 1
"meta_title": null,
"meta_description":null,
"email_only": false, // boolean indicating email-only type of post
"author_id": 1, // the first user created has an id of 1
"created_at": 1283780649000, // epoch time in milliseconds
"created_by": 1, // the first user created has an id of 1
"updated_at": 1286958624000, // epoch time in milliseconds
"updated_by": 1 // the first user created has an id of 1
}
],
"tags": [
{
"id": 5,
"name": "Colorado Ho!",
"slug": "colorado-ho", // Optional, will be generated by Ghost if missing
"description": ""
}
],
"posts_tags": [
{"tag_id": 5, "post_id": 1},
],
"users": [
{
"id": 3,
"name": "Jo Bloggs",
"slug": "jo-blogs", // Optional, will be generated by Ghost if missing
"email": "jo@example.com",
"profile_image": null,
"cover_image": null,
"bio": null,
"website": null,
"location": null,
"accessibility": null,
"meta_title": null,
"meta_description": null,
"created_at": 1283780649000, // epoch time in millis
"created_by": 1,
"updated_at": 1286958624000, // epoch time in millis
"updated_by": 1
}
],
// Provide this if you want different roles to the default "Author" role
"roles_users": [
{
"user_id": 2,
"role_id": ObjectId // This must reference the id from your database
}
]
}
}
```
# Migrating from Ghost To Ghost
Source: https://docs.ghost.org/migration/ghost
Migrate from a self-hosted instance to Ghost(Pro) with this guide
If you're a Ghost(Pro) customer, our team may be able to help you migrate your content and subscribers. Learn more about our [Concierge service](https://ghost.org/concierge/).
This guide will walk you through the process of migrating from a self-hosted Ghost instance on your own server to Ghost(Pro).
## Prerequisites
If your self-hosted site is running an older major version of Ghost, you may need to update. Check the latest [version of Ghost on GitHub](https://github.com/TryGhost/Ghost/releases), and follow this [upgrade guide](/update/).
## Back up your data
The first step towards moving from your own self-hosted Ghost instance to Ghost(Pro) is to retrieve all of your data from your server to your local machine. It’s best to do this first, to ensure you have a backup in place.
The commands in this guide assume you followed our [Ubuntu guide](/install/ubuntu/) to set up your own instance. If you used another method, you’ll need to adapt the paths in the commands to suit.
### Exporting content
Log into Ghost Admin for your self-hosted in production and navigate to the **Labs** view, and click **Export** to download your content. This will be `.json` file, with a name like `my-site.ghost.2020-09-30-14-15-49.json`.
First, make sure the CLI is installed.
```sh
# Install CLI
npm install --global @tryghost/migrate
# Verify it's installed
migrate
```
To run a basic migration with the default commands:
```sh
# Basic migration
migrate beehiiv --posts /path/to/posts.csv --url https://example.com
```
There are [more options](https://github.com/TryGhost/migrate/tree/main/packages/mg-beehiiv#usage), such as the ability define a default author name and choose where `/subscribe` links go to.
Once the CLI task has finished, it creates a new ZIP file which you can [import into Ghost](https://ghost.org/help/imports/).
### Using custom domains
If you’re using a custom domain on BeeHiiv, you’ll need to implement redirects in Ghost to prevent broken links.
BeeHiiv uses `/p/` as part of the public post URL, where as Ghost uses it in the URL for post previews. This means the redirect regular expression is quite complex, but necessary so that post previews in Ghost function correctly.
```yaml
# redirects.yaml
301:
^\/p\/(?![0-9a-fA-F]{8}-[0-9a-fA-F]{4}-[0-9a-fA-F]{4}-[0-9a-fA-F]{4}-[0-9a-fA-F]{12})(.*): /$1
^\/polls\/[0-9a-fA-F]{8}-[0-9a-fA-F]{4}-[0-9a-fA-F]{4}-[0-9a-fA-F]{4}-[0-9a-fA-F]{12}(.*): /
^\/t\/(.*): /tag/$1
302:
```
This means that if a visitor or crawler goes to `https://mysite.com/p/awesome-post`, they will automatically be redirected to `https://mysite.com/awesome-post`.
***
## Summary
Congratulations on your migration to Ghost 🙌. All that’s left to do is check over your content to ensure the migration has worked as expected. We also have a guide on [how to implement redirects](https://ghost.org/tutorials/implementing-redirects/) to make your transition smoother.
# Migrating from Buttondown
Source: https://docs.ghost.org/migration/buttondown
Migrate from Buttondown and import your content to Ghost with this guide
If you're a Ghost(Pro) customer, our team may be able to help you migrate your content and subscribers. Learn more about our [Concierge service](https://ghost.org/concierge/).
## Export your subscribers
To get started, export your current subscribers in CSV format.
## Import subscribers to Ghost
Under the Ghost Admin members settings, select the import option from the settings menu.
Upload your CSV file to Ghost, and map each of the fields contained in your export file to the corresponding fields in Ghost. The **email** field is required in order to create members in Ghost, while the other fields are optional.
To import paid members with an existing Stripe subscription, you must import their **Stripe customer ID**.
Once the import has completed, all your subscribers will be migrated to Ghost. There’s nothing else you need to do, members can now log into your site and receive email newsletters.
# Developer Migration Docs
Source: https://docs.ghost.org/migration/custom
If no export tools exist for your current blogging system you’ll need to create one that generates a JSON file as described here. There is a full example at the end of this file. Please note that your final JSON file should have no comments in the final format. Those are only included here for readability and explanatory purposes.
### JSON file structure
First and foremost, your JSON file must contain valid JSON. You can test your file is valid using the [JSONLint](https://jsonlint.com/) online tool.
The file structure can optionally be wrapped in:
```json
{
"db": [...contents here...]
}
```
Both with and without are valid Ghost JSON files. But you must include a `meta` and a `data` object.
### The meta object
```json
"meta": {
"exported_on":1408552443891,
"version":"2.14.0"
}
```
The `meta` block expects two keys, `exported_on` and `version`. `exported_on` should be an epoch timestamp in milliseconds, version should be the Ghost version the import is valid for.
### The data block
Ghost’s JSON format mirrors the underlying database structure, rather than the API, as it allows you to override fields that the API would ignore.
```json
"data": {
"posts": [{...}, ...],
"tags": [],
"users": [],
"posts_tags": [],
"posts_authors": [],
"roles_users": []
}
```
The data block contains all of the individual post, tag, and user resources that you want to import into your site, as well as the relationships between all of these resources. Each item that you include should be an array of objects.
Relationships can be defined between posts and tags, posts and users (authors) and between users and their roles.
IDs inside the file are relative to the file only, so if you have a `post` with `id: 1` and a `posts_tags` object which references `post_id: 1`, then those two things will be linked, but they do not relate to the `post` with `id: 1` in your database.
## Example
```json
{
"meta":{
// epoch time in milliseconds
"exported_on": 1388805572000,
"version": "2.14.0"
},
"data":{
"posts": [
{
"id": 1,
"title": "my blog post title",
"slug": "my-blog-post-title", // Optional, will be generated by Ghost if missing
// Lexical is used to represent your content
"lexical": "{\"root\":{\"children\":[{\"children\":[{\"detail\":0,\"format\":0,\"mode\":\"normal\",\"style\":\"\",\"text\":\"Hello, beautiful world! 👋\",\"type\":\"extended-text\",\"version\":1}],\"direction\":\"ltr\",\"format\":\"\",\"indent\":0,\"type\":\"paragraph\",\"version\":1}],\"direction\":\"ltr\",\"format\":\"\",\"indent\":0,\"type\":\"root\",\"version\":1}}",
"feature_image": null,
"feature_image_alt": null,
"feature_image_caption": null,
"featured": 0, // boolean indicating featured status
"page": 0, // boolean indicating if this is a page or post
"status": "published", // or draft
"published_at": 1283780649000, // epoch time in milliseconds
"published_by": 1, // the first user created has an id of 1
"meta_title": null,
"meta_description":null,
"email_only": false, // boolean indicating email-only type of post
"author_id": 1, // the first user created has an id of 1
"created_at": 1283780649000, // epoch time in milliseconds
"created_by": 1, // the first user created has an id of 1
"updated_at": 1286958624000, // epoch time in milliseconds
"updated_by": 1 // the first user created has an id of 1
}
],
"tags": [
{
"id": 5,
"name": "Colorado Ho!",
"slug": "colorado-ho", // Optional, will be generated by Ghost if missing
"description": ""
}
],
"posts_tags": [
{"tag_id": 5, "post_id": 1},
],
"users": [
{
"id": 3,
"name": "Jo Bloggs",
"slug": "jo-blogs", // Optional, will be generated by Ghost if missing
"email": "jo@example.com",
"profile_image": null,
"cover_image": null,
"bio": null,
"website": null,
"location": null,
"accessibility": null,
"meta_title": null,
"meta_description": null,
"created_at": 1283780649000, // epoch time in millis
"created_by": 1,
"updated_at": 1286958624000, // epoch time in millis
"updated_by": 1
}
],
// Provide this if you want different roles to the default "Author" role
"roles_users": [
{
"user_id": 2,
"role_id": ObjectId // This must reference the id from your database
}
]
}
}
```
# Migrating from Ghost To Ghost
Source: https://docs.ghost.org/migration/ghost
Migrate from a self-hosted instance to Ghost(Pro) with this guide
If you're a Ghost(Pro) customer, our team may be able to help you migrate your content and subscribers. Learn more about our [Concierge service](https://ghost.org/concierge/).
This guide will walk you through the process of migrating from a self-hosted Ghost instance on your own server to Ghost(Pro).
## Prerequisites
If your self-hosted site is running an older major version of Ghost, you may need to update. Check the latest [version of Ghost on GitHub](https://github.com/TryGhost/Ghost/releases), and follow this [upgrade guide](/update/).
## Back up your data
The first step towards moving from your own self-hosted Ghost instance to Ghost(Pro) is to retrieve all of your data from your server to your local machine. It’s best to do this first, to ensure you have a backup in place.
The commands in this guide assume you followed our [Ubuntu guide](/install/ubuntu/) to set up your own instance. If you used another method, you’ll need to adapt the paths in the commands to suit.
### Exporting content
Log into Ghost Admin for your self-hosted in production and navigate to the **Labs** view, and click **Export** to download your content. This will be `.json` file, with a name like `my-site.ghost.2020-09-30-14-15-49.json`.
 ### Routes and redirects
Staying on the **Labs** page, click **Download current redirects** to get your redirects file. This will be called `redirects.yaml` (or `redirects.json` depending on your Ghost version). If you’re using custom routes, click **Download current routes.yaml** to get your `routes.yaml` file.
### Routes and redirects
Staying on the **Labs** page, click **Download current redirects** to get your redirects file. This will be called `redirects.yaml` (or `redirects.json` depending on your Ghost version). If you’re using custom routes, click **Download current routes.yaml** to get your `routes.yaml` file.
 ### Themes
Navigate to the **Design** view, and click the **Download** button next to the Active label export your current theme. This will be a `.zip` file. Optionally, if you have other themes that you’d like to save, download them and back them up.
### Themes
Navigate to the **Design** view, and click the **Download** button next to the Active label export your current theme. This will be a `.zip` file. Optionally, if you have other themes that you’d like to save, download them and back them up.
 ### Images
To download your images, you’ll need shell access to your server. If you’re unable to gain shell access to your current web host, you may need to contact their support team and ask for a zip of your images directory.
Once you’re logged in to your server, `cd` to the `content` directory:
```bash
cd /var/www/ghost/content
```
And then `zip` the `images` directory with all its contents:
```bash
zip -r images.zip images/*
```
Ensure your `images` folder only contains images. Any other file types may cause import errors.
Now we need to get that zip file from your server onto your local machine:
```bash
scp user@123.456.789.123:/var/www/ghost/content/images.zip ~/Desktop/images.zip
```
The folder structure should look like this, with `images` being the only top-level folder once unzipped:
### Images
To download your images, you’ll need shell access to your server. If you’re unable to gain shell access to your current web host, you may need to contact their support team and ask for a zip of your images directory.
Once you’re logged in to your server, `cd` to the `content` directory:
```bash
cd /var/www/ghost/content
```
And then `zip` the `images` directory with all its contents:
```bash
zip -r images.zip images/*
```
Ensure your `images` folder only contains images. Any other file types may cause import errors.
Now we need to get that zip file from your server onto your local machine:
```bash
scp user@123.456.789.123:/var/www/ghost/content/images.zip ~/Desktop/images.zip
```
The folder structure should look like this, with `images` being the only top-level folder once unzipped:
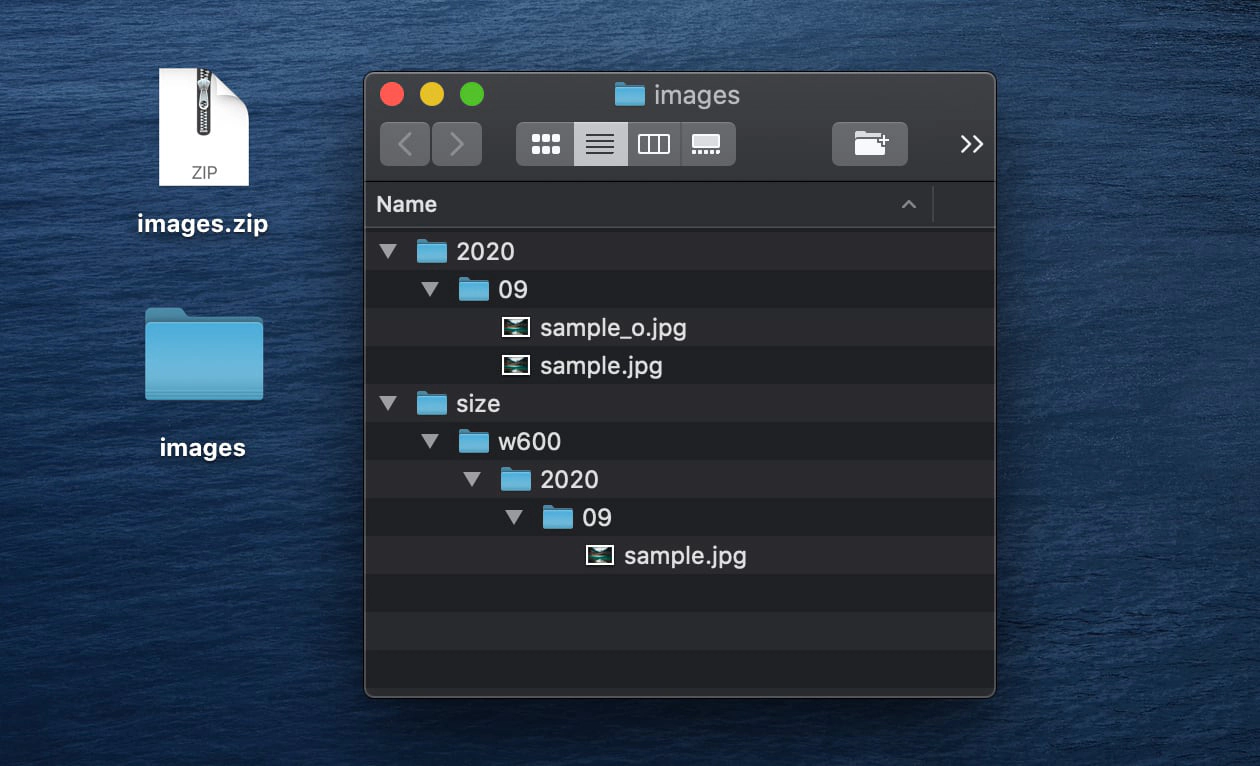 ## Uploading to Ghost(Pro)
Once you’ve retrieved all of these exports, you can upload them to Ghost(Pro) in the same order.
### Content
Log into your new Ghost(Pro) site, and head to the **Labs** view. Next to the **Import content** header, select your content `.json` file and click **Import**.
## Uploading to Ghost(Pro)
Once you’ve retrieved all of these exports, you can upload them to Ghost(Pro) in the same order.
### Content
Log into your new Ghost(Pro) site, and head to the **Labs** view. Next to the **Import content** header, select your content `.json` file and click **Import**.
 ### Routes and Redirects
Staying on the **Labs** view, click **Upload redirects JSON**, then select your `redirects.json` file to upload it. Then click **Upload routes YAML**, select your `routes.yaml` file to upload that.
### Themes
Head over to the **Design** view, and click **Upload a theme**, select your theme `.zip` file, and activate it.
### Routes and Redirects
Staying on the **Labs** view, click **Upload redirects JSON**, then select your `redirects.json` file to upload it. Then click **Upload routes YAML**, select your `routes.yaml` file to upload that.
### Themes
Head over to the **Design** view, and click **Upload a theme**, select your theme `.zip` file, and activate it.
 ### Images
The final step is to upload your images. The best way to approach this depends on how big your `images.zip` file is. A large file will take longer to upload and process.
If your file is less than 500mb, you can upload this zip in the same way you uploaded your content JSON file. If the file is larger, it’s recommended to split it into multiple smaller files, whilst retaining the folder structure.
If you have a large image directory or encounter any errors, contact support so we can help upload your images.
***
## Summary
Congratulations on moving to Ghost(Pro). All that’s left to do is check over your content to ensure everything works as expected.
By hosting your site with us, you directly fund future product development of Ghost itself and allow us to make the product better for everyone 💘
# Migrating from Gumroad
Source: https://docs.ghost.org/migration/gumroad
Migrate from Gumroad and import your customers to Ghost with this guide
## Overview
Since Gumroad manages your subscriptions on your behalf, there is no direct migration path to move your paid subscriptions from Gumroad to other platforms.
The good news: Ghost makes it possible to import all of your existing customer emails and give them access to premium content, or to sync your Gumroad with your Ghost site using an automation.
## Export your customers
To get started, export your current subscribers from Gumroad in CSV format.
### Images
The final step is to upload your images. The best way to approach this depends on how big your `images.zip` file is. A large file will take longer to upload and process.
If your file is less than 500mb, you can upload this zip in the same way you uploaded your content JSON file. If the file is larger, it’s recommended to split it into multiple smaller files, whilst retaining the folder structure.
If you have a large image directory or encounter any errors, contact support so we can help upload your images.
***
## Summary
Congratulations on moving to Ghost(Pro). All that’s left to do is check over your content to ensure everything works as expected.
By hosting your site with us, you directly fund future product development of Ghost itself and allow us to make the product better for everyone 💘
# Migrating from Gumroad
Source: https://docs.ghost.org/migration/gumroad
Migrate from Gumroad and import your customers to Ghost with this guide
## Overview
Since Gumroad manages your subscriptions on your behalf, there is no direct migration path to move your paid subscriptions from Gumroad to other platforms.
The good news: Ghost makes it possible to import all of your existing customer emails and give them access to premium content, or to sync your Gumroad with your Ghost site using an automation.
## Export your customers
To get started, export your current subscribers from Gumroad in CSV format.
 Gumroad allows you to export all customers who have ever purchased from you within a specific date range, or to segment your export per product.
## Import subscribers to Ghost
Under the Ghost Admin members settings, select the import option from the settings menu.
Upload your CSV file to Ghost, and map each of the fields contained in your export file to the corresponding fields in Ghost. The **email** field is required in order to create members in Ghost, while the other fields are optional.
It’s recommended to edit your data as required before uploading your CSV file to Ghost.
Once the import has completed, all your subscribers will be migrated to Ghost. There’s nothing else you need to do, members can now log into your site and receive email newsletters.
## Running Ghost alongside Gumroad
It’s also possible to use Zapier or the Ghost API to keep customers who have purchased from you on Gumroad in sync with a Ghost membership site. This is useful if you’re giving your existing customers on Gumroad access to premium content on a custom Ghost site as an additional perk, or if you’re accepting signups on both platforms.
To find out how to connect Ghost with Gumroad, check out our [integration](https://ghost.org/integrations/gumroad/).
# Migrating from Jekyll
Source: https://docs.ghost.org/migration/jekyll
Migrate from Jekyll and import your content to Ghost with this guide
Migrations from Jekyll are a complex manual process with a lot of data sanitisation work. If you want to do a migration yourself, you’ll need to follow our [developer documentation](/migration/custom/) to create your own migration archive.
Jekyll users can try the [Jekyll to Ghost Plugin](https://github.com/mekomlusa/Jekyll-to-Ghost)
# Migrating from Kit
Source: https://docs.ghost.org/migration/kit
Migrate from Kit and import your subscribers to Ghost with this guide
## Overview
Since Kit manages subscriptions on your behalf, there is no direct migration path to move any paid subscriptions from Kit to other platforms.
The good news: Ghost makes it possible to import all of your existing subscriber emails and give them access to premium content on your custom Ghost publication, or to sync your Kit subscribers with Ghost using an automation.
## Export your subscribers
To get started, export your current subscribers from Kit in CSV format.
Gumroad allows you to export all customers who have ever purchased from you within a specific date range, or to segment your export per product.
## Import subscribers to Ghost
Under the Ghost Admin members settings, select the import option from the settings menu.
Upload your CSV file to Ghost, and map each of the fields contained in your export file to the corresponding fields in Ghost. The **email** field is required in order to create members in Ghost, while the other fields are optional.
It’s recommended to edit your data as required before uploading your CSV file to Ghost.
Once the import has completed, all your subscribers will be migrated to Ghost. There’s nothing else you need to do, members can now log into your site and receive email newsletters.
## Running Ghost alongside Gumroad
It’s also possible to use Zapier or the Ghost API to keep customers who have purchased from you on Gumroad in sync with a Ghost membership site. This is useful if you’re giving your existing customers on Gumroad access to premium content on a custom Ghost site as an additional perk, or if you’re accepting signups on both platforms.
To find out how to connect Ghost with Gumroad, check out our [integration](https://ghost.org/integrations/gumroad/).
# Migrating from Jekyll
Source: https://docs.ghost.org/migration/jekyll
Migrate from Jekyll and import your content to Ghost with this guide
Migrations from Jekyll are a complex manual process with a lot of data sanitisation work. If you want to do a migration yourself, you’ll need to follow our [developer documentation](/migration/custom/) to create your own migration archive.
Jekyll users can try the [Jekyll to Ghost Plugin](https://github.com/mekomlusa/Jekyll-to-Ghost)
# Migrating from Kit
Source: https://docs.ghost.org/migration/kit
Migrate from Kit and import your subscribers to Ghost with this guide
## Overview
Since Kit manages subscriptions on your behalf, there is no direct migration path to move any paid subscriptions from Kit to other platforms.
The good news: Ghost makes it possible to import all of your existing subscriber emails and give them access to premium content on your custom Ghost publication, or to sync your Kit subscribers with Ghost using an automation.
## Export your subscribers
To get started, export your current subscribers from Kit in CSV format.
 ## Import subscribers to Ghost
Under the Ghost Admin members settings, select the import option from the settings menu.
Upload your CSV file to Ghost, and map each of the fields contained in your export file to the corresponding fields in Ghost. The **email** field is required in order to create members in Ghost, while the other fields are optional.
It’s recommended to edit your data as required before uploading your CSV file to Ghost.
Once the import has completed, all your subscribers will be migrated to Ghost. There’s nothing else you need to do, members can now log into your site and receive email newsletters.
## Running Ghost alongside Kit
It’s also possible to use Zapier or the Ghost API to keep email subscribers from Kit in sync with a Ghost membership site. This is useful if you’re giving your existing audience in Kit access to premium content on a your Ghost site as an additional perk, or if you’re accepting signups on both platforms.
To find out how to connect Ghost with Kit, check out our [integration](https://ghost.org/integrations/convertkit/).
# Migrating from Mailchimp
Source: https://docs.ghost.org/migration/mailchimp
Migrate from Mailchimp and import your content to Ghost with this guide
You can easily migrate your subscribers from Mailchimp to Ghost in just a few clicks, using the Mailchimp migrator in Ghost Admin.
✏️ It's not currently possible to migrate your Mailchimp content.
## **Run the migration**
The Mailchimp migrator allows you to quickly import members from your Mailchimp to your Ghost publication. You can access the migrator tool from the **Settings → Advanced →** **Import/Export** area of Ghost Admin.

It's helpful to log in to your Mailchimp account before running the migration in Ghost Admin.
### **1. Export subscribers**
Next, it's time to import your Mailchimp subscribers. Click **Open Mailchimp Audience**, and click **Export Audience**.
Once downloaded, select **Click or drag file here to upload** and navigate to the text download, and click **Continue**.
### **2. Review**
Ghost will confirm the number of subscribers that will be imported to your publication. If satisfied, click **Import subscribers** to begin the import of your data.
After a few moments, you'll see a confirmation message, confirming that your data was successfully migrated to your Ghost site.
## **Large and Complex migrations**
If your migration needs go beyond what our in-built migration tools can support you can still move to Ghost.
If you're a **Ghost(Pro) customer**, our Migrations team can support you in migrating your content and subscribers. Learn more and get in touch with the team [here](https://ghost.org/concierge/).
Alternatively, if you are a developer, comfortable with using the command line, or running a self-hosted Ghost instance, we have a suite of[ open-source migration tools ](https://github.com/TryGhost/migrate)to help with large, complex and custom migrations.
# Migrating from Medium
Source: https://docs.ghost.org/migration/medium
Migrate from Medium and import your content to Ghost with this guide
You can easily migrate your posts and subscribers from Medium to Ghost in just a few clicks, using the Medium migrator in Ghost Admin.
## **Run the migration**
The Medium migrator allows you to quickly import content and members from your Medium to your Ghost publication. You can access the migrator tool from the **Settings → Advanced →** **Import/Export** area of Ghost Admin.

It's helpful to log in to your Medium account before running the migration in Ghost Admin.
### **1. Enter your Medium URL**
To start the migration process, enter the public URL to your Medium, and click **Continue**.
### **2. Export content**
Next, click **Open Medium Settings**, and click **Download your information**. A link to download the export will be sent to your email.
### **3. Upload content**
Once your export has been downloaded, return to the migrator window in Ghost Admin, and select **Click or drag file here to upload**, and navigate to the zip file you downloaded from Medium, once uploaded click **Continue**.
If you're unsure of where the file was saved, check your Downloads folder.
### **4. Export subscribers**
Next, it's time to import your Medium subscribers. Click **Open Medium Audience stats**, and click **Export this list**.
Once downloaded, select **Click or drag file here to upload** and navigate to the text download, and click **Continue**.
### **5. Review**
Ghost will confirm the number of posts and members that will be imported to your publication. If satisfied, click **Import content and subscribers** to begin the import of your data.
After a few moments, you'll see a confirmation message, confirming that your data was successfully migrated to your Ghost site.
### **6. Verification and manual checks**
⚠️ The Medium content export includes all of your posts and **all of the comments you've written across Medium**. There is no sure-fire way to differentiate between these content types, so you should check the import to verify your posts are live.
The importer will make a post in Ghost for all posts and comments in your Medium export. The importer will try to sort posts and comments, based on the following rules:
* If a piece has only one paragraph, treat it as a **comment**
* If a piece of any length has an image, treat it as a **post**
* Otherwise, treat the piece as a **post**
* All pieces that are treated as **comments** will be saved as **drafts**
* All **posts** that were **drafts** in Medium, will be **drafts** in Ghost
* All \*\*posts \*\*that were **published** in Medium will be **published** in Ghost
You should check that comments and posts were sorted correctly. Possible comments that have been saved as drafts will be tagged `#Medium Possible Comment`.
### Using custom domains
If you’re using a custom domain on Medium, you’ll need to implement redirects in Ghost to prevent broken links.
Medium appends a small random ID to each post, which is removed in the migration step above. The regular expression below removes that random ID, but does not affect preview links.
```yaml
# redirects.yaml
301:
^\/(?!p\/?)(.*)(-[0-9a-f]{10,12}): /$1
302:
```
This means that if a visitor or crawler goes to `https://mysite.com/awesome-post-a1b2c3d4e5f6`, they will automatically be redirected to `https://mysite.com/awesome-post`.
Learn more about Medium redirects [here](https://ghost.org/tutorials/implementing-redirects/#medium).
***
## **Large and Complex migrations**
If your migration needs go beyond what our in-built migration tools can support you can still move to Ghost.
If you're a **Ghost(Pro) customer**, our Migrations team can support you in migrating your content and subscribers. Learn more and get in touch with the team [here](https://ghost.org/concierge/).
Alternatively, if you are a developer, comfortable with using the command line, or running a self-hosted Ghost instance, we have a suite of[ open-source migration tools ](https://github.com/TryGhost/migrate)to help with large, complex and custom migrations.
# Migrating from Memberful
Source: https://docs.ghost.org/migration/memberful
Migrate from Memberful and import your members to Ghost with this guide
If you're a Ghost(Pro) customer, our team may be able to help you migrate your content and subscribers. Learn more about our [Concierge service](https://ghost.org/concierge/).
## Export your subscribers
To get started, export your current subscribers in CSV format.
## Import subscribers to Ghost
Under the Ghost Admin members settings, select the import option from the settings menu.
Upload your CSV file to Ghost, and map each of the fields contained in your export file to the corresponding fields in Ghost. The **email** field is required in order to create members in Ghost, while the other fields are optional.
If you’d like to give these members access to content with an access level of `paid-members only` but retain their subscriptions in Memberful, you can give them unlimited access by setting their `complimentary_plan` status to `true` — read more about [Member imports](https://ghost.org/help/import-members/).
Once the import has completed, all your subscribers will be migrated to Ghost. There’s nothing else you need to do, members can now log into your site and receive email newsletters.
# Migrating from Newspack
Source: https://docs.ghost.org/migration/newspack
Migrate from Newspack and import your content to Ghost with this guide. You can manage a migration from Newspack yourself or, if you prefer, our team can take care of the migration for you.
If you're a Ghost(Pro) customer, our team may be able to help you migrate your content and subscribers. Learn more about our [Concierge service](https://ghost.org/concierge/).
If you’d rather do the migration yourself, that’s fine too, and you can follow the guide below.
## Newspack migration steps
In order to migrate fully from Newspack to Ghost, here are the different steps you’ll need to take.
#### Migrating content
Newspack sites run on WordPress, so the first thing you’ll want to do is follow our [WordPress migration guide](/migration/wordpress/). This will allow you export all your published content, and bring it into Ghost.
#### Migrating your theme
Ghost comes with several free themes built with news publishers in mind. We suggest starting with [Headline](https://ghost.org/themes/headline/), which is lightning fast, SEO optimised, and can be further customised to match your brand.
#### Migrating email subscribers
Ghost can import email subscribers from any platform. Most newspack publishers use Mailchimp, and to migrate contacts you can follow our [Mailchimp migration guide](/migration/mailchimp/). Email newsletters are built into Ghost natively, so you won’t need to keep paying for a 3rd party service anymore after migrating.
#### Migrating paid subscribers
Newspack and Ghost both use Stripe for subscription payments, and you can easily import paying subscribers into Ghost by connecting to your Stripe account. When [importing subscribers](https://ghost.org/help/import-members/#prepare-your-csv-file), make sure to include their Stripe Customer ID, and Ghost will link up the records automatically. If you need help with this, drop us an email on `concierge@ghost.org`.
#### Migrating ads & analytics
Ghost supports all of the same advertising and analytics services as Newspack, and all of these can be migrated easily. You can paste any needed tracking codes into **Settings → Code Injection**, or you can edit your theme directly to include the code snippets there, if you want more control.
#### Migrating URLs
For the most part, Ghost will easily match the URL structure of your old site, so any links to your site will keep working as normal. If you have any URLs that have changed, you can take care of these by [setting up redirects](https://ghost.org/tutorials/implementing-redirects/) in Ghost.
***
## Newspack migration limitations
Ghost has an automatically built-in commenting system for your members and subscribers, but it’s not currently possible to migrate comments from other platforms into Ghost. If you’ve found your comments section is mostly full of spam, though, then you might actually welcome a fresh start.
Ghost does not support marketplace listings / directories. If you use this feature of Newspack, this is not something that can be migrated. However, if it’s really important to you, you could always set up a directory on a subdomain of your site - like `listings.yoursite.com`.
***
## Newspack migration FAQ
**Is migrating from Newspack to Ghost difficult?**\
Not really! Newspack sites are just WordPress, and we’ve migrated tens of thousands of WordPress sites to Ghost over the years. Most people tend to favour Ghost because it’s a fully integrated platform specifically designed for publishers, rather than a disparate set of CMS plugins.
**What about dynamic blocks and pages?**\
Ghost has those, too. They work very similarly to Newspack, but for the most part they’re much easier to use. Ghost places more emphasis on publishing content with rich media, and less emphasis on dragging/dropping things into complex layouts. We’ve also got [a handy comparison guide](https://ghost.org/vs/newspack/) if you want to get a clearer idea of Newspack features compared to Ghost.
**Why is Ghost so much cheaper than Newspack**\
Good question! Newspack is a side-project by WordPress with a small number of customers, so they have to charge a high amount for each customer in order to be able to afford to maintain their product. Ghost is not a side-project, it’s our only project. We have tens of thousands of customers and millions of users, so we don’t need to charge as much per newsroom.
**Newspack works with Google News Initiative, won’t I lose that advantage in migrating to Ghost?**\
Not at all. Ghost has been working with Google News Initiative for years, and we’re proud to be an official technology partner for Google News Initiative bootcamps. We’re thrilled to work with Google on supporting as many local news publishers as we can.
**I read that you offer additional support for small newsrooms, what’s that about?**\
We do! If you run a small local news organisation and would like to chat about how we can support you, get in touch with us by email on `concierge@ghost.org`.
**I’m not confident with tech. How can I do these migration steps?**\
Let our team do them for you, for free. Drop us an email on `concierge@ghost.org` to find out more.
# Migrating from Patreon
Source: https://docs.ghost.org/migration/patreon
Migrate from Patreon and import your Patrons to Ghost with this guide
## Overview
Since Patreon manages your subscriptions on your behalf, there is no direct migration path to move your paid subscriptions from Patreon to other platforms.
The good news: Ghost makes it possible to import all of your existing patrons and give them access to premium content on a custom Ghost publication, or to sync your Patreon account with Ghost using an automation. [Learn more here](https://ghost.org/resources/patreon-vs-your-own-site/).
## Migrating Patrons to Ghost
Ghost has an easy to use importer that allows you to migrate a list of members from any other tool, including Patreon.
This method is useful if you’re planning to turn signups in Patreon off and have all new members sign up via Ghost, but still need to give your existing Patrons access to your new Ghost Publication.
### Export your subscribers
To get started, export your current subscribers in CSV format from [this page](https://www.patreon.com/members) in your Patreon account.
### Import subscribers to Ghost
Under the Ghost Admin members settings, select the import option from the settings menu.
Upload your CSV file to Ghost, and map each of the fields contained in your export file to the corresponding fields in Ghost. The **email** field is required in order to create members in Ghost, while the other fields are optional.
If you’d like to give these members access to content with an acceess level of `paid-members only` but retain their subscriptions in Patreon, you can give them unlimited access by setting their `complimentary_plan` status to `true` — read more about [Member imports](https://ghost.org/help/import-members/).
Once the import has completed, all your subscribers will be migrated to Ghost. There’s nothing else you need to do, members can now log into your site and receive email newsletters.
## Running Ghost alongside Patreon
It’s also possible to use Zapier or the Ghost API to keep your Patrons and Members in sync in both platforms. This is useful if you’re giving your audience on Patreon access to premium content on a custom Ghost site as an additional perk, or if you’re accepting signups on both platforms.
To find out how to connect Ghost with Patreon, check out our [integration](https://ghost.org/integrations/patreon/).
# Migrating from Squarespace
Source: https://docs.ghost.org/migration/squarespace
Official guide: How to migrate from Squarespace to Ghost
You can easily migrate your posts from your Squarespace site to Ghost in just a few clicks, using the built-in Squarespace migrator in Ghost Admin.
## **Run the migration**
The Squarespace migrator allows you to quickly import content from your Squarespace site to your Ghost publication. You can access the migrator tool from the **Settings → Advanced →** **Import/Export** area of Ghost Admin.

It's helpful to log in to your Squarespace site before running the migration in Ghost Admin.
### **1. Enter your Squarespace URL**
To start the migration process, enter the public URL to your Squarespace site, and click **Continue**.
### **2. Export content**
Next, click **Open Squarespace settings.** If already logged into Squarespace, this will take you directly to the location of your Squarespace site where an export can be generated.
Click **Export**, which will download an XML file with your content in it.
### **3. Upload content**
Once your export has been downloaded, return to the migrator window in Ghost Admin, and select **Click or drag file here to upload**, and navigate to the XML file you downloaded from Squarespace, once uploaded click **Continue**.
If you're unsure of where the file was saved, check your Downloads folder.
### **4. Review**
Ghost will confirm the number of posts and pages that will be imported to your publication. If satisfied, click **Import content** to begin the import of your data.

After a few moments, you'll see a confirmation message, confirming that your data was successfully migrated to your Ghost site.
***
### **Redirects**
Squarespace categories are converted to [tags](https://ghost.org/help/tags/) during the migration. The first category for any post will also become the [primary tag](https://ghost.org/help/tags/#primary-tags).
You may need to add [redirects](https://ghost.org/help/redirects/) to ensure backlinks lead to the correct content.
Please refer to this list of the [most common redirection rules for Squarespace migrations](https://ghost.org/tutorials/implementing-redirects/#squarespace).
***
## Large and Complex migrations
If your migration needs go beyond what our in-built migration tools can support you can still move to Ghost.
If you're a **Ghost(Pro) customer**, our Migrations team can support you in migrating your content and subscribers. Learn more and get in touch with the team [here](https://ghost.org/concierge/).
Alternatively, if you are a developer, comfortable with using the command line, or running a self-hosted Ghost instance, we have a suite of[ open-source migration tools ](https://github.com/TryGhost/migrate)to help with large, complex and custom migrations.
# Migrating from Substack
Source: https://docs.ghost.org/migration/substack
Migrate from Substack and import your content to Ghost with this guide
💡 **Migrating paid memberships from Substack?** You will need to set up Stripe first — [**find out more**](https://ghost.org/help/stripe/). Make sure to use the same Stripe account that is connected to your Substack.
## **Run the migration**
The Substack migrator allows you to quickly import content and members from your Substack to your Ghost publication. You can access the migrator tool from the **Settings → Advanced →** **Import/Export** area of Ghost Admin.

It's helpful to log in to your Substack account before running the migration in Ghost Admin.
### **1. Enter your Substack URL**
To start the migration process, enter the public URL to your Substack, and click **Continue**.

### **2. Export content**
Next, click **Open Substack Settings.** If already logged into Substack, this will take you directly to the location of your Substack account where an export can be generated.
Click **Create new export**, and then download the zip file that's generated after the export is completed in Substack.
### **3. Upload content**
Once your export has been downloaded, return to the migrator window in Ghost Admin, and select **Click or drag file here to upload**, and navigate to the zip file you downloaded from Substack, once uploaded click **Continue**.
If you're unsure of where the file was saved, check your Downloads folder.
### **4. Export free subscribers**
Next, it's time to import your Substack subscribers. Click **Download free subscribers from Substack**, to trigger a CSV file download of your subscriber list.
Once downloaded, select **Click or drag CSV file here to upload** and navigate to the CSV download, and click **Continue**.
### **5. Export paid subscribers**
💡 **Migrating paid memberships from Substack?** You will need to set up Stripe first — [**find out more**](https://ghost.org/help/stripe/). Make sure to use the same Stripe account that is connected to your Substack.
Next, it's time to import your Substack subscribers, if you have them. Click **Download paid subscribers from Substack**, to trigger a CSV file download of your subscriber list.
Once downloaded, select **Click or drag CSV file here to upload** and navigate to the CSV download, and click **Continue**.
### **6. Review**
Ghost will confirm the number of posts and members that will be imported to your publication. If satisfied, click **Import content and subscribers** to begin the import of your data.
After a few moments, you'll see a confirmation message, confirming that your data was successfully migrated to your Ghost site.
### **Substack fees**
Ghost does not take a cut of your revenue. Substack will continue to take **10% fees** on your existing paid subscriptions. If you would like help getting payment fees removed, contact [concierge@ghost.org](mailto:concierge@ghost.org).
### **Statement descriptor**
The statement descriptor is what's shown on bank statements, and depending on how the account was set up, might include 'Substack' in the name. We recommend updating this in your [Stripe public details settings](https://dashboard.stripe.com/settings/update/public/support-details).
### **Using custom domains**
If you’re using a custom domain on Substack, you’ll need to implement redirects in Ghost to prevent broken links.
Substack uses `/p/` as part of the public post URL, where as Ghost uses it in the URL for post previews. This means the redirect regular expression is quite complex, but necessary so that post previews in Ghost function correctly.
```yaml
# redirects.yaml
301:
\/p\/(?![0-9a-fA-F]{8}-[0-9a-fA-F]{4}-[0-9a-fA-F]{4}-[0-9a-fA-F]{4}-[0-9a-fA-F]{12})(.*): /$1
302:
```
This means that if a visitor or crawler goes to `https://mysite.com/p/awesome-post`, they will automatically be redirected to `https://mysite.com/awesome-post`.
For more information on Substack redirects, visit our guide [here](https://ghost.org/tutorials/implementing-redirects/#substack).
## Large and Complex migrations
If your migration needs go beyond what our in-built migration tools can support you can still move to Ghost.
If you're a **Ghost(Pro) customer**, our Migrations team can support you in migrating your content and subscribers. Learn more and get in touch with the team [here](https://ghost.org/concierge/).
Alternatively, if you are a developer, comfortable with using the command line, or running a self-hosted Ghost instance, we have a suite of[ open-source migration tools ](https://github.com/TryGhost/migrate)to help with large, complex and custom migrations.
# Migrating from WordPress
Source: https://docs.ghost.org/migration/wordpress
Migrate from WordPress and import your content to Ghost with this guide
You can easily migrate your posts and pages from WordPress site to Ghost in just a few clicks, using the WordPress migrator in Ghost Admin.
## **Run the migration**
The WordPress migrator allows you to quickly import content from your WordPress site to your Ghost publication. You can access the migrator tool from the **Settings → Advanced →** **Import/Export** area of Ghost Admin.

It's helpful to log in to your WordPress site before running the migration in Ghost Admin.
### **1. Enter your WordPress URL**
To start the migration process, enter the public URL to your WordPress site, and click **Continue**.
### **2. Export content**
Next, click **Open WordPress Settings.** If already logged into WordPress, this will take you directly to the location of your WordPress site where an export can be generated.
Select **All content,** click **Download Export File**, which will download an XML file with your content in it.
### **3. Upload content**
Once your export has been downloaded, return to the migrator window in Ghost Admin, and select **Click or drag file here to upload**, and navigate to the XML file you downloaded from WordPress, once uploaded click **Continue**.
If you're unsure of where the file was saved, check your Downloads folder.
### **4. Review**
Ghost will confirm the number of posts and pages that will be imported to your publication. If satisfied, click **Import content** to begin the import of your data.
After a few moments, you'll see a confirmation message, confirming that your data was successfully migrated to your Ghost site.
### Supported Content
What is supported:
* XML files up to 100mb
* Up to 2,500 posts
* Some shortcodes, such as `[caption]`, `[audio]`, `[code]`, along with most `[vc_]` & `[et_]` based shortcodes from page builder plugins.
What's not supported:
* Custom post types
* Most uncommon shortcodes
* Plugins that alter access to content
***
### **Redirects**
ℹ️ WordPress categories are converted to [tags](https://ghost.org/help/tags/) during the migration. The first category for any post will also become the [primary tag](https://ghost.org/help/tags/#primary-tags).
You may need to add redirects to ensure backlinks lead to the correct content.
Please refer to this list of the [most common redirection rules for WordPress migrations](https://ghost.org/tutorials/implementing-redirects/#common-redirects).
## **Large and Complex migrations**
If your migration needs go beyond what our in-built migration tools can support you can still move to Ghost.
If you're a **Ghost(Pro) customer**, our Migrations team can support you in migrating your content and subscribers. Learn more and get in touch with the team [here](https://ghost.org/concierge/).
Alternatively, if you are a developer, comfortable with using the command line, or running a self-hosted Ghost instance, we have a suite of[ open-source migration tools ](https://github.com/TryGhost/migrate)to help with large, complex and custom migrations.
# Email Newsletters
Source: https://docs.ghost.org/newsletters
Sites using the Members feature benefit from built-in email newsletters, where all posts can be delivered directly to segments of your audience in just a few clicks.
***
## Overview
Email newsletters in Ghost can be scheduled and delivered to free and paid members, or a segment of free *or* paid members. Newsletters are delivered using a beautiful HTML template that is standardised for most popular email clients.
Ghost sites have a single newsletter by default but additional ones can be created and customised. Multiple newsletters allow you to tailor content for specific audiences and your members to choose which content they receive.
## Bulk email configuration
In order to send email newsletters from a Ghost site, email needs to be configured.
### Ghost(Pro)
When using [Ghost(Pro)](https://ghost.org/pricing/), email delivery is included and the configuration is handled for you automatically.
### Self-hosted
Self-hosted Ghost installs can configure bulk email by entering Mailgun API keys from the **Email newsletter** settings.
Delivering bulk email newsletters can’t be done with basic SMTP. A bulk mail provider is a requirement to reliably deliver bulk mail. At present, Mailgun is the only supported bulk email provider. Mailgun is free for up to 600 emails per month, and has very reasonable pricing beyond that. [More info here](/faq/mailgun-newsletters/)
## Import subscribers to Ghost
Under the Ghost Admin members settings, select the import option from the settings menu.
Upload your CSV file to Ghost, and map each of the fields contained in your export file to the corresponding fields in Ghost. The **email** field is required in order to create members in Ghost, while the other fields are optional.
It’s recommended to edit your data as required before uploading your CSV file to Ghost.
Once the import has completed, all your subscribers will be migrated to Ghost. There’s nothing else you need to do, members can now log into your site and receive email newsletters.
## Running Ghost alongside Kit
It’s also possible to use Zapier or the Ghost API to keep email subscribers from Kit in sync with a Ghost membership site. This is useful if you’re giving your existing audience in Kit access to premium content on a your Ghost site as an additional perk, or if you’re accepting signups on both platforms.
To find out how to connect Ghost with Kit, check out our [integration](https://ghost.org/integrations/convertkit/).
# Migrating from Mailchimp
Source: https://docs.ghost.org/migration/mailchimp
Migrate from Mailchimp and import your content to Ghost with this guide
You can easily migrate your subscribers from Mailchimp to Ghost in just a few clicks, using the Mailchimp migrator in Ghost Admin.
✏️ It's not currently possible to migrate your Mailchimp content.
## **Run the migration**
The Mailchimp migrator allows you to quickly import members from your Mailchimp to your Ghost publication. You can access the migrator tool from the **Settings → Advanced →** **Import/Export** area of Ghost Admin.

It's helpful to log in to your Mailchimp account before running the migration in Ghost Admin.
### **1. Export subscribers**
Next, it's time to import your Mailchimp subscribers. Click **Open Mailchimp Audience**, and click **Export Audience**.
Once downloaded, select **Click or drag file here to upload** and navigate to the text download, and click **Continue**.

### **2. Review**
Ghost will confirm the number of subscribers that will be imported to your publication. If satisfied, click **Import subscribers** to begin the import of your data.

After a few moments, you'll see a confirmation message, confirming that your data was successfully migrated to your Ghost site.
## **Large and Complex migrations**
If your migration needs go beyond what our in-built migration tools can support you can still move to Ghost.
If you're a **Ghost(Pro) customer**, our Migrations team can support you in migrating your content and subscribers. Learn more and get in touch with the team [here](https://ghost.org/concierge/).
Alternatively, if you are a developer, comfortable with using the command line, or running a self-hosted Ghost instance, we have a suite of[ open-source migration tools ](https://github.com/TryGhost/migrate)to help with large, complex and custom migrations.
# Migrating from Medium
Source: https://docs.ghost.org/migration/medium
Migrate from Medium and import your content to Ghost with this guide
You can easily migrate your posts and subscribers from Medium to Ghost in just a few clicks, using the Medium migrator in Ghost Admin.
## **Run the migration**
The Medium migrator allows you to quickly import content and members from your Medium to your Ghost publication. You can access the migrator tool from the **Settings → Advanced →** **Import/Export** area of Ghost Admin.

It's helpful to log in to your Medium account before running the migration in Ghost Admin.
### **1. Enter your Medium URL**
To start the migration process, enter the public URL to your Medium, and click **Continue**.

### **2. Export content**
Next, click **Open Medium Settings**, and click **Download your information**. A link to download the export will be sent to your email.

### **3. Upload content**
Once your export has been downloaded, return to the migrator window in Ghost Admin, and select **Click or drag file here to upload**, and navigate to the zip file you downloaded from Medium, once uploaded click **Continue**.
If you're unsure of where the file was saved, check your Downloads folder.
### **4. Export subscribers**
Next, it's time to import your Medium subscribers. Click **Open Medium Audience stats**, and click **Export this list**.
Once downloaded, select **Click or drag file here to upload** and navigate to the text download, and click **Continue**.

### **5. Review**
Ghost will confirm the number of posts and members that will be imported to your publication. If satisfied, click **Import content and subscribers** to begin the import of your data.

After a few moments, you'll see a confirmation message, confirming that your data was successfully migrated to your Ghost site.
### **6. Verification and manual checks**
⚠️ The Medium content export includes all of your posts and **all of the comments you've written across Medium**. There is no sure-fire way to differentiate between these content types, so you should check the import to verify your posts are live.
The importer will make a post in Ghost for all posts and comments in your Medium export. The importer will try to sort posts and comments, based on the following rules:
* If a piece has only one paragraph, treat it as a **comment**
* If a piece of any length has an image, treat it as a **post**
* Otherwise, treat the piece as a **post**
* All pieces that are treated as **comments** will be saved as **drafts**
* All **posts** that were **drafts** in Medium, will be **drafts** in Ghost
* All \*\*posts \*\*that were **published** in Medium will be **published** in Ghost
You should check that comments and posts were sorted correctly. Possible comments that have been saved as drafts will be tagged `#Medium Possible Comment`.
### Using custom domains
If you’re using a custom domain on Medium, you’ll need to implement redirects in Ghost to prevent broken links.
Medium appends a small random ID to each post, which is removed in the migration step above. The regular expression below removes that random ID, but does not affect preview links.
```yaml
# redirects.yaml
301:
^\/(?!p\/?)(.*)(-[0-9a-f]{10,12}): /$1
302:
```
This means that if a visitor or crawler goes to `https://mysite.com/awesome-post-a1b2c3d4e5f6`, they will automatically be redirected to `https://mysite.com/awesome-post`.
Learn more about Medium redirects [here](https://ghost.org/tutorials/implementing-redirects/#medium).
***
## **Large and Complex migrations**
If your migration needs go beyond what our in-built migration tools can support you can still move to Ghost.
If you're a **Ghost(Pro) customer**, our Migrations team can support you in migrating your content and subscribers. Learn more and get in touch with the team [here](https://ghost.org/concierge/).
Alternatively, if you are a developer, comfortable with using the command line, or running a self-hosted Ghost instance, we have a suite of[ open-source migration tools ](https://github.com/TryGhost/migrate)to help with large, complex and custom migrations.
# Migrating from Memberful
Source: https://docs.ghost.org/migration/memberful
Migrate from Memberful and import your members to Ghost with this guide
If you're a Ghost(Pro) customer, our team may be able to help you migrate your content and subscribers. Learn more about our [Concierge service](https://ghost.org/concierge/).
## Export your subscribers
To get started, export your current subscribers in CSV format.
## Import subscribers to Ghost
Under the Ghost Admin members settings, select the import option from the settings menu.
Upload your CSV file to Ghost, and map each of the fields contained in your export file to the corresponding fields in Ghost. The **email** field is required in order to create members in Ghost, while the other fields are optional.
If you’d like to give these members access to content with an access level of `paid-members only` but retain their subscriptions in Memberful, you can give them unlimited access by setting their `complimentary_plan` status to `true` — read more about [Member imports](https://ghost.org/help/import-members/).
Once the import has completed, all your subscribers will be migrated to Ghost. There’s nothing else you need to do, members can now log into your site and receive email newsletters.
# Migrating from Newspack
Source: https://docs.ghost.org/migration/newspack
Migrate from Newspack and import your content to Ghost with this guide. You can manage a migration from Newspack yourself or, if you prefer, our team can take care of the migration for you.
If you're a Ghost(Pro) customer, our team may be able to help you migrate your content and subscribers. Learn more about our [Concierge service](https://ghost.org/concierge/).
If you’d rather do the migration yourself, that’s fine too, and you can follow the guide below.
## Newspack migration steps
In order to migrate fully from Newspack to Ghost, here are the different steps you’ll need to take.
#### Migrating content
Newspack sites run on WordPress, so the first thing you’ll want to do is follow our [WordPress migration guide](/migration/wordpress/). This will allow you export all your published content, and bring it into Ghost.
#### Migrating your theme
Ghost comes with several free themes built with news publishers in mind. We suggest starting with [Headline](https://ghost.org/themes/headline/), which is lightning fast, SEO optimised, and can be further customised to match your brand.
#### Migrating email subscribers
Ghost can import email subscribers from any platform. Most newspack publishers use Mailchimp, and to migrate contacts you can follow our [Mailchimp migration guide](/migration/mailchimp/). Email newsletters are built into Ghost natively, so you won’t need to keep paying for a 3rd party service anymore after migrating.
#### Migrating paid subscribers
Newspack and Ghost both use Stripe for subscription payments, and you can easily import paying subscribers into Ghost by connecting to your Stripe account. When [importing subscribers](https://ghost.org/help/import-members/#prepare-your-csv-file), make sure to include their Stripe Customer ID, and Ghost will link up the records automatically. If you need help with this, drop us an email on `concierge@ghost.org`.
#### Migrating ads & analytics
Ghost supports all of the same advertising and analytics services as Newspack, and all of these can be migrated easily. You can paste any needed tracking codes into **Settings → Code Injection**, or you can edit your theme directly to include the code snippets there, if you want more control.
#### Migrating URLs
For the most part, Ghost will easily match the URL structure of your old site, so any links to your site will keep working as normal. If you have any URLs that have changed, you can take care of these by [setting up redirects](https://ghost.org/tutorials/implementing-redirects/) in Ghost.
***
## Newspack migration limitations
Ghost has an automatically built-in commenting system for your members and subscribers, but it’s not currently possible to migrate comments from other platforms into Ghost. If you’ve found your comments section is mostly full of spam, though, then you might actually welcome a fresh start.
Ghost does not support marketplace listings / directories. If you use this feature of Newspack, this is not something that can be migrated. However, if it’s really important to you, you could always set up a directory on a subdomain of your site - like `listings.yoursite.com`.
***
## Newspack migration FAQ
**Is migrating from Newspack to Ghost difficult?**\
Not really! Newspack sites are just WordPress, and we’ve migrated tens of thousands of WordPress sites to Ghost over the years. Most people tend to favour Ghost because it’s a fully integrated platform specifically designed for publishers, rather than a disparate set of CMS plugins.
**What about dynamic blocks and pages?**\
Ghost has those, too. They work very similarly to Newspack, but for the most part they’re much easier to use. Ghost places more emphasis on publishing content with rich media, and less emphasis on dragging/dropping things into complex layouts. We’ve also got [a handy comparison guide](https://ghost.org/vs/newspack/) if you want to get a clearer idea of Newspack features compared to Ghost.
**Why is Ghost so much cheaper than Newspack**\
Good question! Newspack is a side-project by WordPress with a small number of customers, so they have to charge a high amount for each customer in order to be able to afford to maintain their product. Ghost is not a side-project, it’s our only project. We have tens of thousands of customers and millions of users, so we don’t need to charge as much per newsroom.
**Newspack works with Google News Initiative, won’t I lose that advantage in migrating to Ghost?**\
Not at all. Ghost has been working with Google News Initiative for years, and we’re proud to be an official technology partner for Google News Initiative bootcamps. We’re thrilled to work with Google on supporting as many local news publishers as we can.
**I read that you offer additional support for small newsrooms, what’s that about?**\
We do! If you run a small local news organisation and would like to chat about how we can support you, get in touch with us by email on `concierge@ghost.org`.
**I’m not confident with tech. How can I do these migration steps?**\
Let our team do them for you, for free. Drop us an email on `concierge@ghost.org` to find out more.
# Migrating from Patreon
Source: https://docs.ghost.org/migration/patreon
Migrate from Patreon and import your Patrons to Ghost with this guide
## Overview
Since Patreon manages your subscriptions on your behalf, there is no direct migration path to move your paid subscriptions from Patreon to other platforms.
The good news: Ghost makes it possible to import all of your existing patrons and give them access to premium content on a custom Ghost publication, or to sync your Patreon account with Ghost using an automation. [Learn more here](https://ghost.org/resources/patreon-vs-your-own-site/).
## Migrating Patrons to Ghost
Ghost has an easy to use importer that allows you to migrate a list of members from any other tool, including Patreon.
This method is useful if you’re planning to turn signups in Patreon off and have all new members sign up via Ghost, but still need to give your existing Patrons access to your new Ghost Publication.
### Export your subscribers
To get started, export your current subscribers in CSV format from [this page](https://www.patreon.com/members) in your Patreon account.
### Import subscribers to Ghost
Under the Ghost Admin members settings, select the import option from the settings menu.
Upload your CSV file to Ghost, and map each of the fields contained in your export file to the corresponding fields in Ghost. The **email** field is required in order to create members in Ghost, while the other fields are optional.
If you’d like to give these members access to content with an acceess level of `paid-members only` but retain their subscriptions in Patreon, you can give them unlimited access by setting their `complimentary_plan` status to `true` — read more about [Member imports](https://ghost.org/help/import-members/).
Once the import has completed, all your subscribers will be migrated to Ghost. There’s nothing else you need to do, members can now log into your site and receive email newsletters.
## Running Ghost alongside Patreon
It’s also possible to use Zapier or the Ghost API to keep your Patrons and Members in sync in both platforms. This is useful if you’re giving your audience on Patreon access to premium content on a custom Ghost site as an additional perk, or if you’re accepting signups on both platforms.
To find out how to connect Ghost with Patreon, check out our [integration](https://ghost.org/integrations/patreon/).
# Migrating from Squarespace
Source: https://docs.ghost.org/migration/squarespace
Official guide: How to migrate from Squarespace to Ghost
You can easily migrate your posts from your Squarespace site to Ghost in just a few clicks, using the built-in Squarespace migrator in Ghost Admin.
## **Run the migration**
The Squarespace migrator allows you to quickly import content from your Squarespace site to your Ghost publication. You can access the migrator tool from the **Settings → Advanced →** **Import/Export** area of Ghost Admin.

It's helpful to log in to your Squarespace site before running the migration in Ghost Admin.
### **1. Enter your Squarespace URL**
To start the migration process, enter the public URL to your Squarespace site, and click **Continue**.

### **2. Export content**
Next, click **Open Squarespace settings.** If already logged into Squarespace, this will take you directly to the location of your Squarespace site where an export can be generated.

Click **Export**, which will download an XML file with your content in it.
### **3. Upload content**
Once your export has been downloaded, return to the migrator window in Ghost Admin, and select **Click or drag file here to upload**, and navigate to the XML file you downloaded from Squarespace, once uploaded click **Continue**.
If you're unsure of where the file was saved, check your Downloads folder.
### **4. Review**
Ghost will confirm the number of posts and pages that will be imported to your publication. If satisfied, click **Import content** to begin the import of your data.

After a few moments, you'll see a confirmation message, confirming that your data was successfully migrated to your Ghost site.
***
### **Redirects**
Squarespace categories are converted to [tags](https://ghost.org/help/tags/) during the migration. The first category for any post will also become the [primary tag](https://ghost.org/help/tags/#primary-tags).
You may need to add [redirects](https://ghost.org/help/redirects/) to ensure backlinks lead to the correct content.
Please refer to this list of the [most common redirection rules for Squarespace migrations](https://ghost.org/tutorials/implementing-redirects/#squarespace).
***
## Large and Complex migrations
If your migration needs go beyond what our in-built migration tools can support you can still move to Ghost.
If you're a **Ghost(Pro) customer**, our Migrations team can support you in migrating your content and subscribers. Learn more and get in touch with the team [here](https://ghost.org/concierge/).
Alternatively, if you are a developer, comfortable with using the command line, or running a self-hosted Ghost instance, we have a suite of[ open-source migration tools ](https://github.com/TryGhost/migrate)to help with large, complex and custom migrations.
# Migrating from Substack
Source: https://docs.ghost.org/migration/substack
Migrate from Substack and import your content to Ghost with this guide
💡 **Migrating paid memberships from Substack?** You will need to set up Stripe first — [**find out more**](https://ghost.org/help/stripe/). Make sure to use the same Stripe account that is connected to your Substack.
## **Run the migration**
The Substack migrator allows you to quickly import content and members from your Substack to your Ghost publication. You can access the migrator tool from the **Settings → Advanced →** **Import/Export** area of Ghost Admin.

It's helpful to log in to your Substack account before running the migration in Ghost Admin.
### **1. Enter your Substack URL**
To start the migration process, enter the public URL to your Substack, and click **Continue**.

### **2. Export content**
Next, click **Open Substack Settings.** If already logged into Substack, this will take you directly to the location of your Substack account where an export can be generated.

Click **Create new export**, and then download the zip file that's generated after the export is completed in Substack.
### **3. Upload content**
Once your export has been downloaded, return to the migrator window in Ghost Admin, and select **Click or drag file here to upload**, and navigate to the zip file you downloaded from Substack, once uploaded click **Continue**.
If you're unsure of where the file was saved, check your Downloads folder.
### **4. Export free subscribers**
Next, it's time to import your Substack subscribers. Click **Download free subscribers from Substack**, to trigger a CSV file download of your subscriber list.
Once downloaded, select **Click or drag CSV file here to upload** and navigate to the CSV download, and click **Continue**.

### **5. Export paid subscribers**
💡 **Migrating paid memberships from Substack?** You will need to set up Stripe first — [**find out more**](https://ghost.org/help/stripe/). Make sure to use the same Stripe account that is connected to your Substack.
Next, it's time to import your Substack subscribers, if you have them. Click **Download paid subscribers from Substack**, to trigger a CSV file download of your subscriber list.
Once downloaded, select **Click or drag CSV file here to upload** and navigate to the CSV download, and click **Continue**.

### **6. Review**
Ghost will confirm the number of posts and members that will be imported to your publication. If satisfied, click **Import content and subscribers** to begin the import of your data.

After a few moments, you'll see a confirmation message, confirming that your data was successfully migrated to your Ghost site.
### **Substack fees**
Ghost does not take a cut of your revenue. Substack will continue to take **10% fees** on your existing paid subscriptions. If you would like help getting payment fees removed, contact [concierge@ghost.org](mailto:concierge@ghost.org).
### **Statement descriptor**
The statement descriptor is what's shown on bank statements, and depending on how the account was set up, might include 'Substack' in the name. We recommend updating this in your [Stripe public details settings](https://dashboard.stripe.com/settings/update/public/support-details).
### **Using custom domains**
If you’re using a custom domain on Substack, you’ll need to implement redirects in Ghost to prevent broken links.
Substack uses `/p/` as part of the public post URL, where as Ghost uses it in the URL for post previews. This means the redirect regular expression is quite complex, but necessary so that post previews in Ghost function correctly.
```yaml
# redirects.yaml
301:
\/p\/(?![0-9a-fA-F]{8}-[0-9a-fA-F]{4}-[0-9a-fA-F]{4}-[0-9a-fA-F]{4}-[0-9a-fA-F]{12})(.*): /$1
302:
```
This means that if a visitor or crawler goes to `https://mysite.com/p/awesome-post`, they will automatically be redirected to `https://mysite.com/awesome-post`.
For more information on Substack redirects, visit our guide [here](https://ghost.org/tutorials/implementing-redirects/#substack).
## Large and Complex migrations
If your migration needs go beyond what our in-built migration tools can support you can still move to Ghost.
If you're a **Ghost(Pro) customer**, our Migrations team can support you in migrating your content and subscribers. Learn more and get in touch with the team [here](https://ghost.org/concierge/).
Alternatively, if you are a developer, comfortable with using the command line, or running a self-hosted Ghost instance, we have a suite of[ open-source migration tools ](https://github.com/TryGhost/migrate)to help with large, complex and custom migrations.
# Migrating from WordPress
Source: https://docs.ghost.org/migration/wordpress
Migrate from WordPress and import your content to Ghost with this guide
You can easily migrate your posts and pages from WordPress site to Ghost in just a few clicks, using the WordPress migrator in Ghost Admin.
## **Run the migration**
The WordPress migrator allows you to quickly import content from your WordPress site to your Ghost publication. You can access the migrator tool from the **Settings → Advanced →** **Import/Export** area of Ghost Admin.

It's helpful to log in to your WordPress site before running the migration in Ghost Admin.
### **1. Enter your WordPress URL**
To start the migration process, enter the public URL to your WordPress site, and click **Continue**.

### **2. Export content**
Next, click **Open WordPress Settings.** If already logged into WordPress, this will take you directly to the location of your WordPress site where an export can be generated.

Select **All content,** click **Download Export File**, which will download an XML file with your content in it.
### **3. Upload content**
Once your export has been downloaded, return to the migrator window in Ghost Admin, and select **Click or drag file here to upload**, and navigate to the XML file you downloaded from WordPress, once uploaded click **Continue**.
If you're unsure of where the file was saved, check your Downloads folder.
### **4. Review**
Ghost will confirm the number of posts and pages that will be imported to your publication. If satisfied, click **Import content** to begin the import of your data.

After a few moments, you'll see a confirmation message, confirming that your data was successfully migrated to your Ghost site.
### Supported Content
What is supported:
* XML files up to 100mb
* Up to 2,500 posts
* Some shortcodes, such as `[caption]`, `[audio]`, `[code]`, along with most `[vc_]` & `[et_]` based shortcodes from page builder plugins.
What's not supported:
* Custom post types
* Most uncommon shortcodes
* Plugins that alter access to content
***
### **Redirects**
ℹ️ WordPress categories are converted to [tags](https://ghost.org/help/tags/) during the migration. The first category for any post will also become the [primary tag](https://ghost.org/help/tags/#primary-tags).
You may need to add redirects to ensure backlinks lead to the correct content.
Please refer to this list of the [most common redirection rules for WordPress migrations](https://ghost.org/tutorials/implementing-redirects/#common-redirects).
## **Large and Complex migrations**
If your migration needs go beyond what our in-built migration tools can support you can still move to Ghost.
If you're a **Ghost(Pro) customer**, our Migrations team can support you in migrating your content and subscribers. Learn more and get in touch with the team [here](https://ghost.org/concierge/).
Alternatively, if you are a developer, comfortable with using the command line, or running a self-hosted Ghost instance, we have a suite of[ open-source migration tools ](https://github.com/TryGhost/migrate)to help with large, complex and custom migrations.
# Email Newsletters
Source: https://docs.ghost.org/newsletters
Sites using the Members feature benefit from built-in email newsletters, where all posts can be delivered directly to segments of your audience in just a few clicks.
***
## Overview
Email newsletters in Ghost can be scheduled and delivered to free and paid members, or a segment of free *or* paid members. Newsletters are delivered using a beautiful HTML template that is standardised for most popular email clients.
Ghost sites have a single newsletter by default but additional ones can be created and customised. Multiple newsletters allow you to tailor content for specific audiences and your members to choose which content they receive.
## Bulk email configuration
In order to send email newsletters from a Ghost site, email needs to be configured.
### Ghost(Pro)
When using [Ghost(Pro)](https://ghost.org/pricing/), email delivery is included and the configuration is handled for you automatically.
### Self-hosted
Self-hosted Ghost installs can configure bulk email by entering Mailgun API keys from the **Email newsletter** settings.
Delivering bulk email newsletters can’t be done with basic SMTP. A bulk mail provider is a requirement to reliably deliver bulk mail. At present, Mailgun is the only supported bulk email provider. Mailgun is free for up to 600 emails per month, and has very reasonable pricing beyond that. [More info here](/faq/mailgun-newsletters/)
 ### Auth email
The Members feature uses passwordless email-link based logins for your members. These auth emails are not delivered in bulk and are sent using the standard mail configuration in Ghost.
Self-hosted Ghost installs can [configure mail](/config/#mail) using Mailgun or other providers if preferred.
# Product Principles & Roadmap
Source: https://docs.ghost.org/product
Developing Ghost as a product is a complex process undertaken by a small number of people with a great deal of care.
***
## How we make product decisions
Ghost is a small, bootstrapped non-profit organization with no external funding. We make revenue from our [Ghost(Pro)](https://ghost.org/pricing/) platform, which sustains the company and funds a handful of developers who improve the software. Because we don’t have tens of millions of dollars in VC money or hundreds of developers, we have to carefully choose where to dedicate our limited team and resources. We can’t do everything.
When deciding what to do next, we try to look at what would benefit most users, in most ways, most of the time. You can get a sense of those things over on [our public changelog](https://ghost.org/changelog/).
Outside of the core team, Ghost is completely [open source](https://github.com/tryghost/ghost/), so anyone in the world can contribute and help build a feature that they’d like to see in the software, even if the core team isn’t working on it.
## Feature requests
We welcome feature requests from users over in [the ideas category](https://forum.ghost.org/c/Ideas) of the Ghost Forum. Here, people can request and suggest things which they’d like to see in Ghost, and others can add their votes.
The ideas board is a great way for us to gauge user demand, but it’s not a democratic system. We don’t automatically build things just because they get a lot of votes, and not everything that gets requested makes it into core, but we do pay close attention to things with lots of demand.
## Why haven’t you built X yet? When will you?
Based on how we make product decisions, and what feature requests we get (detailed above) — if neither the core team nor the wider community are building the thing you want, then it’s likely that there isn’t enough demand or interest to make it happen at the moment.
But, the great thing about open source is that if enough people want something, they can easily get together on GitHub and make it happen themselves (or fund someone else to). There’s no need to wait on the core team to deliver it. If you really want or need a particular feature, it’s entirely possible to make that happen.
You can get involved, either by contributing your time and development skills, or by providing financial support to fund someone with these skills.
## I’m very upset you aren’t doing what I want!
For the most part, the Ghost community is kind and understanding of the complexities and constraints of building modern software. Every so often, though, we get a series of comments along the lines of:
> Wow, I can’t believe this is broken and nobody is doing anything. How have you messed up something so basic? Can the devs fix ASAP. Thanks.
Comments like this don't inspire anyone to help you. Not the core team, and certainly not the wider group of volunteer contributors. If you're friendly and polite, other will typically be friendly in return.
If you feel really passionate about something specific, you have 3 potential courses of action:
1. Get involved on GitHub and contribute code to fix the issue
2. Hire a developer to get involved on GitHub and contribute code to fix the issue
3. Start a feature request topic on the forum to demonstrate that lots of other users care about this too, and have voted on it, which is the most likely way the core team will prioritize it.
## Is there a public roadmap for what’s coming next?
The Ghost core team maintains a broad 1-2 year product roadmap at any given time, which defines the overall direction of the company and the software. While the exact roadmap isn’t shared publicly (we tried it and it turned out to be more distracting than helpful), the things being worked on are generally very visible [on GitHub](https://github.com/tryghost/ghost).
# Publishing
Source: https://docs.ghost.org/publishing
Posts are the primary entry-type within Ghost, and generally represent the majority of stored data.
***
By default Ghost will return a reverse chronological feed of posts in the traditional format of a blog. However, a great deal of customisation is available for this behaviour.
## Overview
Posts are created within Ghost-Admin using the editor to determine your site’s main content. Within them are all the fields which you might expect such as title, description, slug, metadata, authors, tags and so on.
Additionally, posts have **Code Injection** fields which mean you can register additional styles, scripts or other content to be injected just before `` or `
### Auth email
The Members feature uses passwordless email-link based logins for your members. These auth emails are not delivered in bulk and are sent using the standard mail configuration in Ghost.
Self-hosted Ghost installs can [configure mail](/config/#mail) using Mailgun or other providers if preferred.
# Product Principles & Roadmap
Source: https://docs.ghost.org/product
Developing Ghost as a product is a complex process undertaken by a small number of people with a great deal of care.
***
## How we make product decisions
Ghost is a small, bootstrapped non-profit organization with no external funding. We make revenue from our [Ghost(Pro)](https://ghost.org/pricing/) platform, which sustains the company and funds a handful of developers who improve the software. Because we don’t have tens of millions of dollars in VC money or hundreds of developers, we have to carefully choose where to dedicate our limited team and resources. We can’t do everything.
When deciding what to do next, we try to look at what would benefit most users, in most ways, most of the time. You can get a sense of those things over on [our public changelog](https://ghost.org/changelog/).
Outside of the core team, Ghost is completely [open source](https://github.com/tryghost/ghost/), so anyone in the world can contribute and help build a feature that they’d like to see in the software, even if the core team isn’t working on it.
## Feature requests
We welcome feature requests from users over in [the ideas category](https://forum.ghost.org/c/Ideas) of the Ghost Forum. Here, people can request and suggest things which they’d like to see in Ghost, and others can add their votes.
The ideas board is a great way for us to gauge user demand, but it’s not a democratic system. We don’t automatically build things just because they get a lot of votes, and not everything that gets requested makes it into core, but we do pay close attention to things with lots of demand.
## Why haven’t you built X yet? When will you?
Based on how we make product decisions, and what feature requests we get (detailed above) — if neither the core team nor the wider community are building the thing you want, then it’s likely that there isn’t enough demand or interest to make it happen at the moment.
But, the great thing about open source is that if enough people want something, they can easily get together on GitHub and make it happen themselves (or fund someone else to). There’s no need to wait on the core team to deliver it. If you really want or need a particular feature, it’s entirely possible to make that happen.
You can get involved, either by contributing your time and development skills, or by providing financial support to fund someone with these skills.
## I’m very upset you aren’t doing what I want!
For the most part, the Ghost community is kind and understanding of the complexities and constraints of building modern software. Every so often, though, we get a series of comments along the lines of:
> Wow, I can’t believe this is broken and nobody is doing anything. How have you messed up something so basic? Can the devs fix ASAP. Thanks.
Comments like this don't inspire anyone to help you. Not the core team, and certainly not the wider group of volunteer contributors. If you're friendly and polite, other will typically be friendly in return.
If you feel really passionate about something specific, you have 3 potential courses of action:
1. Get involved on GitHub and contribute code to fix the issue
2. Hire a developer to get involved on GitHub and contribute code to fix the issue
3. Start a feature request topic on the forum to demonstrate that lots of other users care about this too, and have voted on it, which is the most likely way the core team will prioritize it.
## Is there a public roadmap for what’s coming next?
The Ghost core team maintains a broad 1-2 year product roadmap at any given time, which defines the overall direction of the company and the software. While the exact roadmap isn’t shared publicly (we tried it and it turned out to be more distracting than helpful), the things being worked on are generally very visible [on GitHub](https://github.com/tryghost/ghost).
# Publishing
Source: https://docs.ghost.org/publishing
Posts are the primary entry-type within Ghost, and generally represent the majority of stored data.
***
By default Ghost will return a reverse chronological feed of posts in the traditional format of a blog. However, a great deal of customisation is available for this behaviour.
## Overview
Posts are created within Ghost-Admin using the editor to determine your site’s main content. Within them are all the fields which you might expect such as title, description, slug, metadata, authors, tags and so on.
Additionally, posts have **Code Injection** fields which mean you can register additional styles, scripts or other content to be injected just before `` or ` ` on any one particular URL where desired.
Here’s an example of a [post](https://demo.ghost.io/welcome/) in the default Ghost Theme: