> ## Documentation Index
> Fetch the complete documentation index at: https://docs.ghost.org/llms.txt
> Use this file to discover all available pages before exploring further.
# Working With Next.Js
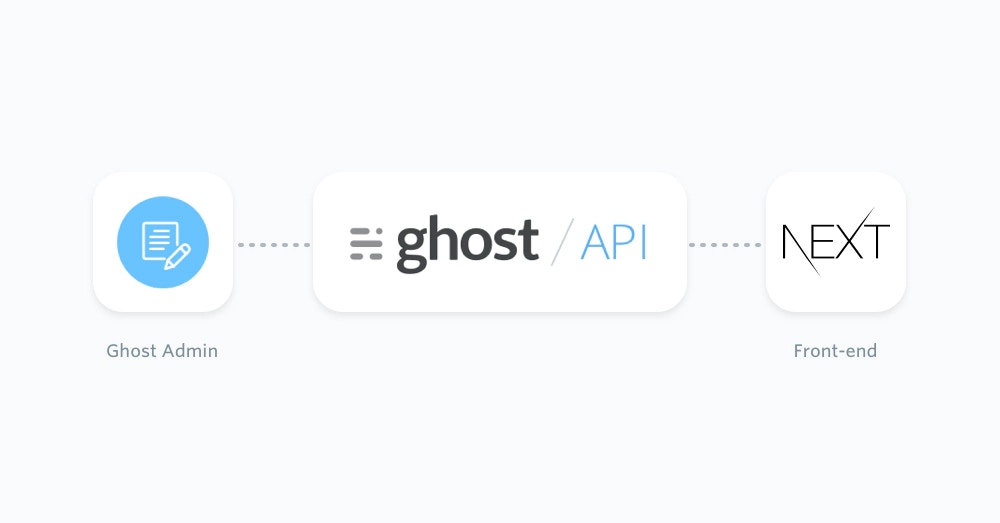
> Learn how to spin up a JavaScript app using Ghost as a headless CMS and build a completely custom front-end with the [Next.js](https://nextjs.org/) React framework.
***
Hey, I finally have a new website 👋\
\
I’m a founder, designer, and filmmaker — and I’m trying to capture a bit more of all of this with my new site.\
\
Had a lot of fun making this in Next.js, with [@TryGhost](https://twitter.com/TryGhost?ref_src=twsrc%5Etfw) as backend, deployed on [@vercel](https://twitter.com/vercel?ref_src=twsrc%5Etfw).\
\
Check it out → [https://t.co/iawYNTuB8y](https://t.co/iawYNTuB8y) [pic.twitter.com/o1i81y5uL6](https://t.co/o1i81y5uL6)
— Fabrizio Rinaldi (@linuz90) [August 3, 2021](https://twitter.com/linuz90/status/1422574429754822661?ref_src=twsrc%5Etfw)
## Prerequisites
This configuration of a Ghost publication requires existing moderate knowledge of JavaScript and [React](https://reactjs.org/). You’ll need an active Ghost account to get started, which can either be self-hosted or using [Ghost(Pro)](https://ghost.org/pricing/).
Additionally, you’ll need to setup a React & Next.js application via the command line:
```bash theme={"dark"}
yarn create next-app
```
Then answer the prompts. The examples in these docs answer "No" to all for simplicity:
**Note this uses the [pages router](https://nextjs.org/docs/pages), not the [app router](https://nextjs.org/docs/app/getting-started).**
```bash theme={"dark"}
✔ What is your project named? … my-next-app
✔ Would you like to use TypeScript? … **No** / Yes
✔ Would you like to use ESLint? … **No** / Yes
✔ Would you like to use Tailwind CSS? … **No** / Yes
✔ Would you like your code inside a src/ directory? … **No** / Yes
✔ Would you like to use App Router? … **No** / Yes
✔ Would you like to use Turbopack for next dev? … **No** / Yes
✔ Would you like to customize the import alias? … **No** / Yes
```
Finally, start the app:
```bash theme={"dark"}
cd my-next-app
yarn dev
```
Next.js can also be setup manually – refer to the [official Next.js documentation](https://nextjs.org/docs) for more information.
## Getting started
Thanks to the [JavaScript Content API Client Library](/content-api/javascript/), it’s possible for content from a Ghost site can be directly accessed within a Next.js application.
Create a new file called `posts.js` within an `lib/` directory. This file will contain all the functions needed to request Ghost post content, as well as an instance of the Ghost Content API.
Install the official [JavaScript Ghost Content API](/content-api/javascript/#installation) helper using:
```bash theme={"dark"}
yarn add @tryghost/content-api
```
Once the helper is installed it can be added to the `posts.js` file using a [static `import` statement](https://developer.mozilla.org/en-US/docs/Web/JavaScript/Reference/Statements/import):
```js theme={"dark"}
import GhostContentAPI from "@tryghost/content-api";
```
Now an instance of the Ghost Content API can be created using Ghost site credentials:
```js theme={"dark"}
// lib/posts.js - or make a separate file to reuse for other resources
import GhostContentAPI from "@tryghost/content-api";
// Create API instance with site credentials
const api = new GhostContentAPI({
url: 'https://demo.ghost.io',
key: '22444f78447824223cefc48062',
version: "v6.0"
});
```
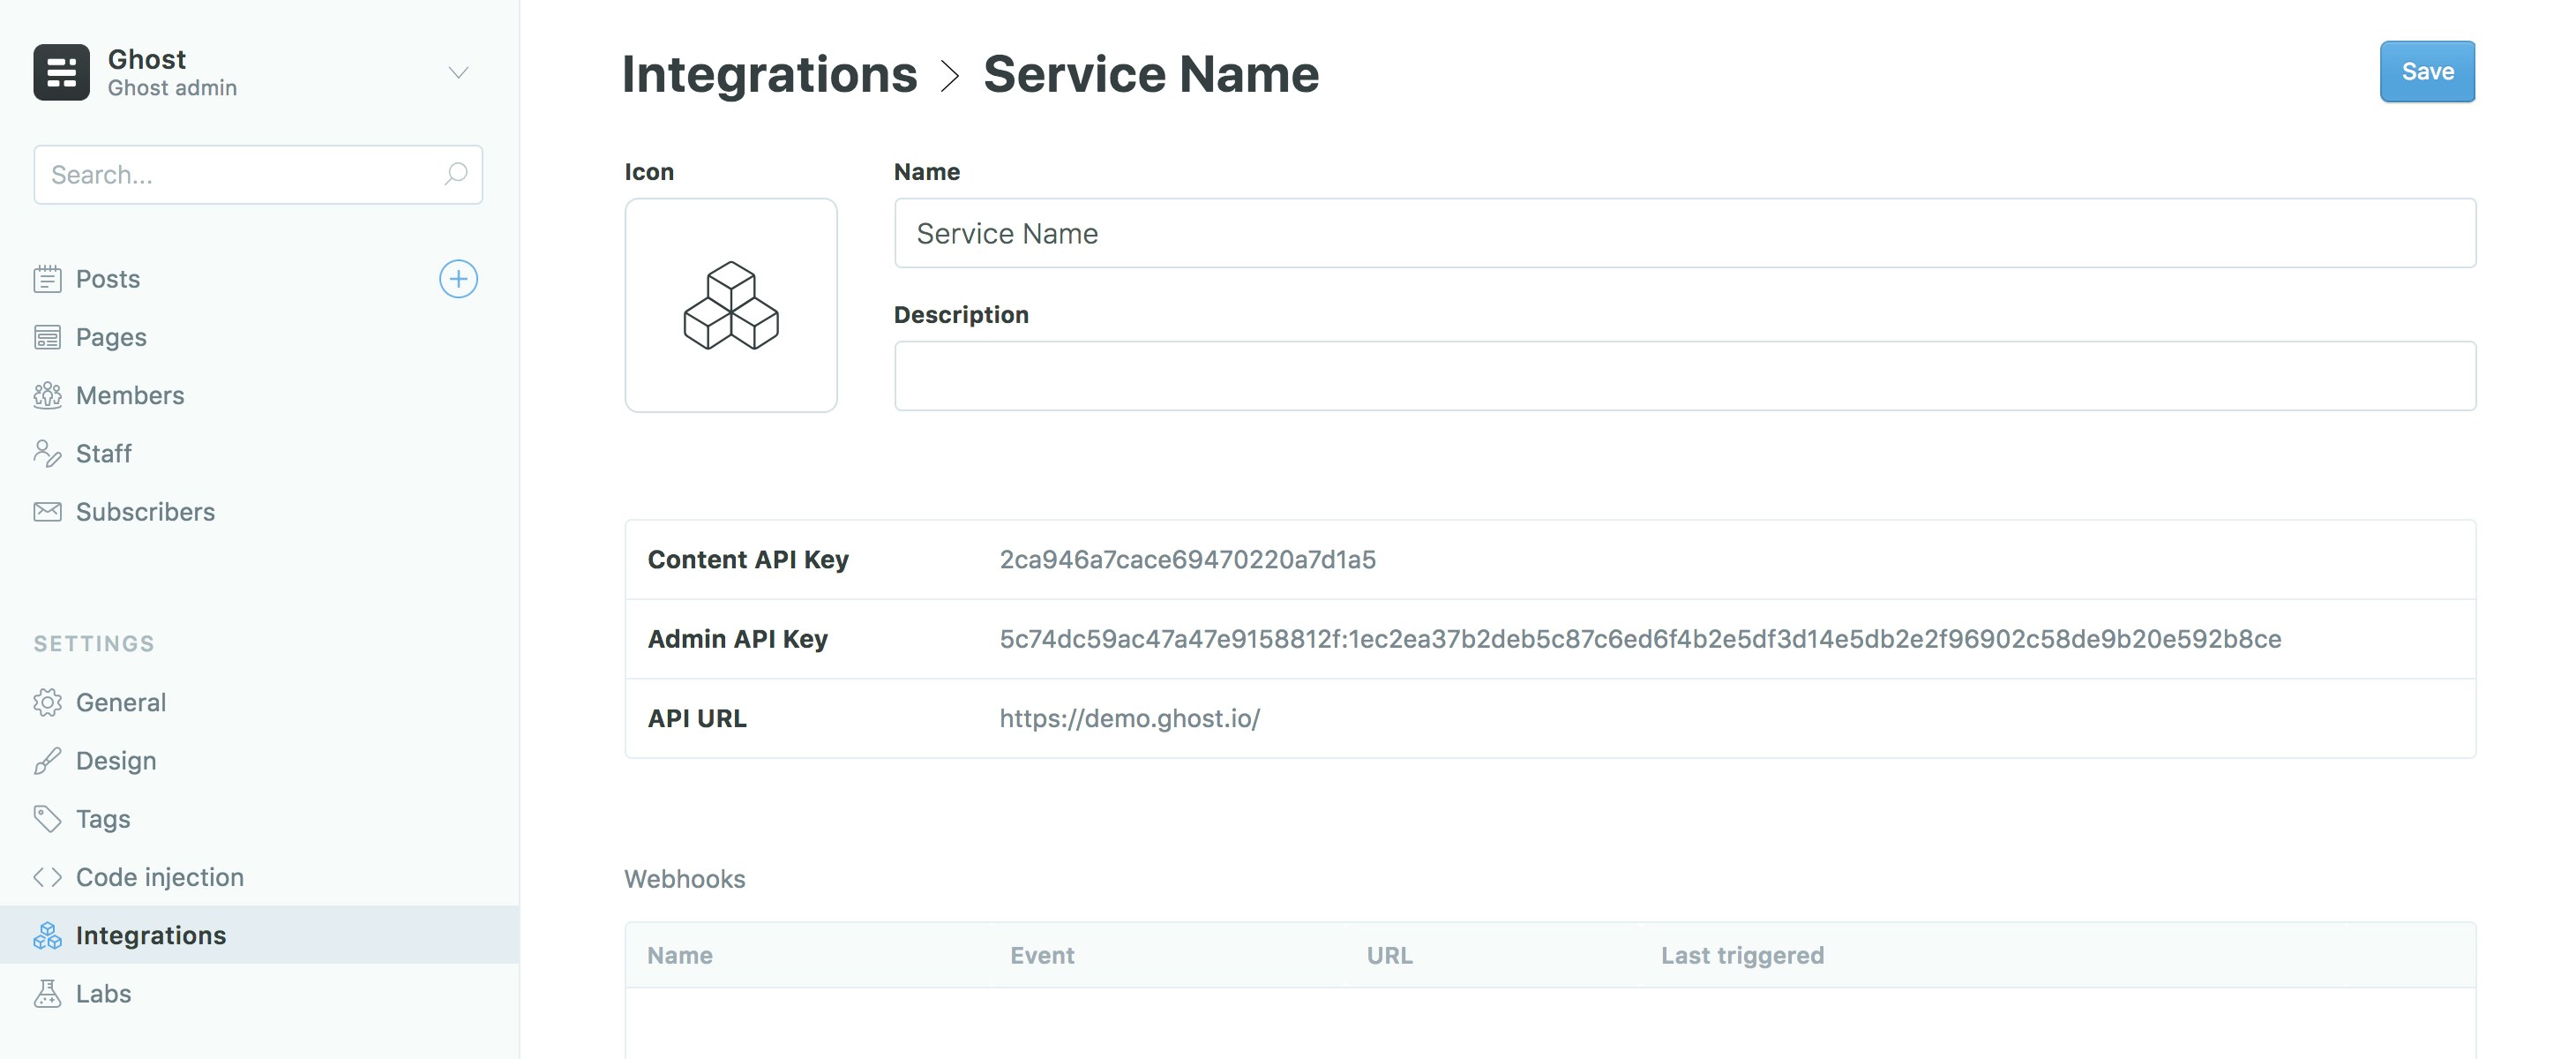
Change the `url` value to the URL of the Ghost site. For Ghost(Pro) customers, this is the Ghost URL ending in `.ghost.io`, and for people using the self-hosted version of Ghost, it’s the same URL used to view the admin panel.
Create a custom integration within Ghost Admin to generate a key and change the `key` value.
For more detailed steps on setting up Integrations check out [our documentation on the Content API](/content-api/#authentication).
### Exposing content
The [`posts.browse()`](/content-api/javascript/#endpoints) endpoint can be used to get all the posts from a Ghost site. This can be done with the following code as an asynchronous function:
```js theme={"dark"}
export async function getPosts() {
return await api.posts
.browse({
limit: 15 // default is 15, max is 100
})
.catch(err => {
console.error(err);
});
}
```
Using an asynchronous function means Next.js will wait until all the content has been retrieved from Ghost before loading the page. The `export` function means your content will be available throughout the application.
### Rendering posts
Since you’re sending content from Ghost to a React application, data is passed to pages and components with [`props`](https://react.dev/learn/passing-props-to-a-component). Next.js extends upon that concept with [`getStaticProps`](https://nextjs.org/docs/pages/building-your-application/data-fetching/get-static-props). This function will load the Ghost site content into the page before it’s rendered in the browser.
Use the following to import the `getPosts` function created in previous steps within a page you want to render Ghost posts, like `pages/index.js`:
```js theme={"dark"}
import { getPosts } from '../lib/posts';
```
The posts can be fetched from within `getStaticProps` for the given page:
```js theme={"dark"}
export async function getStaticProps() {
const posts = await getPosts()
if (!posts) {
return {
notFound: true,
}
}
return {
props: { posts }
}
}
```
Now the posts can be used within the `Home` page in `pages/index.js` via the component `props`:
```js theme={"dark"}
export default function Home(props) {
return (
{props.posts.map((post) => (
{post.title}
))}
);
}
```
Pages in Next.js are stored in a `pages/` directory. To find out more about how pages work [check out the official documentation](https://nextjs.org/docs/pages/building-your-application/routing/pages-and-layouts).
### Rendering a single post
Retrieving Ghost content from a single post can be done in a similar fashion to retrieving all posts. By using [`posts.read()`](/content-api/javascript/#endpoints) it’s possible to query the Ghost Content API for a particular post using a [post `id` or `slug`](/content-api/posts).
Reopen the `lib/posts.js` file and add the following async function:
```js theme={"dark"}
export async function getSinglePost(postSlug) {
return await api.posts
.read({
slug: postSlug
})
.catch(err => {
console.error(err);
});
}
```
This function accepts a single `postSlug` parameter, which will be passed down by the template file using it. The page slug can then be used to query the Ghost Content API and get the associated post data back.
Next.js provides [dynamic routes](https://nextjs.org/docs/pages/building-your-application/routing/dynamic-routes) for pages that don’t have a fixed URL / slug. The name of the js file will be the variable, in this case the post `slug`, wrapped in square brackets – `[slug].js`.
In order to generate these routes, Next.js needs to know the slug for each post. This is accomplished by using `getStaticPaths` in `posts/[slug].js`.
Create another function in `lib/posts.js` called `getAllPostSlugs`. The maximum amount of items that can be fetched from a resource at once is 100, so use pagination to make sure all the slugs are fetched:
```js theme={"dark"}
export async function getAllPostSlugs() {
try {
const allPostSlugs = [];
let page = 1;
let hasMore = true;
while (hasMore) {
const posts = await api.posts.browse({
limit: 100,
page,
fields: "slug", // Only the slug field is needed
});
if (posts && posts.length > 0) {
allPostSlugs.push(...posts.map((item) => item.slug));
// Use the meta pagination info to determine if there are more pages
page = posts.meta.pagination.next;
hasMore = page !== null;
} else {
hasMore = false;
}
}
return allPostSlugs;
} catch (err) {
console.error(err);
return [];
}
}
```
Now `getSinglePost()` and `getAllPostSlugs()` can be used within the `pages/posts/[slug].js` file like so:
```js theme={"dark"}
// pages/posts/[slug].js
import { getSinglePost, getAllPostSlugs } from '../../lib/posts';
// PostPage page component
export default function PostPage(props) {
// Render post title and content in the page from props
// note the html field only populates for public posts in this example
return (
{props.post.title}
)
}
export async function getStaticPaths() {
const slugs = await getAllPostSlugs()
// Get the paths we want to create based on slugs
const paths = slugs.map((slug) => ({
params: { slug: slug },
}))
// { fallback: false } means posts not found should 404.
return { paths, fallback: false }
}
// Pass the page slug over to the "getSinglePost" function
// In turn passing it to the posts.read() to query the Ghost Content API
export async function getStaticProps(context) {
const post = await getSinglePost(context.params.slug)
if (!post) {
return {
notFound: true,
}
}
return {
props: { post }
}
}
```
Pages can be linked to with the Next.js `` component. Calling it can be done with:
```js theme={"dark"}
import Link from 'next/link';
```
The `Link` component is used like so:
```js theme={"dark"}
// pages/index.js
export default function Home(props) {
return (
{props.posts.map((post) => (
{post.title}
))}
);
}
```
Pages are linked in this fashion within Next.js applications to make full use of client-side rendering as well as server-side rendering. To read more about how the `Link` component works and it’s use within Next.js apps [check out their documentation](https://nextjs.org/docs/pages/api-reference/components/link).
## Examples
The flexibility of the [Ghost Content API](/content-api/javascript/) allows you to feed posts, pages and any other pieces of content from Ghost site into a Next.js JavaScript app.
Below are a few examples of how content from Ghost can be passed into a Next.js project.
### Getting pages
Pages can be generated in the [same fashion as posts](/jamstack/next/#exposing-content), and can even use the same dynamic route file.
```js theme={"dark"}
export async function getPages() {
return await api.pages
.browse({
limit: 15 // default is 15, max is 100
})
.catch(err => {
console.error(err);
});
}
```
### Adding post attribute data
Using the `include` option within the Ghost Content API means that attribute data, such as tags and authors, will be included in the post object data:
```js theme={"dark"}
export async function getPosts() {
return await api.posts
.browse({
include: "tags,authors",
limit: 15 // default is 15, max is 100
})
.catch(err => {
console.error(err);
});
}
```
### Rendering author pages
An author can be requested using the [`authors.read()`](/content-api/javascript/#endpoints) endpoint.
```js theme={"dark"}
export async function getAuthor(authorSlug) {
return await api.authors
.read({
slug: authorSlug
})
.catch(err => {
console.error(err);
});
}
```
A custom author template file can be created at `pages/authors/[slug].js`, which will also prevent author URLs colliding with post and page URLs:
```js theme={"dark"}
// pages/authors/[slug].js
import { getSingleAuthor, getAllAuthorSlugs } from "../../lib/authors";
export default function AuthorPage(props) {
return (
{props.author.name}
);
}
export async function getStaticPaths() {
const slugs = await getAllAuthorSlugs();
const paths = slugs.map((slug) => ({
params: { slug },
}));
return { paths, fallback: false };
}
export async function getStaticProps(context) {
const author = await getSingleAuthor(context.params.slug);
if (!author) {
return {
notFound: true,
};
}
return {
props: { author },
};
}
```
### Formatting post dates
The published date of a post, `post.published_at`, is returned as a date timestamp. Modern JavaScript methods can convert this date into a selection of humanly readable formats. To output the published date as “Aug 28, 1963”:
```js theme={"dark"}
const posts = await getPosts();
posts.map(post => {
const options = {
year: 'numeric',
month: 'short',
day: 'numeric'
};
post.dateFormatted = new Intl.DateTimeFormat('en-US', options)
.format(new Date(post.published_at));
});
```
The date can then be added to the template using `{post.dateFormatted}`.
## Further reading
Check out the extensive [Next.js documentation](https://nextjs.org/docs/pages) and [learning courses](https://nextjs.org/learn/pages-router) for more information and to get more familiar when working with Next.js.
 For more detailed steps on setting up Integrations check out [our documentation on the Content API](/content-api/#authentication).
### Exposing content
The [`posts.browse()`](/content-api/javascript/#endpoints) endpoint can be used to get all the posts from a Ghost site. This can be done with the following code as an asynchronous function:
```js theme={"dark"}
export async function getPosts() {
return await api.posts
.browse({
limit: 15 // default is 15, max is 100
})
.catch(err => {
console.error(err);
});
}
```
Using an asynchronous function means Next.js will wait until all the content has been retrieved from Ghost before loading the page. The `export` function means your content will be available throughout the application.
### Rendering posts
Since you’re sending content from Ghost to a React application, data is passed to pages and components with [`props`](https://react.dev/learn/passing-props-to-a-component). Next.js extends upon that concept with [`getStaticProps`](https://nextjs.org/docs/pages/building-your-application/data-fetching/get-static-props). This function will load the Ghost site content into the page before it’s rendered in the browser.
Use the following to import the `getPosts` function created in previous steps within a page you want to render Ghost posts, like `pages/index.js`:
```js theme={"dark"}
import { getPosts } from '../lib/posts';
```
The posts can be fetched from within `getStaticProps` for the given page:
```js theme={"dark"}
export async function getStaticProps() {
const posts = await getPosts()
if (!posts) {
return {
notFound: true,
}
}
return {
props: { posts }
}
}
```
Now the posts can be used within the `Home` page in `pages/index.js` via the component `props`:
```js theme={"dark"}
export default function Home(props) {
return (
For more detailed steps on setting up Integrations check out [our documentation on the Content API](/content-api/#authentication).
### Exposing content
The [`posts.browse()`](/content-api/javascript/#endpoints) endpoint can be used to get all the posts from a Ghost site. This can be done with the following code as an asynchronous function:
```js theme={"dark"}
export async function getPosts() {
return await api.posts
.browse({
limit: 15 // default is 15, max is 100
})
.catch(err => {
console.error(err);
});
}
```
Using an asynchronous function means Next.js will wait until all the content has been retrieved from Ghost before loading the page. The `export` function means your content will be available throughout the application.
### Rendering posts
Since you’re sending content from Ghost to a React application, data is passed to pages and components with [`props`](https://react.dev/learn/passing-props-to-a-component). Next.js extends upon that concept with [`getStaticProps`](https://nextjs.org/docs/pages/building-your-application/data-fetching/get-static-props). This function will load the Ghost site content into the page before it’s rendered in the browser.
Use the following to import the `getPosts` function created in previous steps within a page you want to render Ghost posts, like `pages/index.js`:
```js theme={"dark"}
import { getPosts } from '../lib/posts';
```
The posts can be fetched from within `getStaticProps` for the given page:
```js theme={"dark"}
export async function getStaticProps() {
const posts = await getPosts()
if (!posts) {
return {
notFound: true,
}
}
return {
props: { posts }
}
}
```
Now the posts can be used within the `Home` page in `pages/index.js` via the component `props`:
```js theme={"dark"}
export default function Home(props) {
return (