 ## Prerequisites
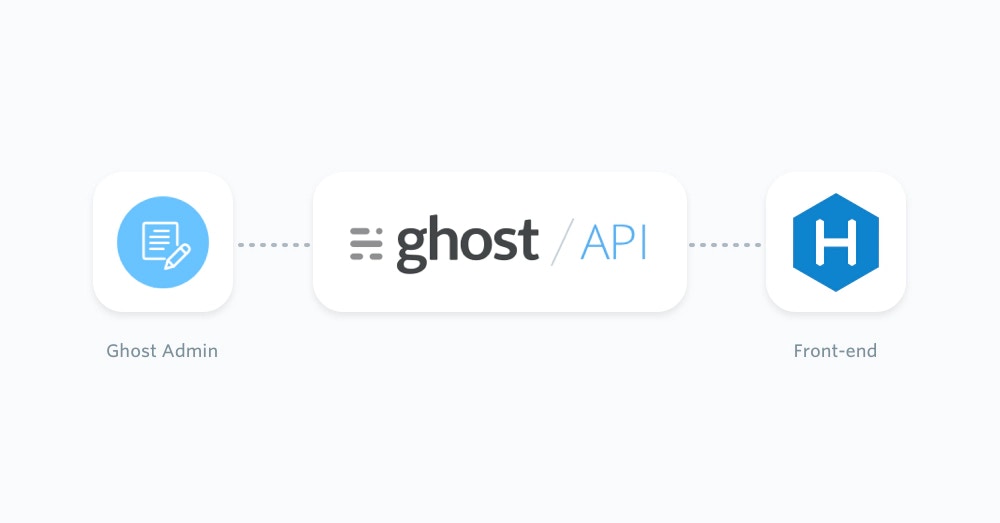
This configuration of a Ghost publication requires existing moderate knowledge of JavaScript. You’ll need an active Ghost account to get started, which can either be self-hosted or using a [Ghost(Pro) account](https://ghost.org/pricing/).
Additionally, you’ll need to install Hexo via the command line:
```bash theme={"dark"}
npm install -g hexo-cli
```
This documentation also assumes Ghost will be added to an existing Hexo site. creating a new Hexo site can be done with the following command:
```bash theme={"dark"}
hexo init my-hexo-site
```
Running the Hexo site locally can be done by running `hexo server` and navigating to `http://localhost:4000/` in a web browser.
More information on setting up and creating a Hexo site can be found on [the official Hexo site](https://hexo.io/docs/setup).
## Getting started
Firstly, create a new JavaScript file within a `scripts` folder at the root of the project directory, for example `./scripts/ghost.js` . Any script placed in the scripts folder acts like a Hexo script plugin, you can find out more about the [Plugins API in the Hexo documentation](https://hexo.io/docs/plugins).
Next, install the official [JavaScript Ghost Content API](/content-api/javascript/#installation) helper using:
```bash theme={"dark"}
yarn add @tryghost/content-api
```
Once the Content API helper is installed it can be used within the newly created `ghost.js` Hexo script:
```js theme={"dark"}
const ghostContentAPI = require("@tryghost/content-api");
const api = new ghostContentAPI({
url: 'https://demo.ghost.io',
key: '22444f78447824223cefc48062',
version: "v6.0"
});
```
Change the `url` value to the URL of the Ghost site. For Ghost(Pro) customers, this is the Ghost URL ending in .ghost.io, and for people using the self-hosted version of Ghost, it’s the same URL used to view the admin panel.
Create a custom integration within Ghost Admin to generate a key and change the `key` value.
## Prerequisites
This configuration of a Ghost publication requires existing moderate knowledge of JavaScript. You’ll need an active Ghost account to get started, which can either be self-hosted or using a [Ghost(Pro) account](https://ghost.org/pricing/).
Additionally, you’ll need to install Hexo via the command line:
```bash theme={"dark"}
npm install -g hexo-cli
```
This documentation also assumes Ghost will be added to an existing Hexo site. creating a new Hexo site can be done with the following command:
```bash theme={"dark"}
hexo init my-hexo-site
```
Running the Hexo site locally can be done by running `hexo server` and navigating to `http://localhost:4000/` in a web browser.
More information on setting up and creating a Hexo site can be found on [the official Hexo site](https://hexo.io/docs/setup).
## Getting started
Firstly, create a new JavaScript file within a `scripts` folder at the root of the project directory, for example `./scripts/ghost.js` . Any script placed in the scripts folder acts like a Hexo script plugin, you can find out more about the [Plugins API in the Hexo documentation](https://hexo.io/docs/plugins).
Next, install the official [JavaScript Ghost Content API](/content-api/javascript/#installation) helper using:
```bash theme={"dark"}
yarn add @tryghost/content-api
```
Once the Content API helper is installed it can be used within the newly created `ghost.js` Hexo script:
```js theme={"dark"}
const ghostContentAPI = require("@tryghost/content-api");
const api = new ghostContentAPI({
url: 'https://demo.ghost.io',
key: '22444f78447824223cefc48062',
version: "v6.0"
});
```
Change the `url` value to the URL of the Ghost site. For Ghost(Pro) customers, this is the Ghost URL ending in .ghost.io, and for people using the self-hosted version of Ghost, it’s the same URL used to view the admin panel.
Create a custom integration within Ghost Admin to generate a key and change the `key` value.
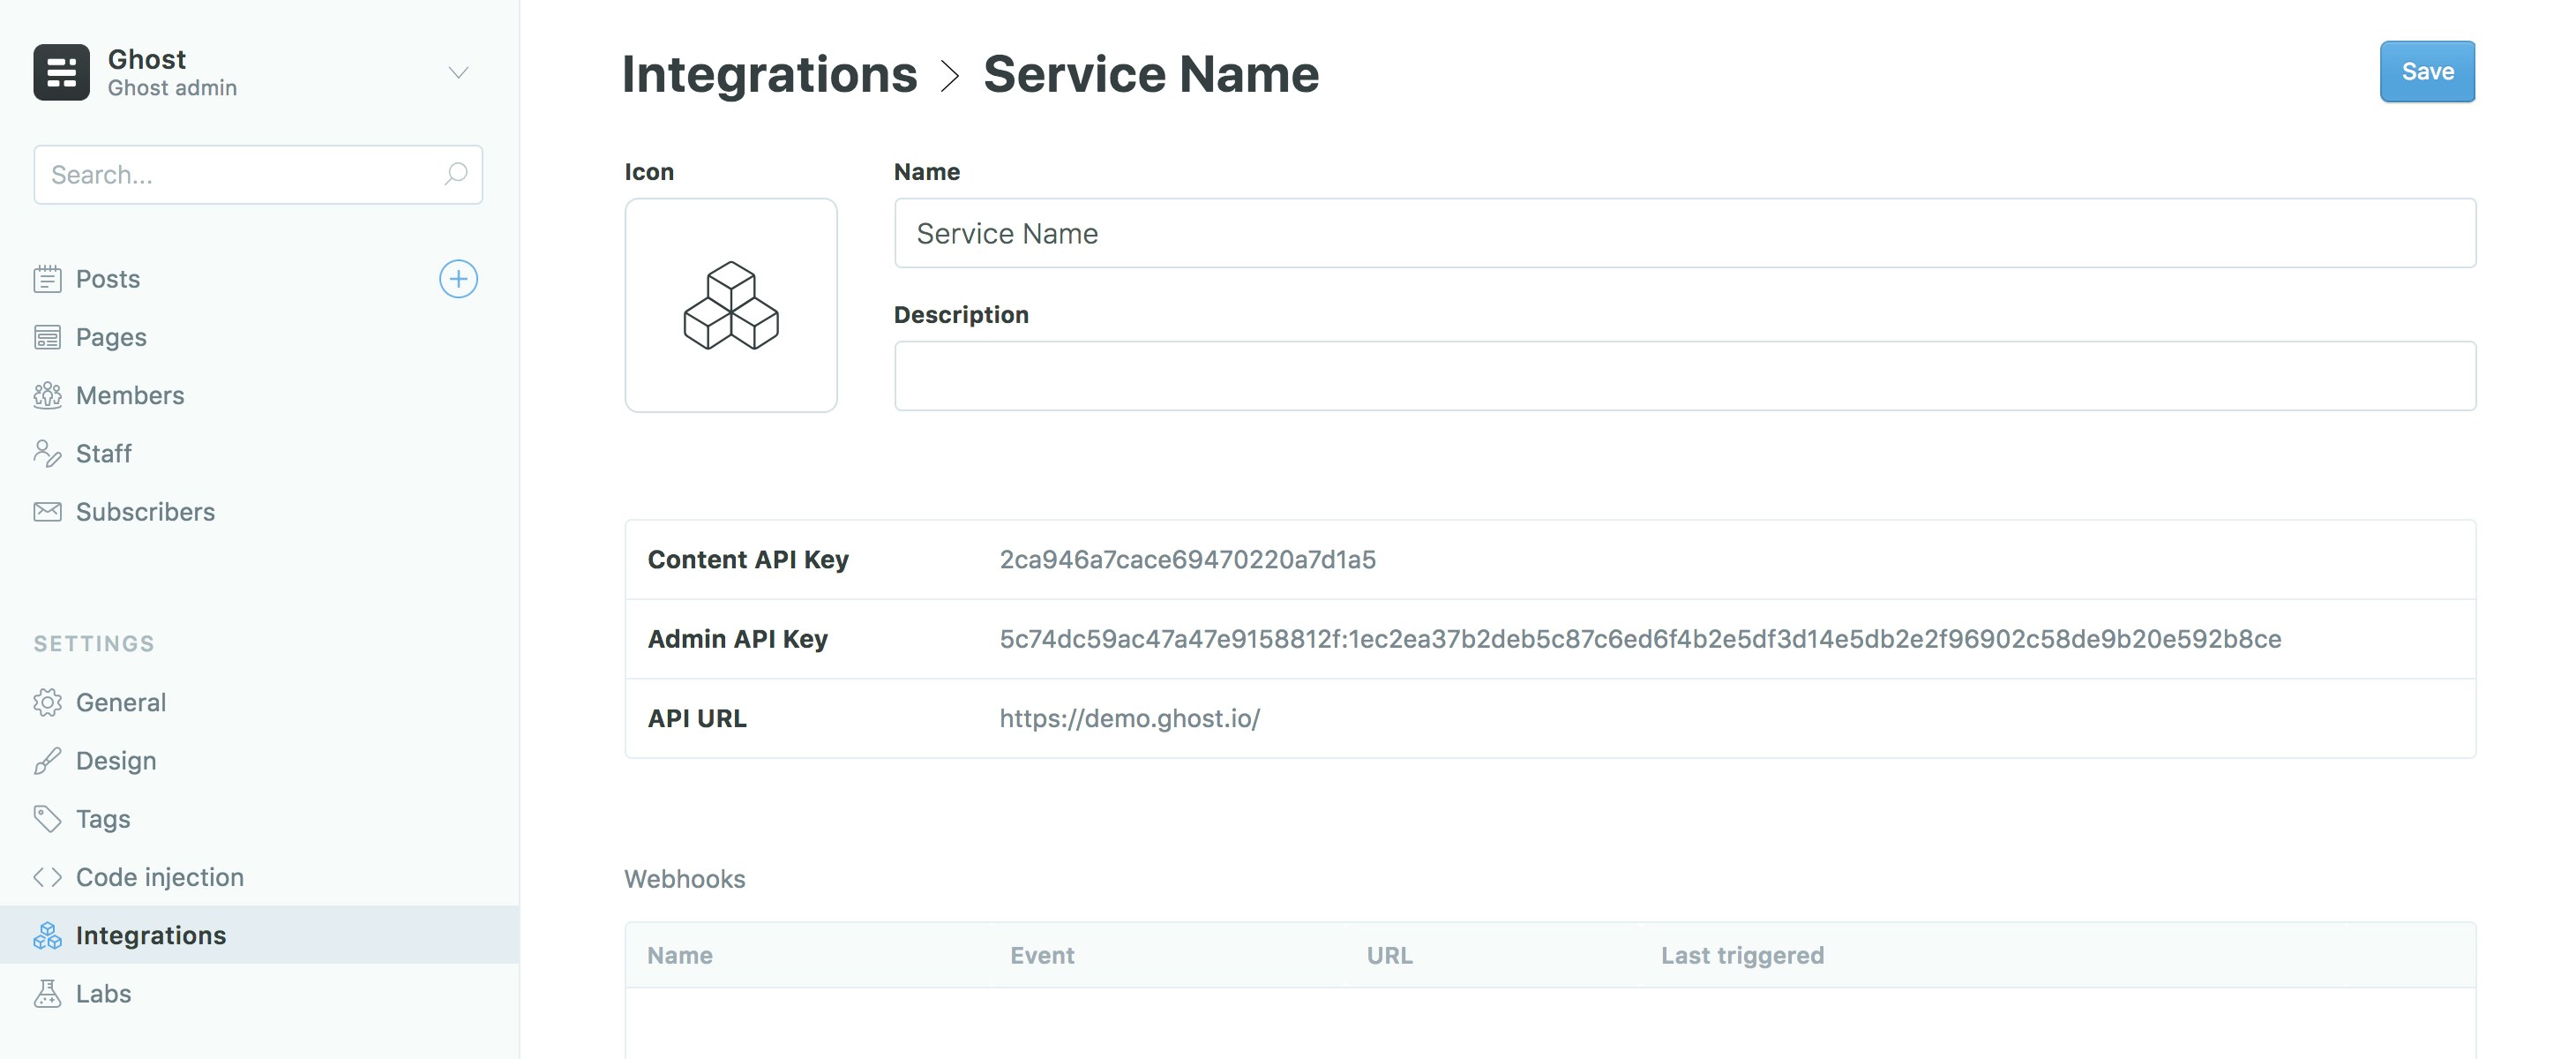 For more detailed steps on setting up Integrations check out [our documentation on the Content API](/content-api/#authentication).
### The code
Once the API integration has been setup, content can be pulled from your Ghost site. To get all posts, use the [`api.posts.browse()`](/content-api/javascript/#endpoints) endpoint:
```js theme={"dark"}
// Store Ghost posts in a 'data' variable
const data = await api.posts
.browse({
limit: 100
})
.catch(err => {
console.error(err);
});
```
This post data can then be used to create posts within Hexo. Creating posts can be done with the `hexo.post.create()` function. The instance of `hexo` is already globally available inside of Hexo script files.
```js theme={"dark"}
data.forEach(post => {
// Create a 'Hexo friendly' post object
const postData = {
title: post.title,
slug: post.slug,
path: post.slug,
date: post.published_at,
content: post.html
};
// Use post data to create a post
hexo.post.create(postData, true);
});
```
### Promise based API
The Ghost Content API is ‘Promised based’ meaning the JavaScript library will wait for all the content to be retrieved before it fully completes. Due to this the whole script needs to be wrapped in an `async` function. Here’s a full example:
```js theme={"dark"}
const ghostContentAPI = require("@tryghost/content-api");
const api = new ghostContentAPI({
url: "https://demo.ghost.io",
key: "22444f78447824223cefc48062",
version: "v6.0"
});
const ghostPostData = async () => {
const data = await api.posts
.browse({
limit: 100
})
.catch(err => {
console.error(err);
});
data.forEach(post => {
const postData = {
title: post.title,
slug: post.slug,
path: post.slug,
date: post.published_at,
content: post.html
}
hexo.post.create(postData, true);
});
};
ghostPostData();
```
For the changes to take affect the Hexo site needs to be restarted using `hexo server` in the command line and navigate to `http://localhost:4000/` in a web browser.
## Next steps
The example code above is the most straightforward approach to using Ghost with Hexo. To use other content such as pages, authors and site data check out the [JavaScript Content API documentation](/content-api/javascript/#endpoints). As well as our documentation there’s the [official Hexo documentation](https://hexo.io/) which explains other ways Hexo can accept data.
## Examples
The flexibility of the [Ghost Content API](/content-api/javascript/) allows you to generate posts, pages and any other pieces of content from a Ghost site and send it to a front-end built with the Node.js based static site generator, Hexo.
Below are a few examples of how various types of content can be sent to your Hexo front-end. All examples assume that the API has already been setup, see the [Working with Hexo](/jamstack/hexo/) page for more information.
## Generate pages
Pages require a slightly different approach to generating posts as they need to be placed at root level. Use the following code in conjunction with the JavaScript Ghost Content API:
```js theme={"dark"}
const ghostPages = async () => {
// Get all pages
const data = await api.pages
.browse({
limit: 100
})
.catch(err => {
console.error(err);
});
data.forEach(page => {
hexo.extend.generator.register(page.slug, function(locals) {
return {
path: `${page.slug}/index.html`,
data: { title: page.title, content: page.html },
layout: ["page", "index"]
};
});
});
};
ghostPages();
```
Note the use of `hexo.extend.generator.register`, which is how scripts inside of a Hexo can generate files alongside the build process.
## Generate author pages
Author pages can also be generated using the following method. This also uses the `generator` extension in Hexo that was used in the pages example above. To prevent URL collisions these author pages are being created under an `/authors/` path.
```js theme={"dark"}
const ghostAuthors = async () => {
// Get all post authors
const data = await api.authors
.browse({
limit: 100
})
.catch(err => {
console.error(err);
});
data.forEach(author => {
hexo.extend.generator.register(author.slug, function(locals) {
return {
// Set an author path to prevent URL collisions
path: `/author/${author.slug}/index.html`,
data: {
title: author.name,
content: `
For more detailed steps on setting up Integrations check out [our documentation on the Content API](/content-api/#authentication).
### The code
Once the API integration has been setup, content can be pulled from your Ghost site. To get all posts, use the [`api.posts.browse()`](/content-api/javascript/#endpoints) endpoint:
```js theme={"dark"}
// Store Ghost posts in a 'data' variable
const data = await api.posts
.browse({
limit: 100
})
.catch(err => {
console.error(err);
});
```
This post data can then be used to create posts within Hexo. Creating posts can be done with the `hexo.post.create()` function. The instance of `hexo` is already globally available inside of Hexo script files.
```js theme={"dark"}
data.forEach(post => {
// Create a 'Hexo friendly' post object
const postData = {
title: post.title,
slug: post.slug,
path: post.slug,
date: post.published_at,
content: post.html
};
// Use post data to create a post
hexo.post.create(postData, true);
});
```
### Promise based API
The Ghost Content API is ‘Promised based’ meaning the JavaScript library will wait for all the content to be retrieved before it fully completes. Due to this the whole script needs to be wrapped in an `async` function. Here’s a full example:
```js theme={"dark"}
const ghostContentAPI = require("@tryghost/content-api");
const api = new ghostContentAPI({
url: "https://demo.ghost.io",
key: "22444f78447824223cefc48062",
version: "v6.0"
});
const ghostPostData = async () => {
const data = await api.posts
.browse({
limit: 100
})
.catch(err => {
console.error(err);
});
data.forEach(post => {
const postData = {
title: post.title,
slug: post.slug,
path: post.slug,
date: post.published_at,
content: post.html
}
hexo.post.create(postData, true);
});
};
ghostPostData();
```
For the changes to take affect the Hexo site needs to be restarted using `hexo server` in the command line and navigate to `http://localhost:4000/` in a web browser.
## Next steps
The example code above is the most straightforward approach to using Ghost with Hexo. To use other content such as pages, authors and site data check out the [JavaScript Content API documentation](/content-api/javascript/#endpoints). As well as our documentation there’s the [official Hexo documentation](https://hexo.io/) which explains other ways Hexo can accept data.
## Examples
The flexibility of the [Ghost Content API](/content-api/javascript/) allows you to generate posts, pages and any other pieces of content from a Ghost site and send it to a front-end built with the Node.js based static site generator, Hexo.
Below are a few examples of how various types of content can be sent to your Hexo front-end. All examples assume that the API has already been setup, see the [Working with Hexo](/jamstack/hexo/) page for more information.
## Generate pages
Pages require a slightly different approach to generating posts as they need to be placed at root level. Use the following code in conjunction with the JavaScript Ghost Content API:
```js theme={"dark"}
const ghostPages = async () => {
// Get all pages
const data = await api.pages
.browse({
limit: 100
})
.catch(err => {
console.error(err);
});
data.forEach(page => {
hexo.extend.generator.register(page.slug, function(locals) {
return {
path: `${page.slug}/index.html`,
data: { title: page.title, content: page.html },
layout: ["page", "index"]
};
});
});
};
ghostPages();
```
Note the use of `hexo.extend.generator.register`, which is how scripts inside of a Hexo can generate files alongside the build process.
## Generate author pages
Author pages can also be generated using the following method. This also uses the `generator` extension in Hexo that was used in the pages example above. To prevent URL collisions these author pages are being created under an `/authors/` path.
```js theme={"dark"}
const ghostAuthors = async () => {
// Get all post authors
const data = await api.authors
.browse({
limit: 100
})
.catch(err => {
console.error(err);
});
data.forEach(author => {
hexo.extend.generator.register(author.slug, function(locals) {
return {
// Set an author path to prevent URL collisions
path: `/author/${author.slug}/index.html`,
data: {
title: author.name,
content: `${author.bio}
` }, layout: ["author", "index"] }; }); }); }; ghostAuthors(); ``` ## Adding post meta All the metadata that is exposed by the [Ghost Content API](/content-api/#endpoints) is available to use inside of a Hexo site. That includes post meta like authors and tags. In the example below the `posts.browse()` API options have been changed to include tags and authors which will be attached to each post object when it is returned. More information on the `include` API option can be found in our [Content API Endpoints](/content-api/#include) documentation. ```js theme={"dark"} const data = await api.posts .browse({ // Ensure tags and authors is included in post objects include: "tags,authors", limit: 100 }) .catch(err => { console.error(err); }); data.forEach(post => { const postData = { title: post.title, slug: post.slug, path: post.slug, date: post.published_at, content: post.html, // Set author meta author: { name: post.primary_author.name, slug: `/author/${post.primary_author.slug}`, }, // Set tag meta tags: post.tags .map(tag => { return tag.name; }) .join(", ") }; hexo.post.create(postData, true); }); ``` The `author.slug` includes `/authors/` in the string so it correlates with [the previous author pages example](#generate-author-pages). Note as well that some manipulation has been performed on tags so it matches the expected format for Hexo (comma separated tags). ## Further reading We highly recommend reading into the [official Hexo documentation](https://hexo.io/docs) for more info on how pages are generated. There’s also a handy [Troubleshooting page](https://hexo.io/docs/troubleshooting.html) for any common issues encountered. Additionally there’s [plenty of themes for Hexo](https://hexo.io/themes/) that might be a good place to start when creating a custom Hexo site.